Page 13 of 30
Re: Replacing the dashboard plastic PCB
Posted: 10 Jun 2018, 11:38
by CovKid
I had the same issue with the dash bulbs. Its not just the connections, its the white plastic covers which were designed to help project the light evenly across the clock faces. As luck would have it, 10mm LEDS (almost) fit the holes in the covers exactly - just need filing slightly. Ofcourse that creates a dilemma in terms of altering the dash bulb covers permanently but I figured that as the stock bulbs generate heat and don't last as long, LEDs had to be the way to go. I've since fitted colour-changing 10mm LEDs (for a bit of fun) and it all works great.
Personally I'd forget bulbs since the dash is having a major upgrade anyway and go for 10mm LEDs. Very minor work required for a snug fit. Far better light and a 280ohm resistor for each gives just the right amount of light. You could include them in the kit I suppose.
They just push straight in once filed to shape. Easy

Mine are soldered but small sockets on flyleads could be included?

Re: Replacing the dashboard plastic PCB
Posted: 10 Jun 2018, 12:33
by CJH
Those are definitely an option, and the resistor locations on the PCB would cater for them easily. But I don't think it's up to me to make the decision on behalf of the end user about permanently modifying the dash.
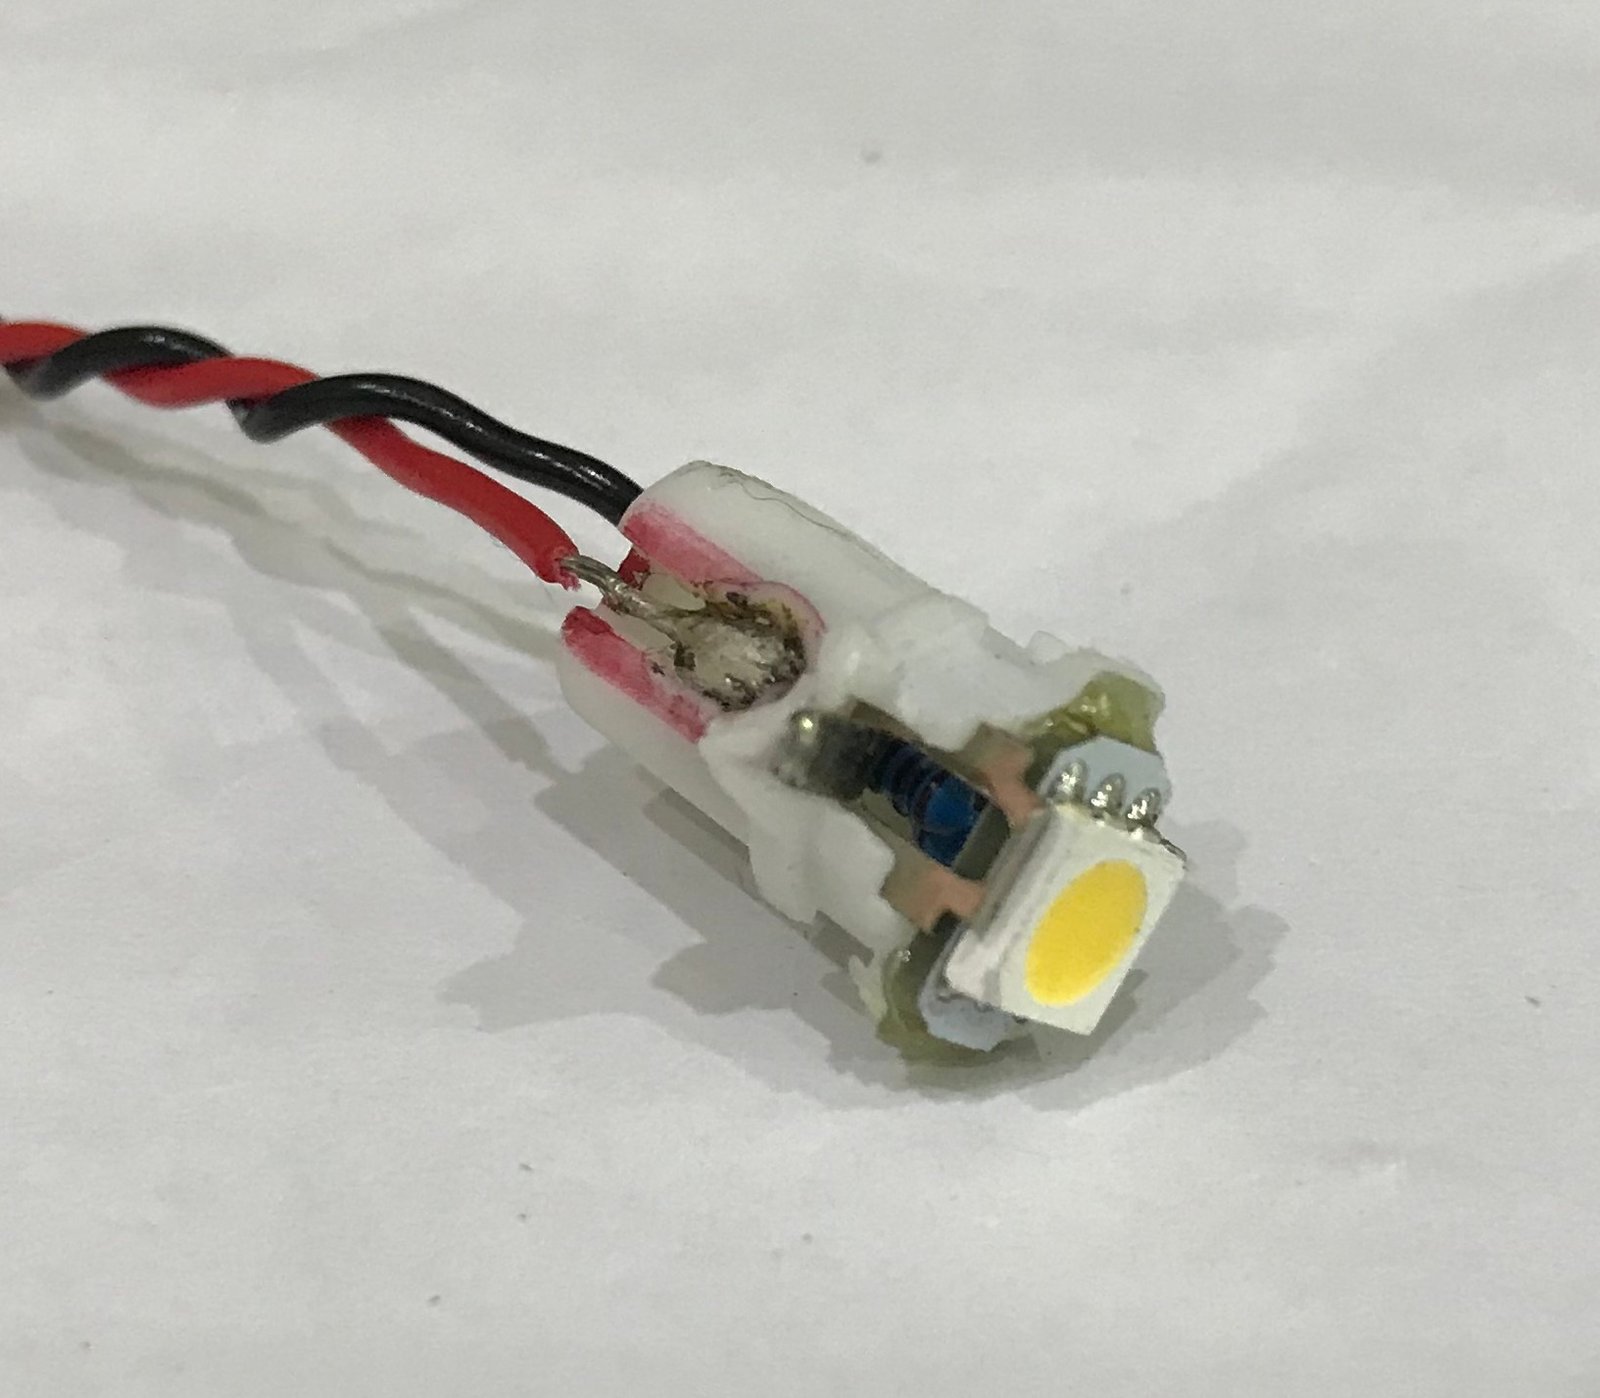
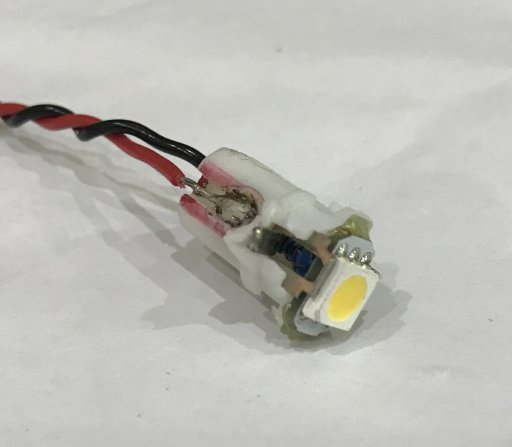
I used the term 'bulb' in its most generic sense - I actually used 12V dimmable LED 'bulbs'. They fit the same way as the originals, and are intended as direct replacements. They lack wires, so I had to attach wires to the terminals, and you need a steadier hand than mine to avoid melting the bulb moulding a little bit. Still, a bit of heat shrink over the end of the bulb would hide all that messiness. Here's one I did earlier - note the red marker pen, where I tested the polarity of each bulb and marked the positive side. If you look closely you can even see the integral resistor.
I'd be happier including these in the kit, but the end user can buy them for the same price that I can, and if I did include them that would inflate the price for people who'd rather use something else. So I think I'll just leave people to their own devices on these bulbs.
Re: Replacing the dashboard plastic PCB
Posted: 10 Jun 2018, 14:30
by CJH
I might have a solution to mounting different bulb holders - for two out of the three bulbs anyway.
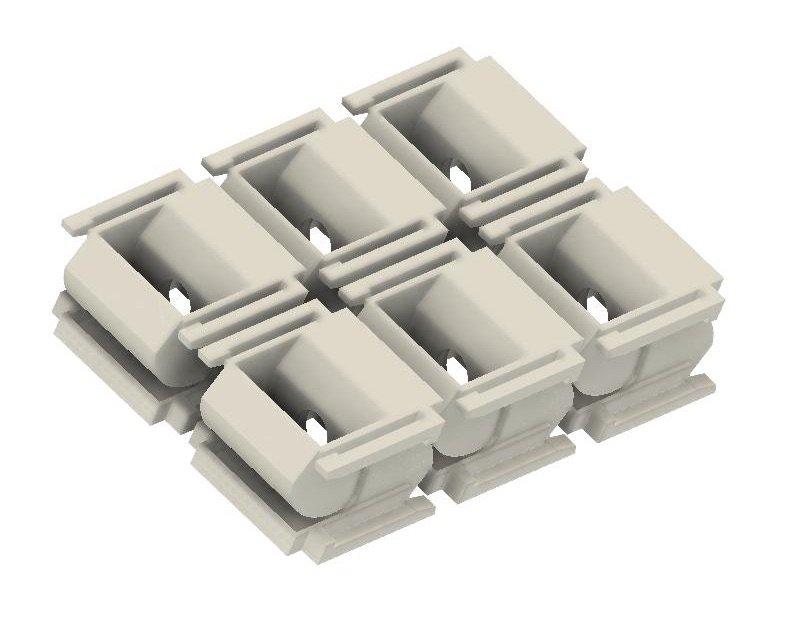
This is nowhere near to a final design, just a proof of concept, but I reckon it should be possible to 3D print an alternative mount/reflector, and of course I can design in any bulb holder shape I like. If you just need a circular hole then I could just make a little pilot hole in the centre.
Re: Replacing the dashboard plastic PCB
Posted: 10 Jun 2018, 16:05
by CovKid
They get brittle as you know Chris, so great idea

Re: Replacing the dashboard plastic PCB
Posted: 10 Jun 2018, 16:27
by ZsZ
CJH wrote:I might have a solution to mounting different bulb holders - for two out of the three bulbs anyway.
This is nowhere near to a final design, just a proof of concept, but I reckon it should be possible to 3D print an alternative mount/reflector, and of course I can design in any bulb holder shape I like. If you just need a circular hole then I could just make a little pilot hole in the centre.
check these:
https://www.thingiverse.com/thing:2425437" onclick="window.open(this.href);return false;
https://www.thingiverse.com/thing:2596474" onclick="window.open(this.href);return false;
BTW your project looks like a great kit. THX for the effort!

Re: Replacing the dashboard plastic PCB
Posted: 10 Jun 2018, 16:34
by CovKid
They get brittle as you know Chris, so great idea
Re: Replacing the dashboard plastic PCB
Posted: 10 Jun 2018, 18:00
by CJH
Good find - that 2nd one looks perfect. I've just sent it to the printer. I might be able to modify his source file to use a different shaped hole.
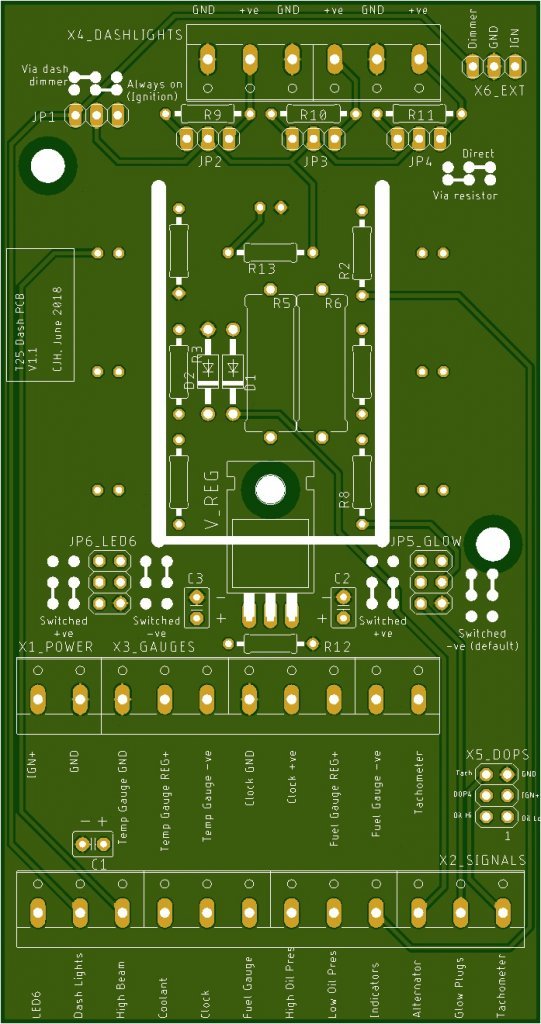
It occurred to me that the solution for the central bulb, which doesn't use a separate bulb holder like that, but uses an octagonal cutout directly in the top of the LED housing, is to use a small white LED mounted on the PCB itself. If I put it in the empty space just about where I currently have my little title block, the bulb should finish up in about the same place. Of course I'll need another jumper and another resistor, but I think there's room.
Re: Replacing the dashboard plastic PCB
Posted: 10 Jun 2018, 18:38
by slowcoach
Just Gets better and better

Re: Replacing the dashboard plastic PCB
Posted: 10 Jun 2018, 19:35
by CJH
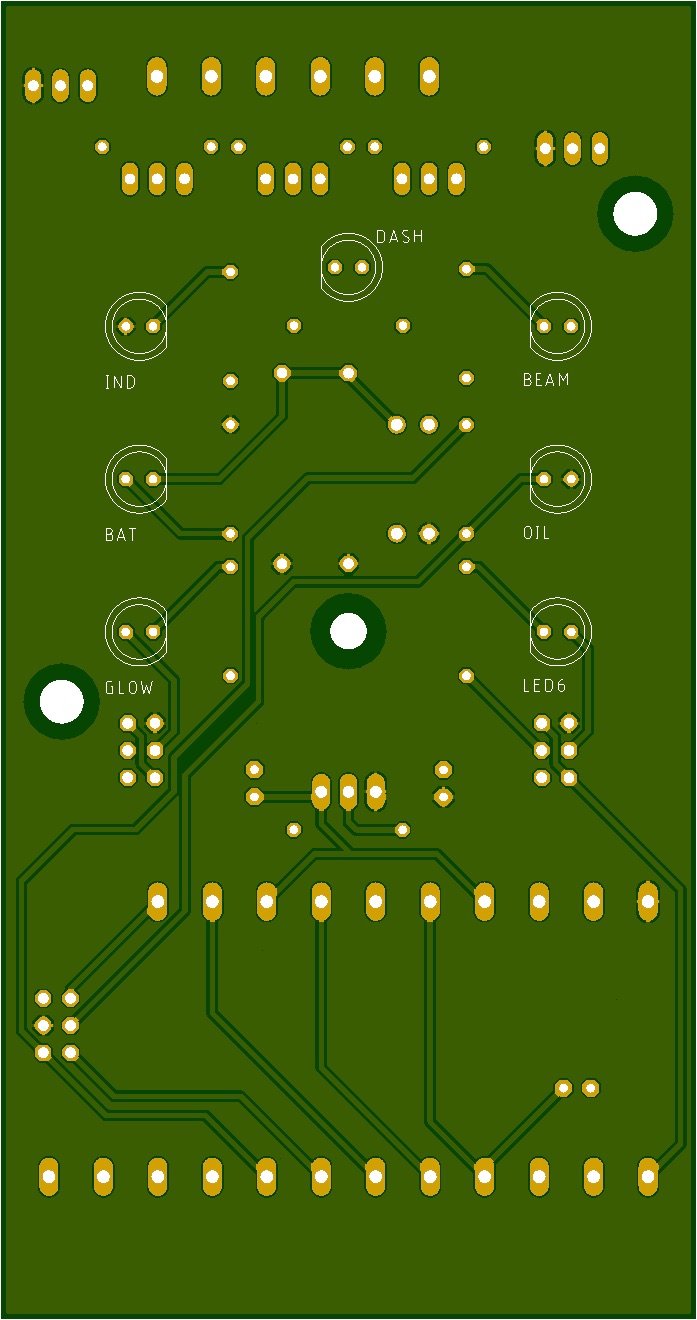
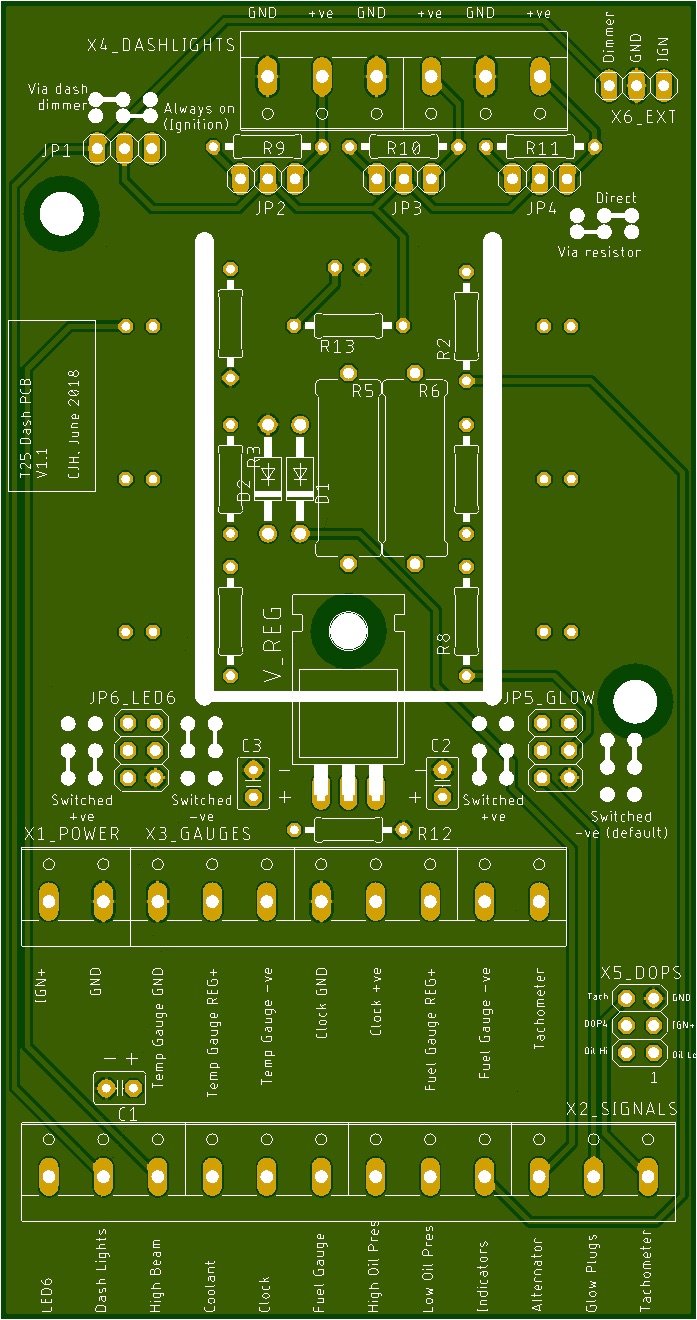
I've added the central illumination LED - it should remove the need for the separate central bulb altogether. The LED size and height, and the resistor value, can all be worked on later - the main thing was to make a place for it on the board. It's got the same option for 'always on' or 'via dimmer', but I haven't included the option to go via the resistor or direct since this PCB-mounted LED will always need a resistor.
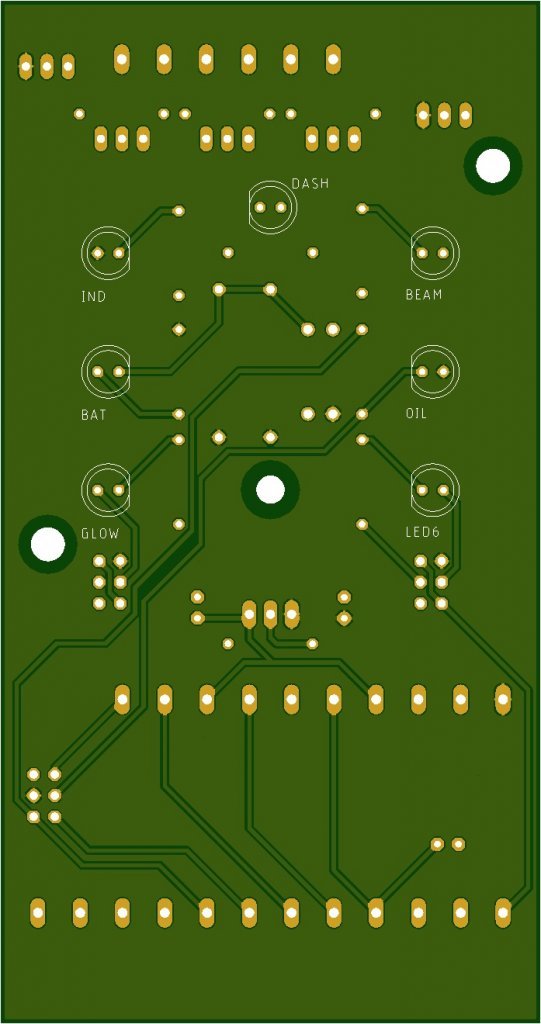
It was only while measuring up to locate this LED properly that I noticed how difficult it is to prevent the solder lugs on the reverse of the component side from fouling on some part of the LED frame. I drew the critical part of the frame onto the PCB, and then shuffled a few components a little bit to make sure they all clear this frame. I think I'm about done with this iteration now.
Re: Replacing the dashboard plastic PCB
Posted: 11 Jun 2018, 11:34
by CJH
CJH wrote:
Good find - that 2nd one looks perfect. I've just sent it to the printer. I might be able to modify his source file to use a different shaped hole.
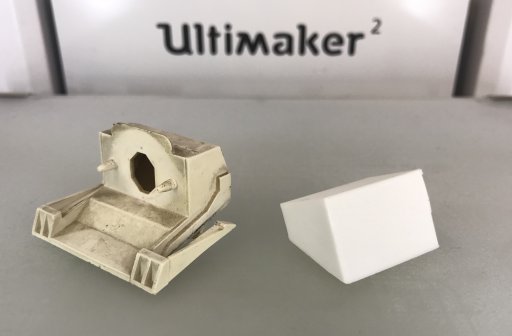
That existing model is a really nice design. Unfortunately it's not ideal as a model for my 3D printer. The cheaper plastic filament type of printer doesn't cope well with unsupported (near) horizontal elements, so the top surface doesn't print cleanly enough for my liking. It would be a perfect model to have printed by a commercial laser sintering process, which has no problem with unsupported parts thanks to the model being supported by the unsintered powder.
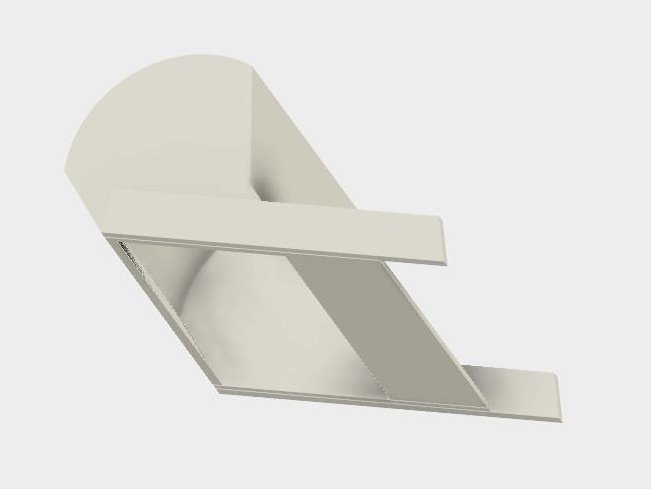
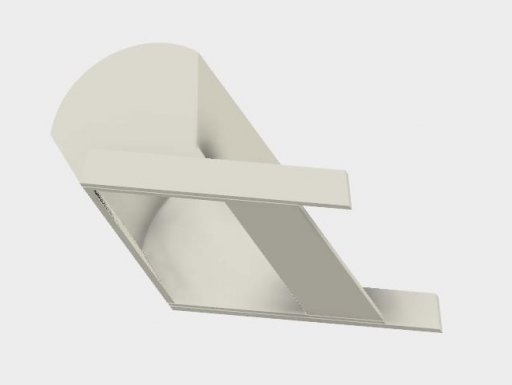
So I thought I'd have a go at making something that might print more cleanly on a cheap printer, as well as making it easier for me to adapt to different bulb holders since I'll have the original AutoCAD drawing. This is a work in progress - I still need to add the arms on the sides, but they're fairly straightforward. The curved surface is an improvement over the flat top for printing, and might help with light diffusion as well.
Re: Replacing the dashboard plastic PCB
Posted: 11 Jun 2018, 12:22
by CovKid
Agree on the curve!
Re: Replacing the dashboard plastic PCB
Posted: 12 Jun 2018, 06:33
by CJH
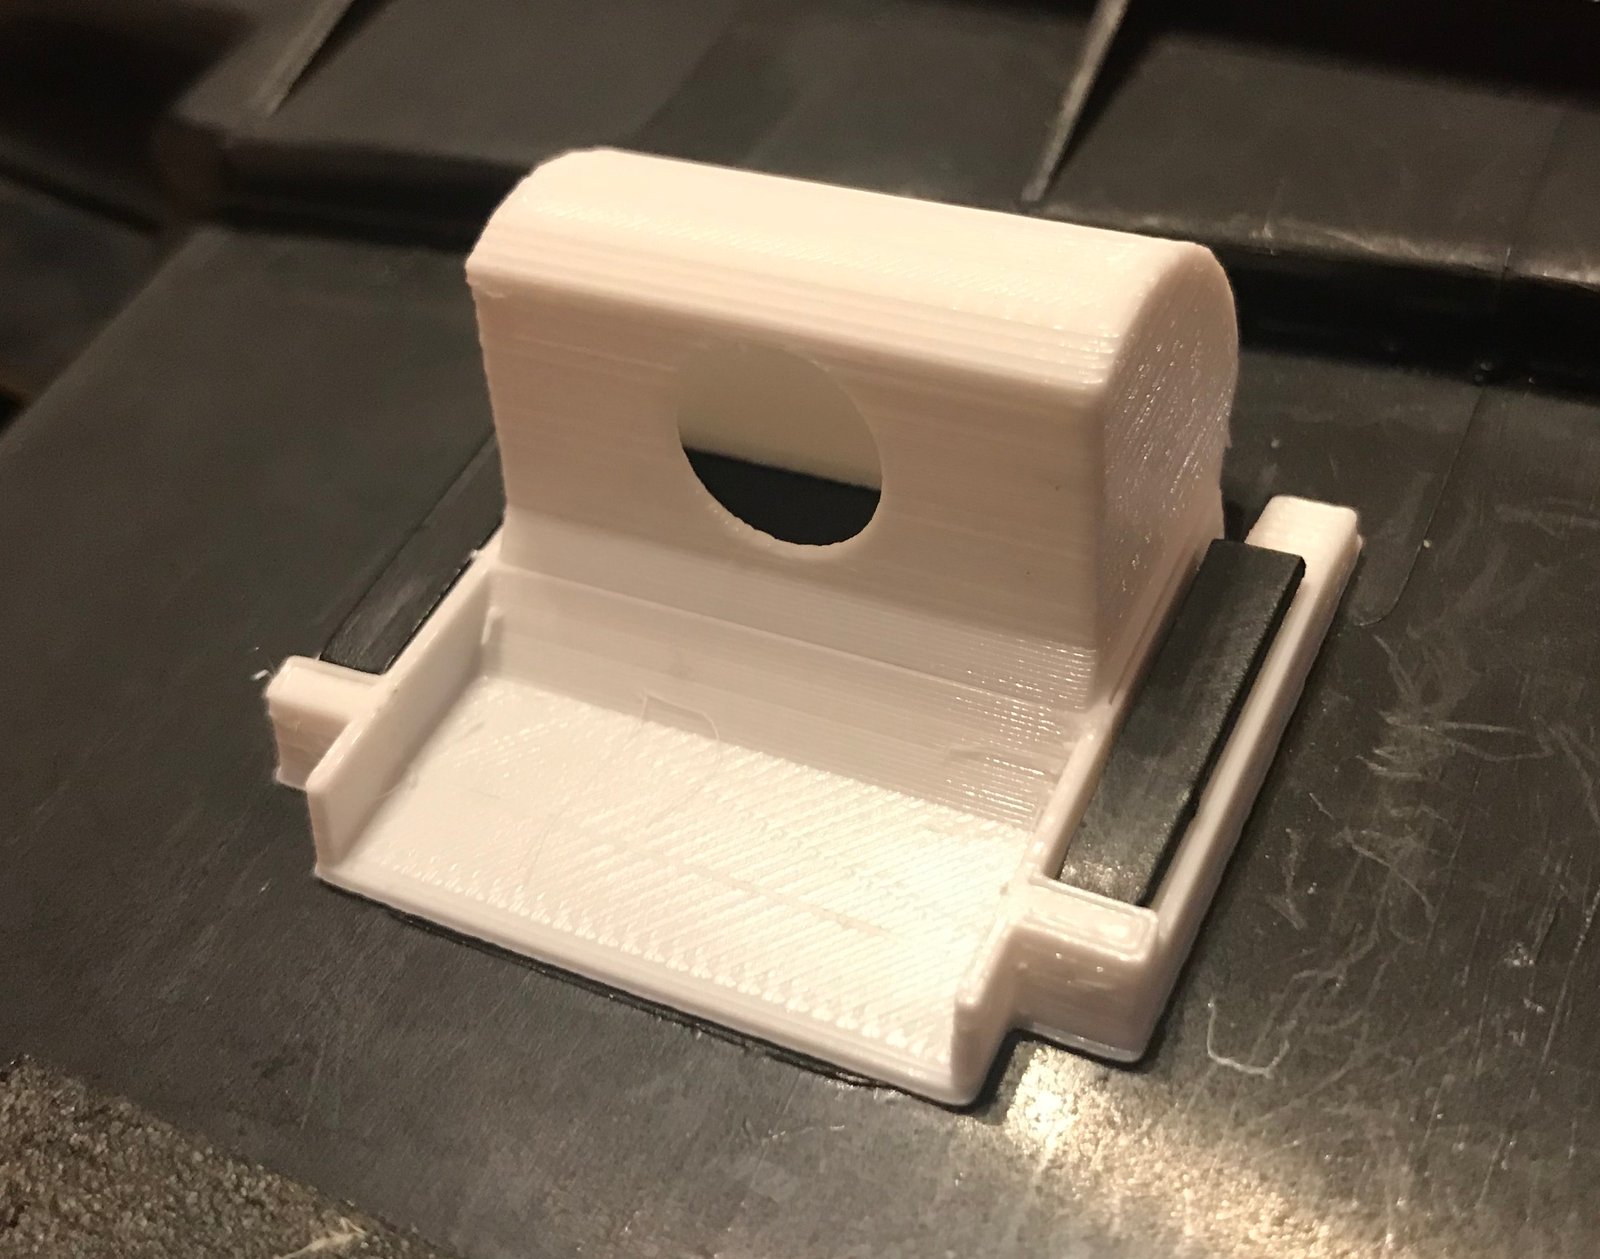
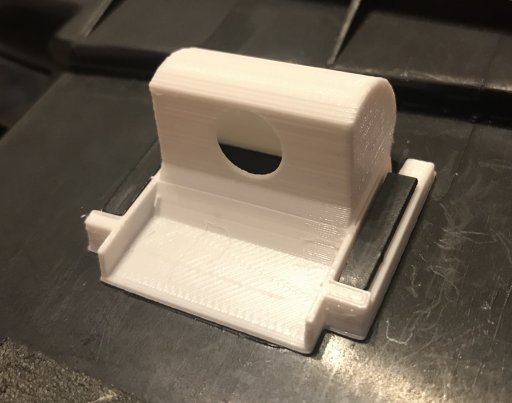
Making progress. I've ordered some 10mm diffuse LEDs to test them out - the hole is sized to suit.

I think the same 10mm LED could work well on the PCB as the centre 'bulb'. I tried a small 3mm white LED last night once it got dark, but the ones I have are far too directional. There's actually a system of louvres/shades behind the symbols in the central LED panel to make sure they only receive reflected light, and not direct light, so the bulb has to be positioned quite accurately to avoid casting shadows.
Re: Replacing the dashboard plastic PCB
Posted: 12 Jun 2018, 06:42
by CJH
In situ:
Re: Replacing the dashboard plastic PCB
Posted: 12 Jun 2018, 06:58
by ZsZ
CJH wrote:In situ:
nice work
Re: Replacing the dashboard plastic PCB
Posted: 12 Jun 2018, 22:50
by CJH
I'll wait until I've tried a couple of these 'homebrew' bulb holders with the 10mm LEDs that I've ordered, but if they work OK I may look into having a small batch made by a professional 3D printing service. The selective laser sintering (SLS) Nylon that they use produces a much more professional finish. In something of a first, the bulb holders pack rather nicely into a standard container size, so the price per unit wouldn't be prohibitive. They'd still add several pounds to the PCB kit though, so I'd probably make them an optional extra.