Page 1 of 3
Westfalia canvas replacement
Posted: 13 Apr 2010, 17:30
by t25darren
Anyone on here live in Suffolk that has fitted a roof canvas who could help----OR does anyone know a specialist who can fit one properly

(I have the new canvas already)
Thanks
Darren
Re: Westfalia canvas replacement
Posted: 14 Apr 2010, 08:16
by bitler1@gmail.com
Hi Darren,
Sorry, can't help, but where did you get the replacement canvas from? Is it any good? Mine has been on its way out for a while!
Cheers,
Phil
Re: Westfalia canvas replacement
Posted: 14 Apr 2010, 09:21
by Red Westie
Well despite the often negative reviews on here 'for the price' under £150.....Just Kampers 'LASTEST' cavasses are pretty good. Like I say....for the money. Some of there pre-2008 stuff was rubbish and did not fit well but I was told there latest products are from a completely different supplier.
And yes there are better replacements....but they are double the cost..
Here is mine fitted about 10 months ago now.
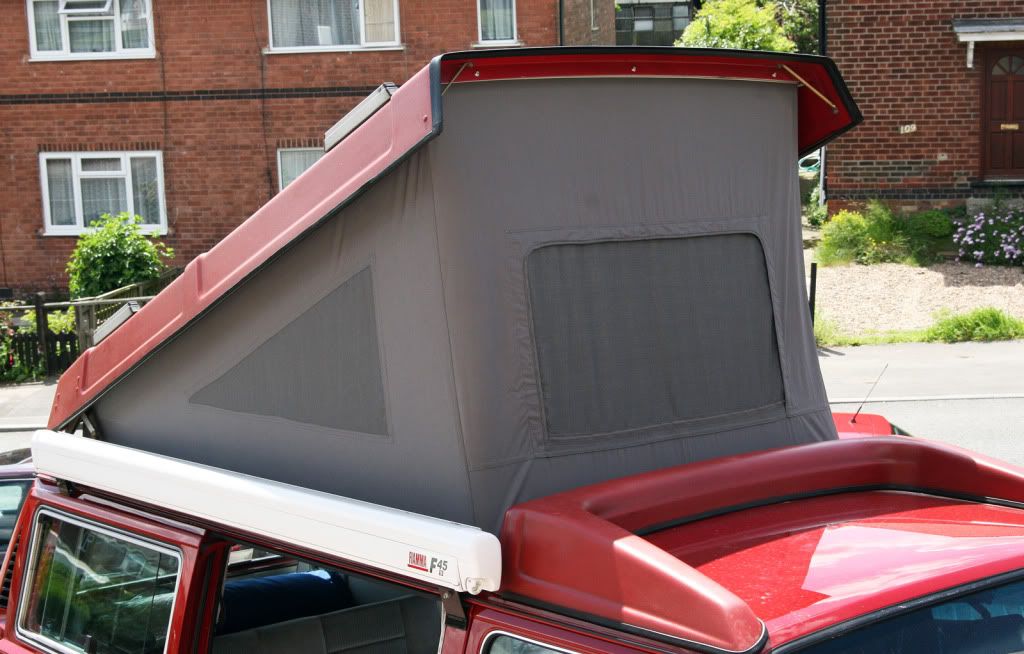
Martin
Re: Westfalia canvas replacement
Posted: 14 Apr 2010, 17:42
by t25darren
Hi Phil
I actually got a genuine one off the bay of many fleas !!! Was a real find being brand new too!!
Darren

bitler1@gmail.com wrote:Hi Darren,
Sorry, can't help, but where did you get the replacement canvas from? Is it any good? Mine has been on its way out for a while!
Cheers,
Phil
Re: Westfalia canvas replacement
Posted: 14 Apr 2010, 19:25
by Red Westie
Very nice.....should be spot on once done.
Martin
Re: Westfalia canvas replacement
Posted: 15 Apr 2010, 09:15
by poshbuggers
Looks good Martin.
Need one for mine soon. Any fitting tips?
Re: Westfalia canvas replacement
Posted: 15 Apr 2010, 09:39
by Red Westie
Tips....
Be very careful to note down how things come off....infact it might help to take a few digital snaps of the old canvas fitment for reference.
The trims fit on the outside at the top but on the inside on the bottom.
Once the old canvas has been removed....start fitting the new one from the middle top (measure and mark the canvas) working your way out towards the front corners EVENLY .
The JK canvas pulls level with the trim so you can JUST see the canvas appearing from the trim sides.
Pull as you go, don't leave any slack but don't tension the canvas either. Keep going left side then right side, evenly all the way.
The slack...if there is any...goes across the rear and has a large elasticated section which pulls...again make sure this is evenly distributed.
Now the bottom..same thing...mark the centre, start in the middle at the front, take out the slack.
The lower part of the canvas has a bead which is trapped nicely to one side of the alluminium trims.
The corners will need two V shaped notches cutting in the bead to go neatly around the 90 degree bends.
Again pull, fasten, one side then the other.
The corners are a bugger and will require a short stubby screwdriver to get access (not easy tho)
We found it awkward rather that difficult, should take 4 to 8 hours depending on how fussy you are.
Thats about it.
Martin
Re: Westfalia canvas replacement
Posted: 15 Apr 2010, 10:32
by poshbuggers
Thanks for that.
Sounds pretty straightforward and sensible - I suppose having adecent canvas is half the battle.
I'll take some pics when I dismantle the old roof then.

Re: Westfalia canvas replacement
Posted: 15 Apr 2010, 11:01
by Red Westie
Definately...the fit of the canvas as in, whether all the dimensions are correct, is important but the even distribution of the fabric, centering and patient methodical manner whilst fitting is vital if you want a good fit. I suspect most critisism's of canvas quality are down to poor fitting rather than a bad canvas itself.
Martin
Re: Westfalia canvas replacement
Posted: 15 Apr 2010, 21:49
by bitler1@gmail.com
Hi Darren,
Thanks for that. If I ever get my beloved van back from the respray shop I'll bite the bullet and replace the canvas!
Phil
Re: Westfalia canvas replacement
Posted: 10 Apr 2011, 21:27
by PetenAli
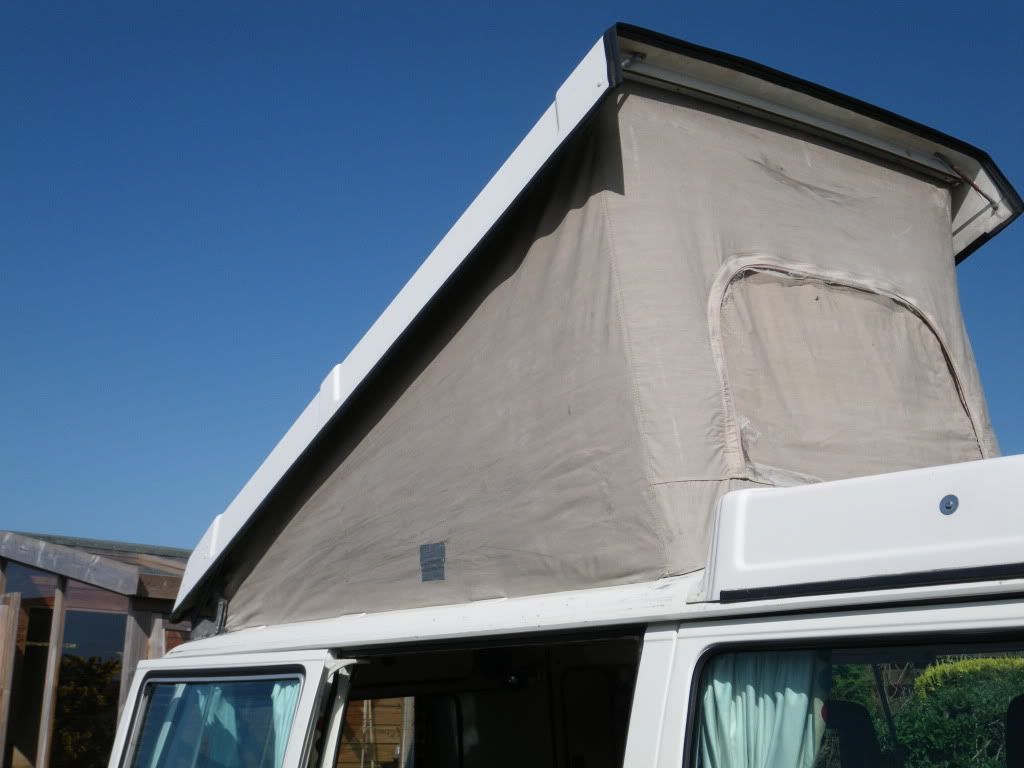
Well, we've done ours this weekend and its been some job although we also took the opportunity to clean the mould off the flock type stuff in the roof and fit three press studs to the front to hold up the thermal screen. We bought the canvas before Xmas but wanted a clear dry weekend before we went for it. Big thanks to Red Westie for the tips above which were very helpful. Our canvas is a JK one also. The JK instructions weren't much help - mostly for a 70's Bay and although we measured, measured, measured and then measured again, I'm left thinking that it is too small by 3/8" or so. Its like a drum skin when the roof is up - maybe it will stretch when its had a wetting. Anyway here's a few pix which might be helpful to anyone doing theirs:
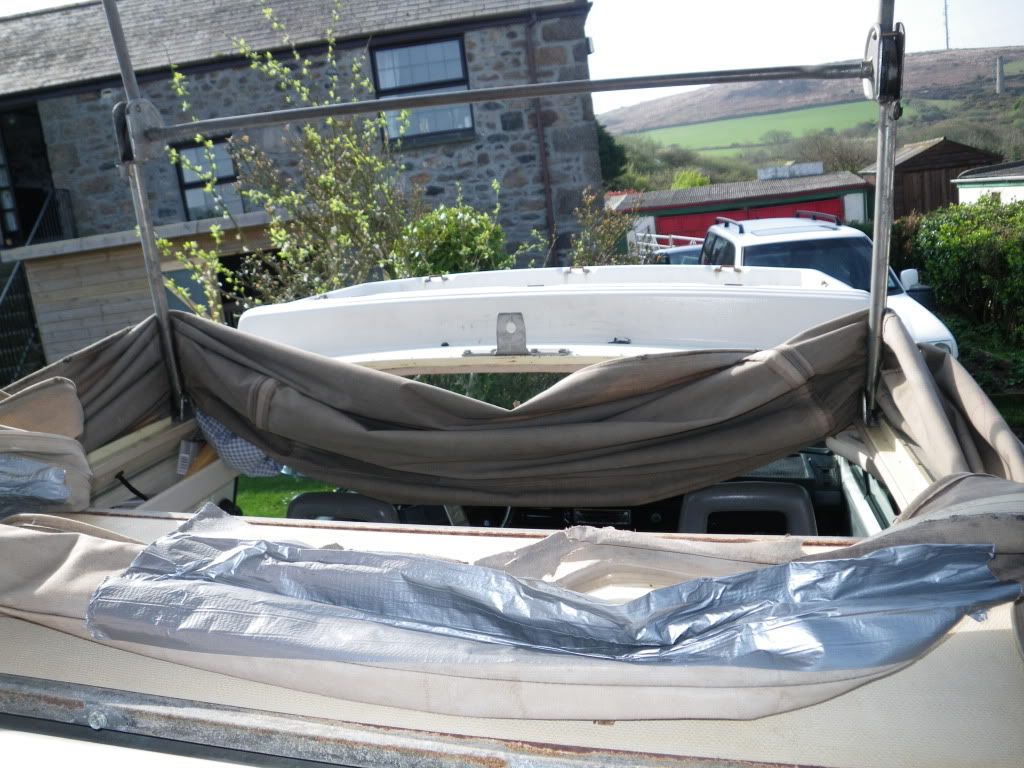
This is the old canvas - rotten and held together with duct tape.
We took lots of pics to remember how it all fits together:
Took the cushions out of the top for better access - this was a good move:
The old canvas came off fairly easily although the corners were tricky:
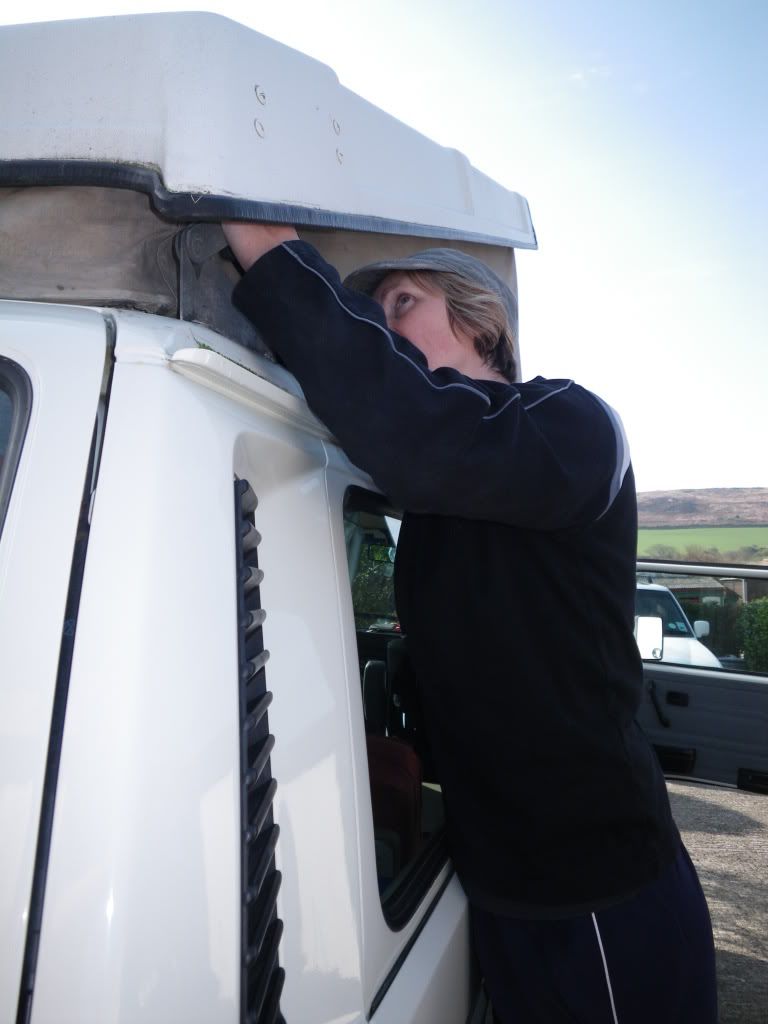
Because the canvas sits outside the H frame and inside the rear hinges you need to prop the roof and undo the top mounting brackets:

Thats the easy bit!
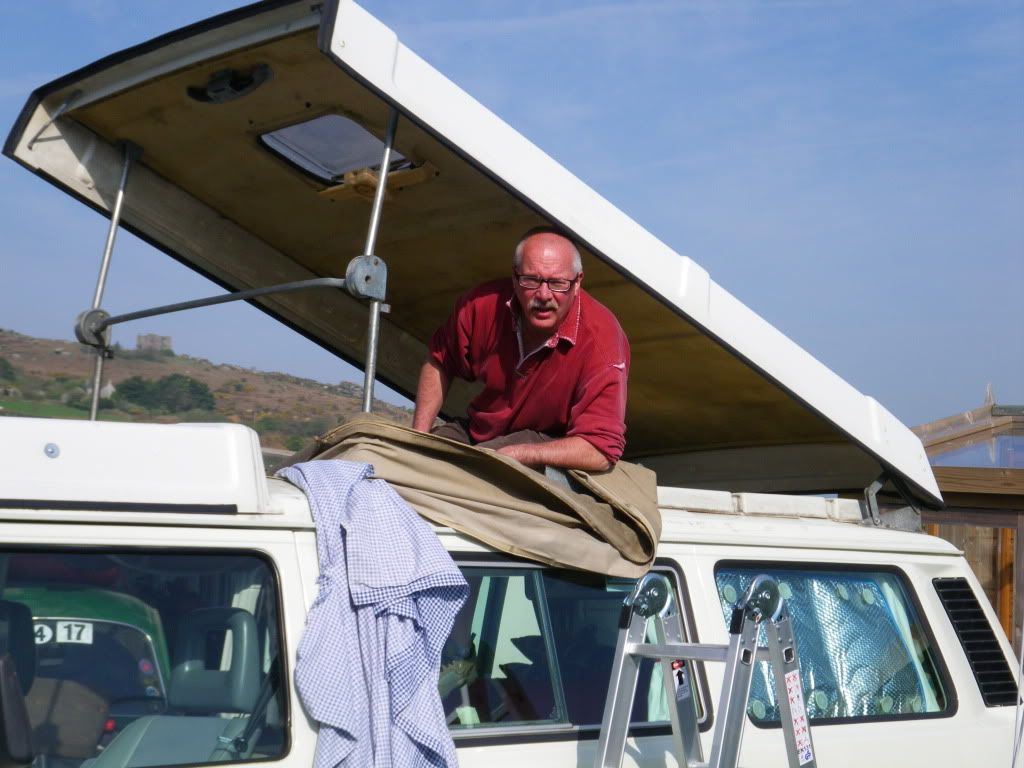
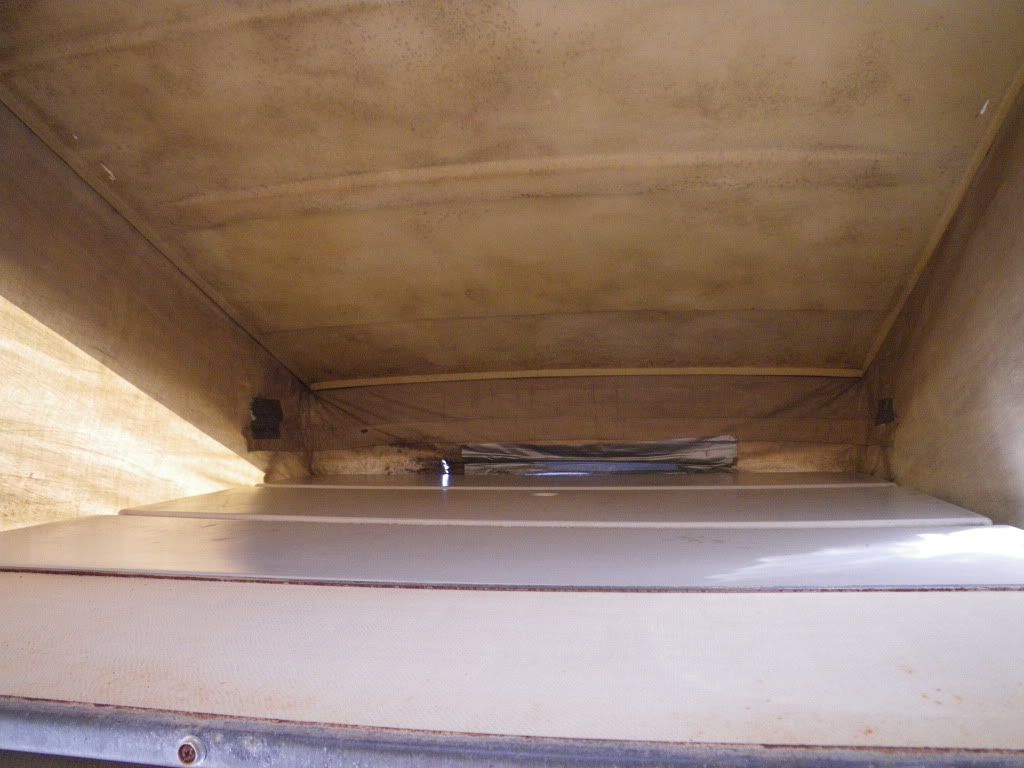
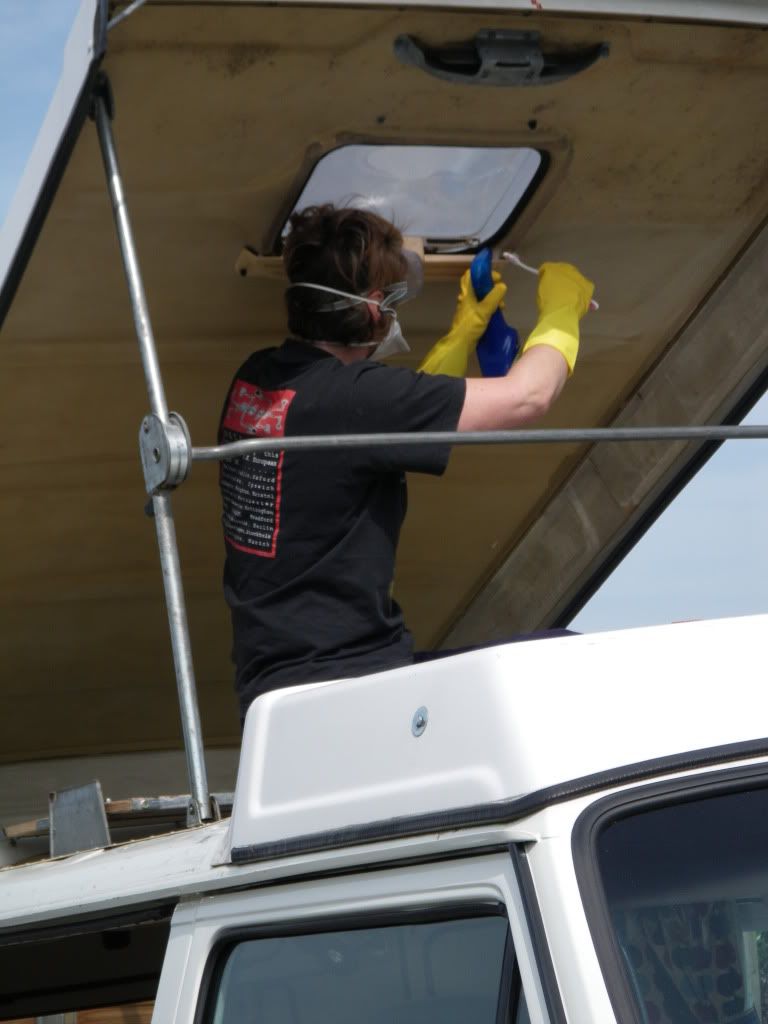
The top was well mouldy:
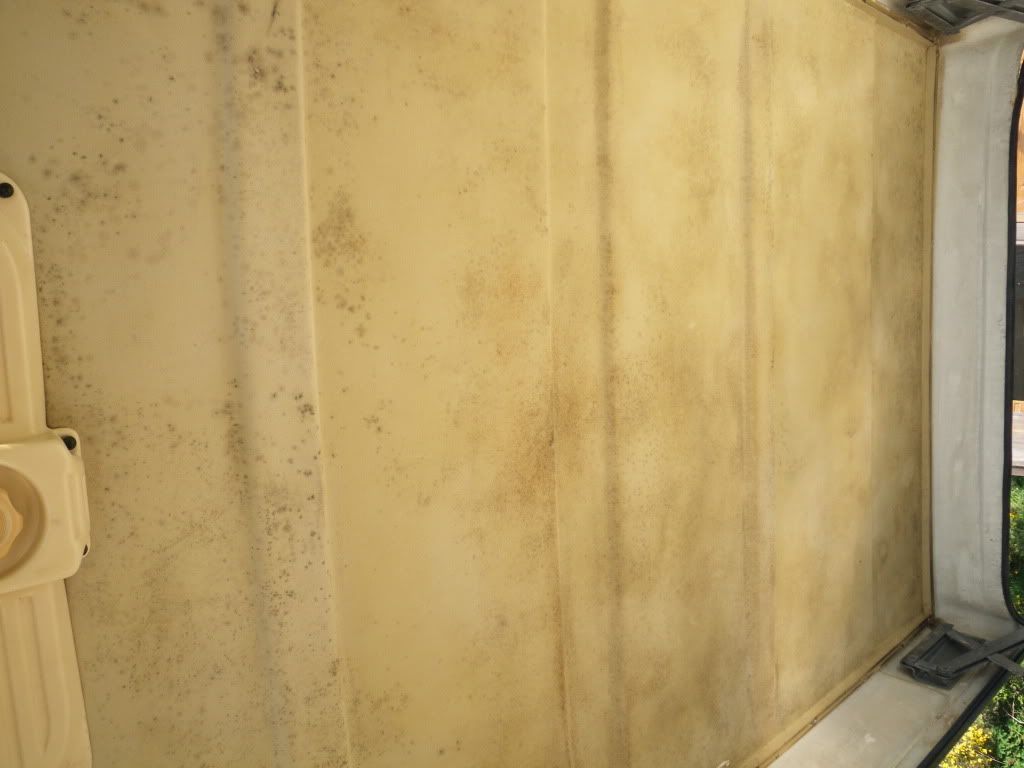
So the boss got to work on it and made an awesome job:
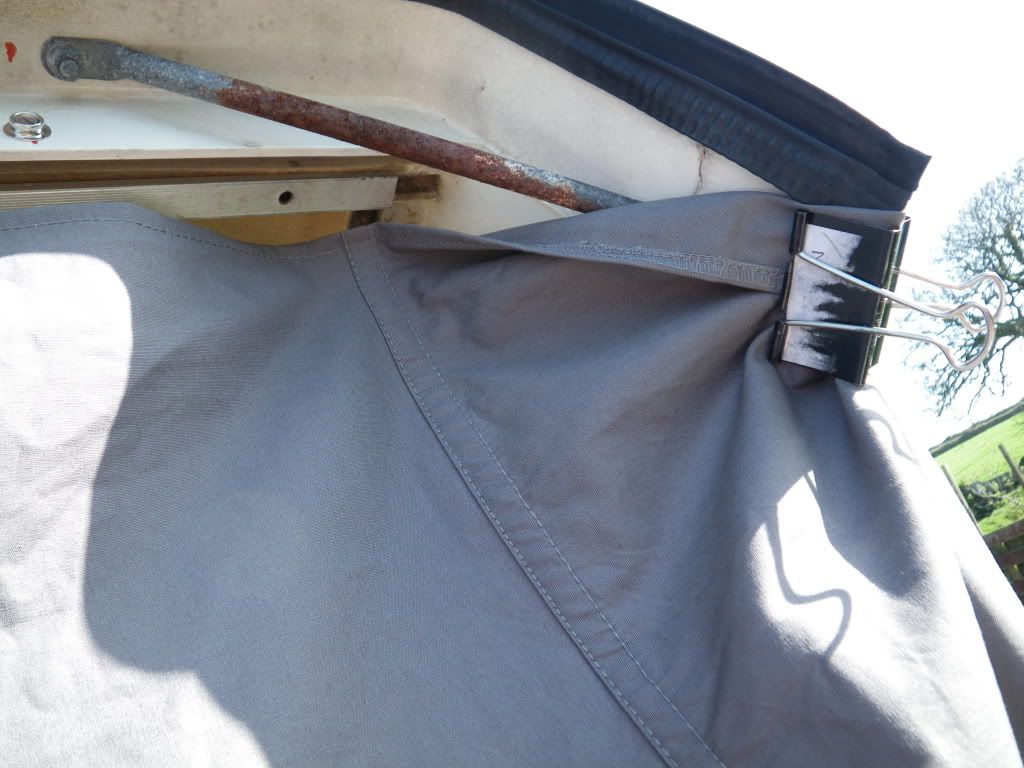
Fitting the new canvas was pretty much as Red Westie says above plus remember that the top brackets have to be undone again so that the circular canvas can fit outside the H frame and inside the rear hinges. The top is held in place with alloy strips. We fitted the front first taking care to get the centres exactly right and letting the smallest amount show outside the alloy strips. Bulldog clips helped to overcome the effects of gravity.
Then we fitted the back from the centre out and then the sides. This was because it was very tight and we wouldn't have been able to do the back last - we had to stretch it tighter then we really wanted to but it seems to have gone alright in the end.
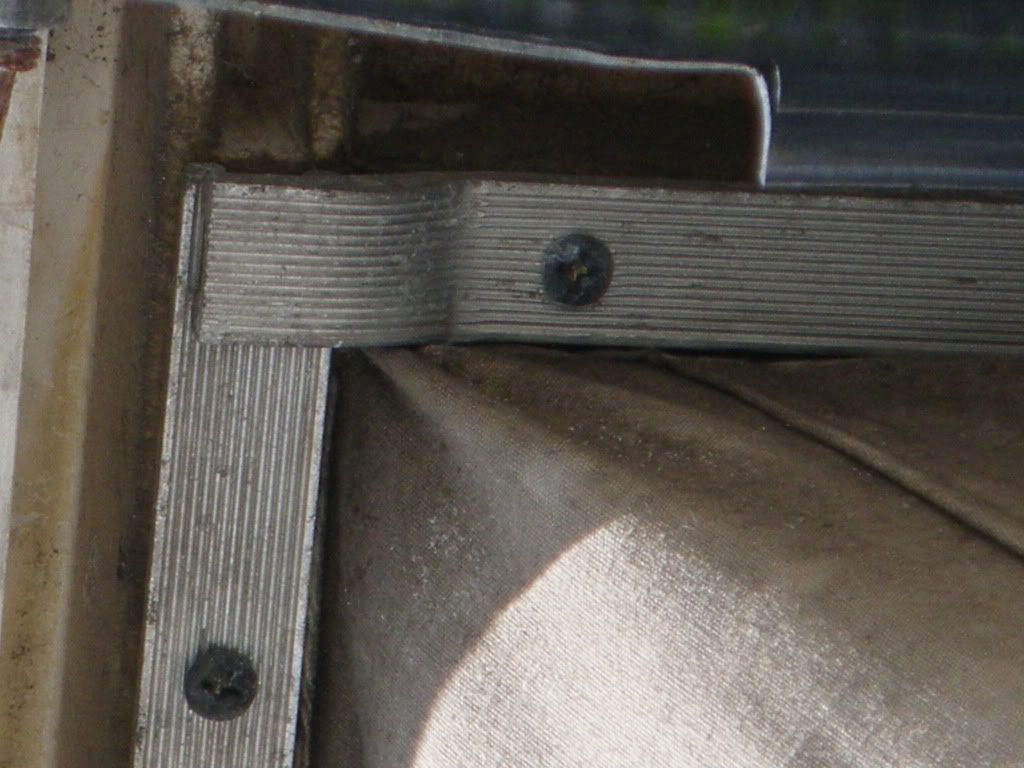
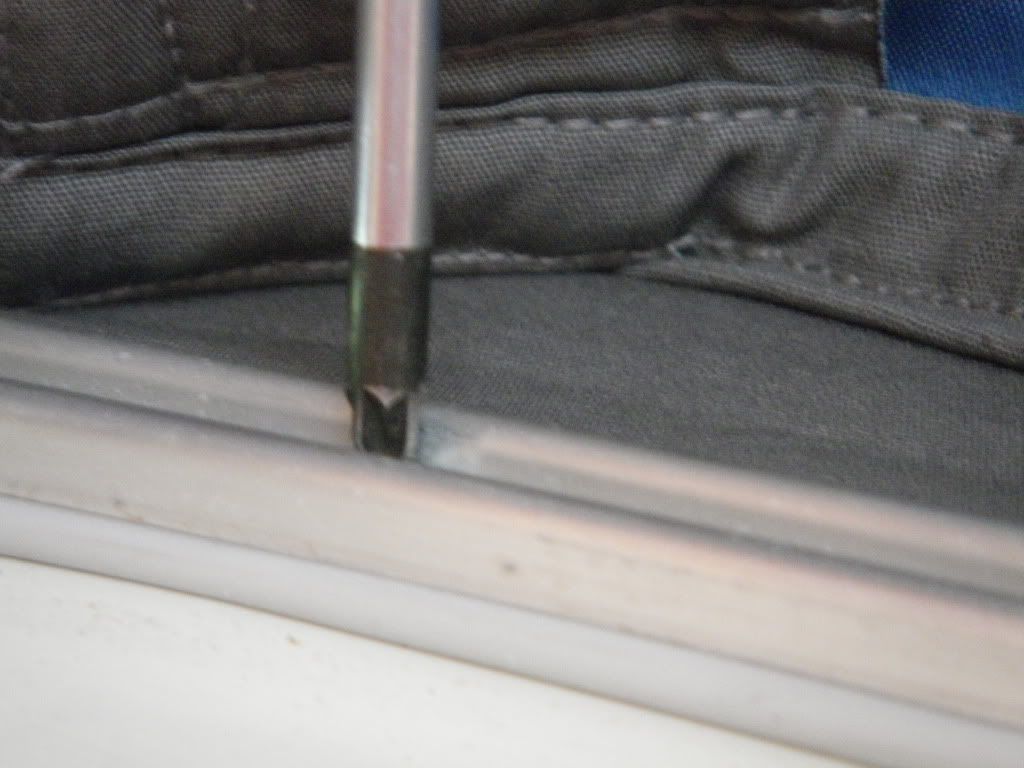
We centred up the bottom as well - front first, then rears, then sides. On the bottom there is a plastic bead that fits just inside the alloy strip:
To be honest fitting the replacement took most of today and Ali says she's never going to do another one! It was very fiddly and we did most of the bottom section with the roof propped 3/4 open otherwise we would never have got the bottom bead to fit under the alloy strips.
This is the finished job. It looks a whole heap better although it is
very tight.
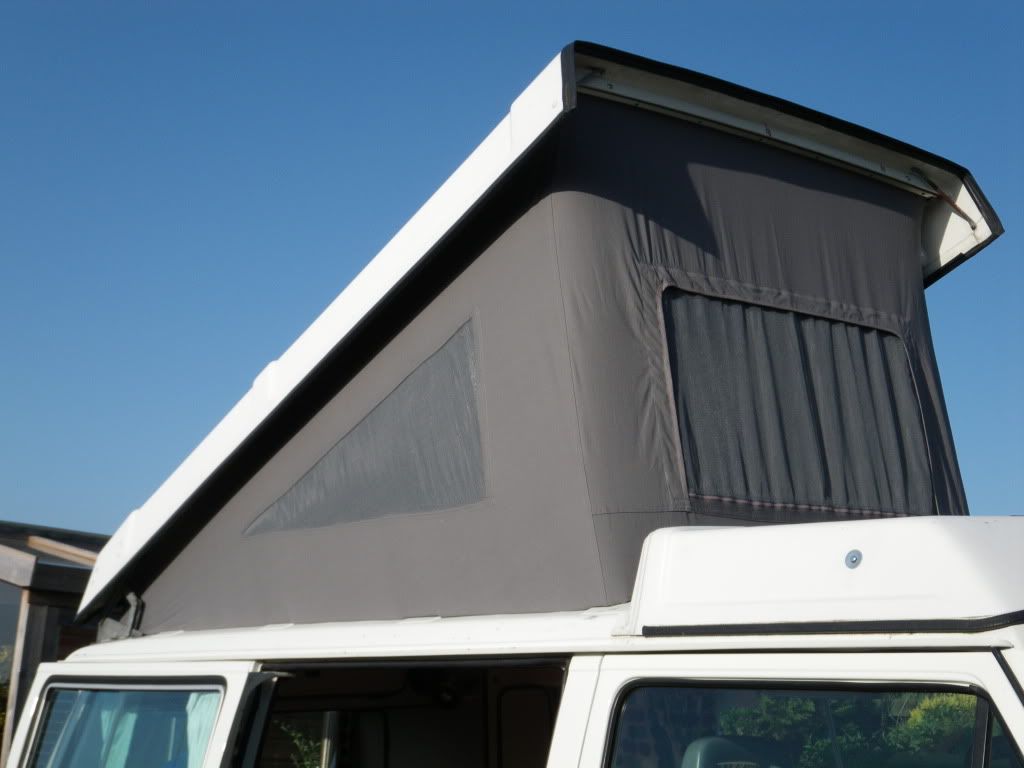
I am now waiting for it rain (making myself popular in Cornwall in the holidays!) and hoping that it will stretch the canvas slightly.
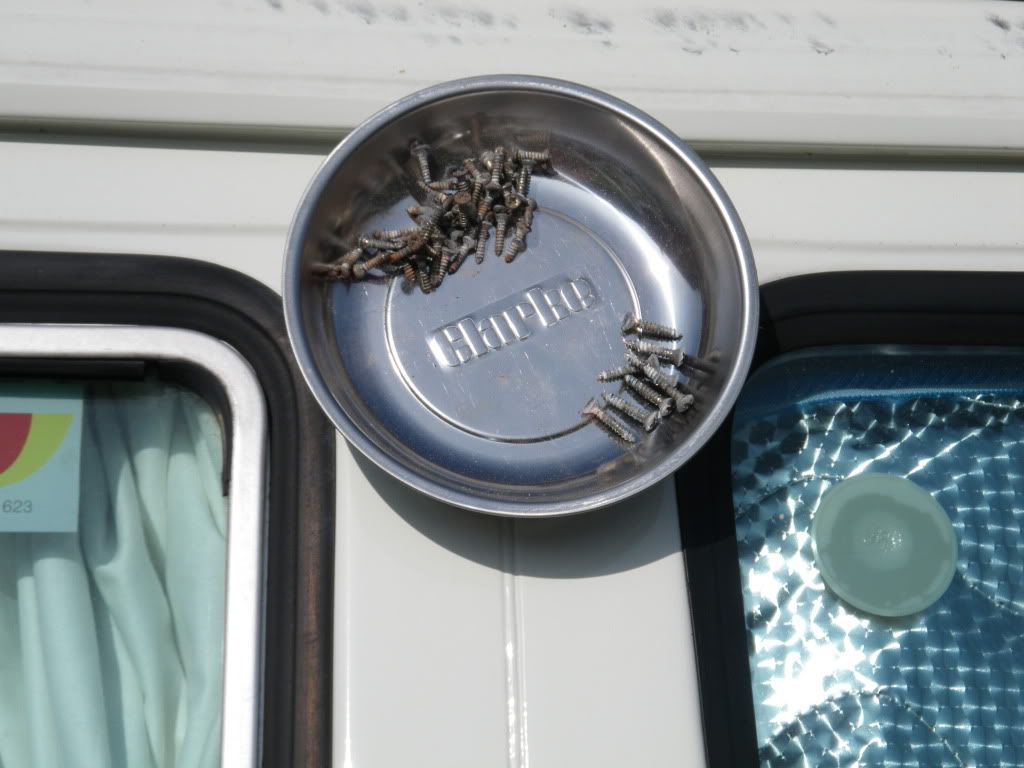
These are the tools we used for the roof canvas although there were others for fitting the press studs and cleaning the inside of the roof.

Couldn't have managed without the magnetic tray
Like I said earlier - big thanks to Red Westie for giving us the impetus to think we could this ourselves. It is quite a tough job and I wouldn't want to do it every weekend but we took it carefully and hopefully we've got it right.
Re: Westfalia canvas replacement
Posted: 10 Apr 2011, 22:31
by Red Westie
Well done Pete and Ali.....just to set your mind at rest, mine was very tight, as you describe, like a drum skin and very difficult to open the last 10% of the bar (make sure you have a door open when popping the roof, I know it's obvious)
Mine has been fitted a while now (2 years) and it has slackened off nicely, not baggy but just right.
A few damp mornings will see the creases fall out and that warm glow of satisfaction will stop with you both for quite a while....well done.

As a bonus I'm sure this thread will be refered to in the years to come where your excellent pictures will be of great help to others spurred on to do one themselves.
Martin
Re: Westfalia canvas replacement
Posted: 10 Apr 2011, 23:44
by badbod777
the job is simple ,just time consuming ,i done mine on my own last weekend it took me about 6-7 hours but i will advise not to undo the bolts in the glassfibre top as they can start to spin i recomend taking the pin out of the lifting frame it has a star like lock washer on the back much easier and less chance of a major problem i started on the top at the front middle then went to each corner, then i went to the top rear end middle worked to the sides,then the 2 long edges to finish off .
i got mine from just kampers and the label was sewn on upside down which left me double checking every thing as it didn't seem right but the label was upside down i thought this was a bit dissapointing but at the end of the day it is only a label i suppose lol
Re: Westfalia canvas replacement
Posted: 11 Apr 2011, 05:30
by PetenAli
the job is simple ,just time consuming ,i done mine on my own last weekend it took me about 6-7 hours but i will advise not to undo the bolts in the glassfibre top as they can start to spin i recomend taking the pin out of the lifting frame it has a star like lock washer on the back much easier and less chance of a major problem i started on the top at the front middle then went to each corner, then i went to the top rear end middle worked to the sides,then the 2 long edges to finish off .
i got mine from just kampers and the label was sewn on upside down which left me double checking every thing as it didn't seem right but the label was upside down i thought this was a bit dissapointing but at the end of the day it is only a label i suppose lol
Much respect for doing yours on your own! Couldn't even contemplate that! Definately agree with you about the top bolts as one of ours did start to spin so it went back with a good dod of silicon as the old sealant was very crusty. Our JK label was on upside down as well which made me worry a bit too.
Well done Pete and Ali.....just to set your mind at rest, mine was very tight, as you describe, like a drum skin and very difficult to open the last 10% of the bar (make sure you have a door open when popping the roof, I know it's obvious)
Mine has been fitted a while now (2 years) and it has slackened off nicely, not baggy but just right.
A few damp mornings will see the creases fall out and that warm glow of satisfaction will stop with you both for quite a while....well done.
Thanks for the reassuring comments about the tension Martin - we were thinking that if it gets wet and dries out a few times this would help it settle. Thanks also for the comments on the pictures - hopefully if people put the various bits of info on this thread together they now have a fairly comprehensive set of tips for doing the job - which to me is the biggest part of what the forum is all about. Its good to be able to contribute for once!
Pete
Re: Westfalia canvas replacement
Posted: 11 Apr 2011, 17:16
by Gandalf
Excellent pics and process - will refer to this when doing mine (its on the list but not at the top).