DT Gearbox Drive Flange Removal

Big lumps of metals and spanners. Including servicing and fluids.

Moderators: User administrators, Moderators

User avatar
Robsey
Registered user
Posts: 1171
Joined: 19 May 2012, 20:45
80-90 Mem No: 11137
Location: East Manchester

DT Gearbox Drive Flange Removal

Post by Robsey »

Hi all,

This should be an easy one to answer.
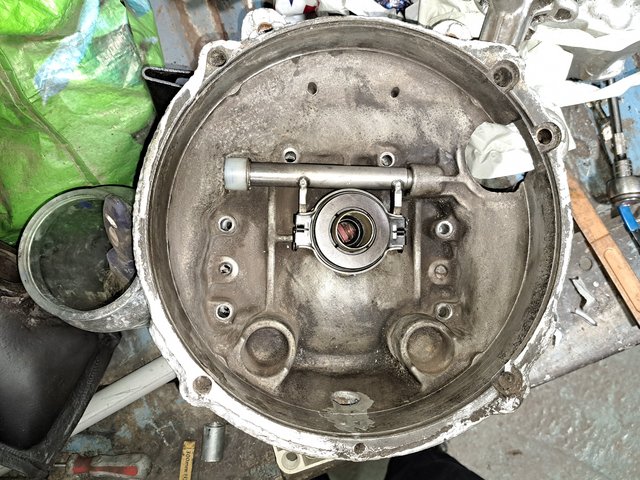
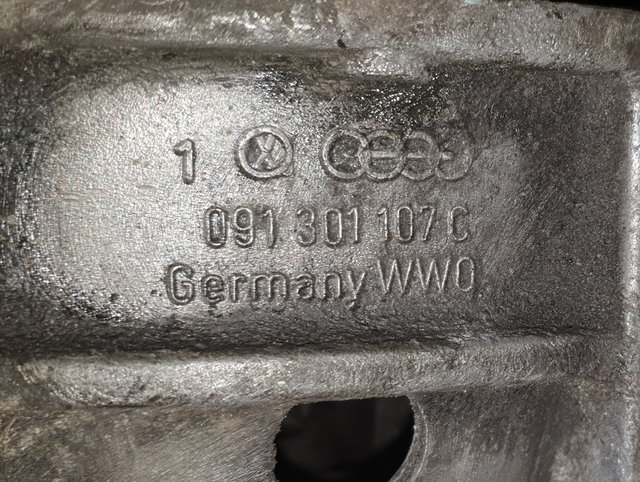
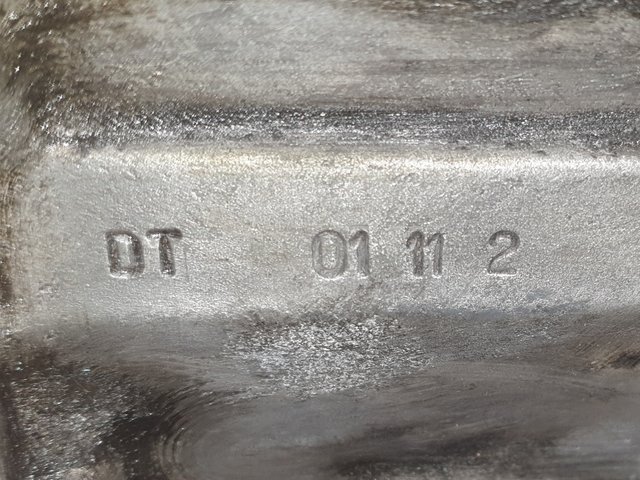
As part of my van rebuild (1983 1.9DF van), I am planning to replace all the gaskets and seals on the DT gearbox.

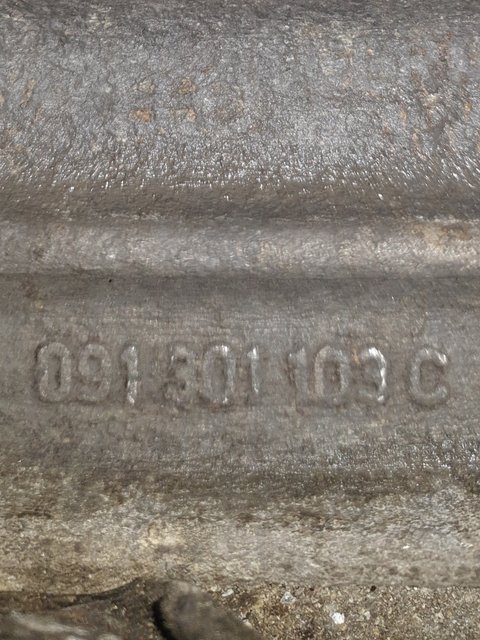
It is a 4 speed 091 type box if I understand correctly.

Image

Image

Image

Image

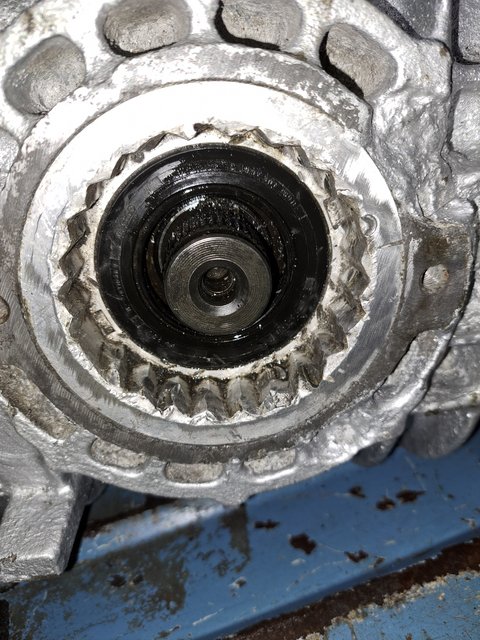
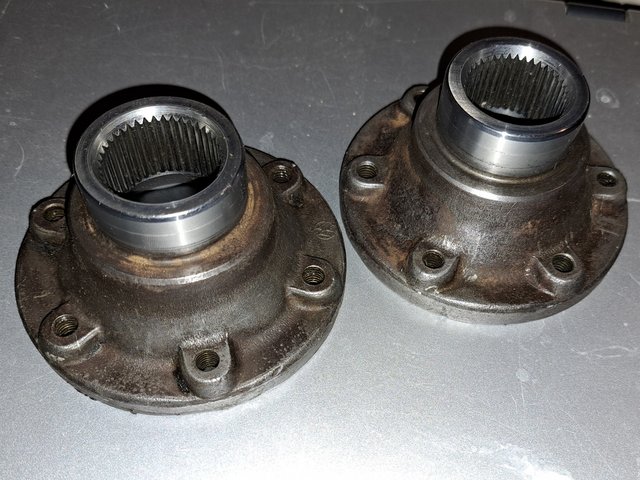
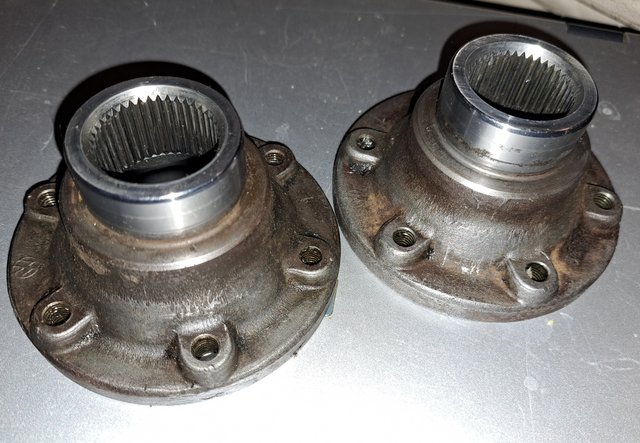
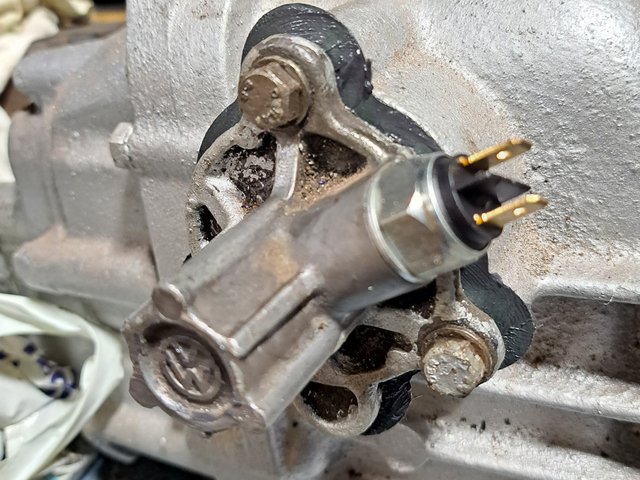
I tried to get one of the drive flanges off the other night, but it was having none of it.

I had remembered to remove the circlip, but no amount of pulling or levering could budge it.

All the youtube videos show it being possible to wriggle the flanges off the splines by hand.
But Bentley shows the need to use a glorified hub puller type tool.

Should it be 'modestly' easy to pull the flange off ? - therefore proving that I am doing something wrong,
or are these things often 'stuck' on ?- proving that youtube videos are all telling me lies.

I tried a hub-puller type tool, to no avail.

Next step would be to apply heat to the flange, and shock it loose with a few hammer blows to a large socket straddling over the centre splined shaft.

Any thoughts please dear chaps...

I should point out that the van has not had any gearbox work at anytime in the previous 40 years of existance, and it had been stood for 30 years on the drive of a house.

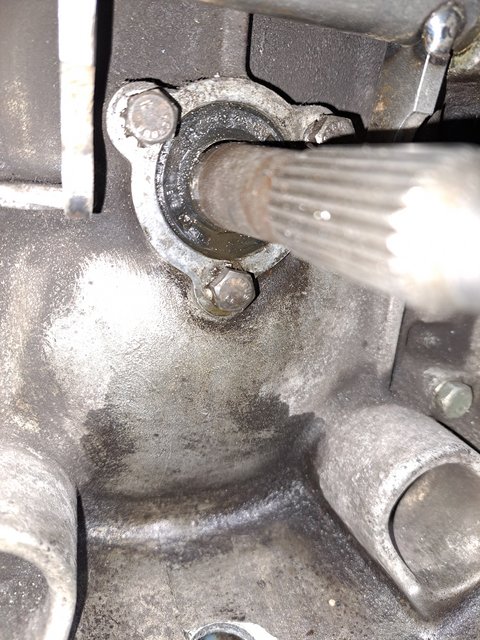
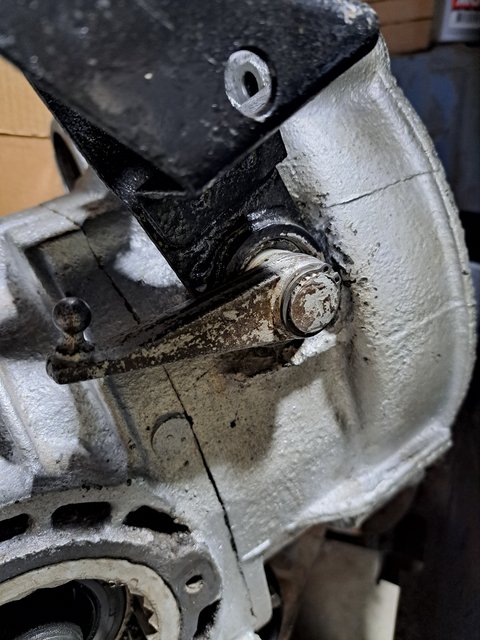
Also - I did notice an oil leak or two from somewhere...
Hence my desire to fit seals and gaskets.
1983 Tin Top with a poorly DF and 4 speed DT box.
1987 Electrics and a DJ engine.
Maybe one day I might get it finished

User avatar
Aidan
Trader
Posts: 6557
Joined: 11 Oct 2005, 19:21
80-90 Mem No: 742
Location: Llanfyllin, mid Wales : )
Contact:

Re: DT Gearbox Drive Flange Removal

Post by Aidan »

The centre of the differential output pinion that the hub is fitted to is threaded at M10 so you can pop a short M10 bolt in there and use a 6" three leg puller to pull the flange off using the head of the bolt as the fulcrum point, damaging nothing; if you drill a slight depression in the middle of the head of the bolt that will prevent the puller forcing screw tip from popping off when under load

or you can use 2 long M8 threaded bolts through the CV boltholes acting against the plastic disc and the adjusting rings to force the flange off, but you will potentially damage both the plastic retainer discs and the adjusting rings which are aluminium, though such damage is not generally significant.

once they are moving they generally come off quite easily

when refitting use new circlips everytime, make sure the belville washer is correct way up, open the circlip just enough to get it on the end of the shaft then tw*t into place with something like a 32mm socket with enough force to compress the washer and force the circlip into the groove and check it is fully seated with a prybar. Use a safety pin down the side of the cap when pushing it in to allow air to come out then pull the safety pin out

User avatar
Robsey
Registered user
Posts: 1171
Joined: 19 May 2012, 20:45
80-90 Mem No: 11137
Location: East Manchester

Re: DT Gearbox Drive Flange Removal

Post by Robsey »

Cheers fella, that is good to know.

It is very much appreciated.
Hopefully have a go at the box tonight.
Assuming I am not dragged off to deal with something else.

I will report back in due course. (Over the weekend).
1983 Tin Top with a poorly DF and 4 speed DT box.
1987 Electrics and a DJ engine.
Maybe one day I might get it finished

User avatar
Robsey
Registered user
Posts: 1171
Joined: 19 May 2012, 20:45
80-90 Mem No: 11137
Location: East Manchester

Re: DT Gearbox Drive Flange Removal

Post by Robsey »

I finally managed to "push" the drive flanges off the gearbox.

Flat plates behind the flanges and then tighten three M8 bolts through the threaded flange against the flat plates.
It worked a treat.

Image

But I must have scared the gearbox, because it promptly pee'd smelly oil out onto the van floor.
About a litre of oil in my estimation.
Bugger!!

It appears that both drive flange seals are totally shot, along with the output shaft seal.

Image

I will be fitting a complete gearbox seal and gasket kit, drain and level plugs, starter motor bush, and clutch release bearing and guide tube.

Payday next week, so time to get the parts-order shopping list ready - lol.
1983 Tin Top with a poorly DF and 4 speed DT box.
1987 Electrics and a DJ engine.
Maybe one day I might get it finished

User avatar
Aidan
Trader
Posts: 6557
Joined: 11 Oct 2005, 19:21
80-90 Mem No: 742
Location: Llanfyllin, mid Wales : )
Contact:

Re: DT Gearbox Drive Flange Removal

Post by Aidan »

That gearbox has definitely been 'worked' on before, the adjusting ring shown has been removed using a chisel type tool leaving major witness marks; I note also that it has a reference mark on it, which doesn't line up with the screw hole which is where I would expect it to be referenced to, but maybe it was referenced to that part of the case which has corroded away
also the input seal is not fitted deeply enough, it needs to go in far enough that the locating lugs on the back of the guide tube can properly centre on the aperture

User avatar
Robsey
Registered user
Posts: 1171
Joined: 19 May 2012, 20:45
80-90 Mem No: 11137
Location: East Manchester

Re: DT Gearbox Drive Flange Removal

Post by Robsey »

Ooh - sounds like I have opened a can of worms.

Will I need to re-adjust the drive-shaft rings to re-align the marks?
I would expect the marks are there for a reason.
My assumption would be to set the pre-load on the bearings.

Sadly the history of this engine predates my involvement with the in-laws by at least four years.
So I cannot say who, what, or why the gearbox was looked at before.

I had noticed the corrosion which I assumed was due to being parked up for 30 years.

The late father-in-law would have been quite happy to get his hands dirty.

I never saw any manuals for the van before I took on the rebuild, so I presume if he did work on the box, it would have been by "best guess" means.

------------------------------------------------

Rambling history alert.

The only garage history I have is the original service book from Hebble Garage in Huddersfield, from where the previous owner had bought it in April 1983.
There are no records beyond 1986 when it came into the wife's family.
Other than word of mouth tales that it had blown the first DF engine.
Had a replacement DG engine with DF manifold fitted,
by the inlaw parents, and then the valve seat of the left head blew out in winter 1990.
Indicated mileage = 129,983 miles.
After that the van was left to rot on the drive until I was asked to take on the now scrap-yard fodder by the tearful mother-in-law in 2012. (father-in-law had died in 2010).

I had half-heartedly stripped the van due to being mentally and financially overwhelmed by the task ahead, but finally started to take things seriously about two years ago.

Yes - the van should have been scrapped in 2012...
But I have come this far now.

-----------------------------

So back to today.
I assume that as long as I now set things up properly, the box should be fit to rebuild (seals etc).

Time to consult the Bentley and the remains of the forum wiki for info on how to set things up properly.

Thanks Aidan for your guidance, it is like gold to people like me with good intentions and limited experience.
I had not even noticed alignment marks until you mentioned them.
Now I have a little bit more understanding of how I should proceed.

I suppose - I should really look to see what is stuck on the drain plug before I try to fix up what could be a dog that has had a very hard life...
So thinking filings from standard wear, or chunks from the gears of a box that should be binned.

The gears feel okay and quite smooth to turn with not too-much back-lash when turning the shafts clockwise and anti-clockwise.

To be continued...

Oh eck - there goes my "trying to repair on a budget" theory.
1983 Tin Top with a poorly DF and 4 speed DT box.
1987 Electrics and a DJ engine.
Maybe one day I might get it finished

User avatar
tobydog
Registered user
Posts: 1384
Joined: 07 Mar 2009, 21:03
80-90 Mem No: 6484
Location: Near Saarfend, Essex

Re: DT Gearbox Drive Flange Removal

Post by tobydog »

Robsey wrote: 21 Apr 2023, 23:57

Image


Is that a drop of weld, top right hand corner?
Knowledge is power
1970 CU

multisi
Registered user
Posts: 1731
Joined: 03 Apr 2016, 12:01
80-90 Mem No: 12
Location: jersey

Re: DT Gearbox Drive Flange Removal

Post by multisi »

Its the clutch operating shaft.
1992 red lle 2.2 subaru 1990 rhd caravelle 2.2 subaru 1986 california import vanagon

User avatar
Robsey
Registered user
Posts: 1171
Joined: 19 May 2012, 20:45
80-90 Mem No: 11137
Location: East Manchester

Re: DT Gearbox Drive Flange Removal

Post by Robsey »

multisi wrote: 22 Apr 2023, 09:54 Its the clutch operating shaft.

Yes it is the clutch operating lever on the shaft.
1983 Tin Top with a poorly DF and 4 speed DT box.
1987 Electrics and a DJ engine.
Maybe one day I might get it finished

User avatar
tobydog
Registered user
Posts: 1384
Joined: 07 Mar 2009, 21:03
80-90 Mem No: 6484
Location: Near Saarfend, Essex

Re: DT Gearbox Drive Flange Removal

Post by tobydog »

Image
Knowledge is power
1970 CU

User avatar
Aidan
Trader
Posts: 6557
Joined: 11 Oct 2005, 19:21
80-90 Mem No: 742
Location: Llanfyllin, mid Wales : )
Contact:

Re: DT Gearbox Drive Flange Removal

Post by Aidan »

that is how they are made originally, a tack weld and a half decent tig weld, they do fail occasionally

User avatar
tobydog
Registered user
Posts: 1384
Joined: 07 Mar 2009, 21:03
80-90 Mem No: 6484
Location: Near Saarfend, Essex

Re: DT Gearbox Drive Flange Removal

Post by tobydog »

8)
Knowledge is power
1970 CU

User avatar
Robsey
Registered user
Posts: 1171
Joined: 19 May 2012, 20:45
80-90 Mem No: 11137
Location: East Manchester

Re: DT Gearbox Drive Flange Removal

Post by Robsey »

I would consider changing the operating shaft bushes, but the shaft has been peined over at the end to retain the operating arm :(

It pivots easily enough without any excess play or rubbing. So I may as well say "don't fix what isn't broke".
Because if I did try to fix it, something would probably break.

There are definite rub marks / ridges around the release bearing guide tube, so plenty has happened in the past.

Must have had a very hard albeit brief 7 year life.
1983 Tin Top with a poorly DF and 4 speed DT box.
1987 Electrics and a DJ engine.
Maybe one day I might get it finished

User avatar
Robsey
Registered user
Posts: 1171
Joined: 19 May 2012, 20:45
80-90 Mem No: 11137
Location: East Manchester

Re: DT Gearbox Drive Flange Removal

Post by Robsey »

A look at the clutch release guide tube shows a lot of wear...

Image

At least the contact face with the bell housing looks okay to my untrained eye.

Image

The drive flange on the left looks quite battle scarred.

Image

Some pitting on the polished part where the seal would go. (right flange in bottom photo).
Hopefully not too severe to require new flanges.

Image

Image

You have got to love these vans. :roll:
1983 Tin Top with a poorly DF and 4 speed DT box.
1987 Electrics and a DJ engine.
Maybe one day I might get it finished

User avatar
Robsey
Registered user
Posts: 1171
Joined: 19 May 2012, 20:45
80-90 Mem No: 11137
Location: East Manchester

Re: DT Gearbox Drive Flange Removal

Post by Robsey »

Finally started rebuilding the bell housing.

Despite the end of the clutch-release shaft being peined over, I was able to carefully file back down to the correct diameter before persuading the pivot arm to slide off.

I removed the "Steradent" tube along with the ribbed rubber seals and the inner plastic bush.
With the release shaft out, I was able to mount this carefully in a lathe, and clean up the end, before re-cutting the circlip grooves.

Reassembled with a box load of parts from Brickwerks.

Including new guide tube and release bearing.

Image

The whole release mechanism is much stiffer, but not binding.
I should confirm that a new output shaft seal was also fitted, but it didn't look that snug on the shaft.

In the photo above, I had removed the bell housing to investigate an initial period of an excessively stiff release shaft.

All assembled complete with proper circlips, seals etc.

Image

I am assuming another 'Bodgit & Scarper' repair by the late father-in-law as there was no seal or gasket on the bell-housing flange.
Just a year's supply of battleship-grey bathroom sealant type stuff.
It soon peeled off,
Allowing me to use the 'correct' paper gasket.
-----------------------------

New drive shaft seals fitted... but I had left the plastic cover thingies at home. Pah!!
Oh well a job for next week.
------------------------------
Finally, fitted a new reverse light switch, aluminium washer and gasket.

Image

Wowsers that looks like overkill - as long as it does it's job.
It was part of a full gasket and seal kit from our favourite Yorkshire supplier.
-------------------------------

The plan next week is to finish fitting the rest of the seals and gaskets for the casing, followed by fitting the drive flanges and the selector mechanisn.
Complete with new ball-lever assembly and boot.
1983 Tin Top with a poorly DF and 4 speed DT box.
1987 Electrics and a DJ engine.
Maybe one day I might get it finished

Post Reply