One man photo guide to removing a late Petrol van gearbox.
Moderators: User administrators, Moderators
-
what2do
- Registered user
- Posts: 2824
- Joined: 05 Oct 2012, 08:55
- 80-90 Mem No: 11974
- Location: Salisbury
Re: One man photo guide to removing a late Petrol van gearbox.
I can see your fuel line, what keeps the radius part tight to the bodywork as it goes from horizontal to the near vertical angle? Mine has a clip to stop it from moving around.
Why would the glass be anything other than half full?
'89 panel van, 1.9 DG.
'89 panel van, 1.9 DG.
-
itchyfeet

- Registered user
- Posts: 12427
- Joined: 23 Jul 2007, 17:24
- 80-90 Mem No: 12733
- Location: South Hampshire
Re: One man photo guide to removing a late Petrol van gearbox.
nothing, it's just there, yours is a year later perhaps an addition
-
itchyfeet
- Registered user
- Posts: 12427
- Joined: 23 Jul 2007, 17:24
- 80-90 Mem No: 12733
- Location: South Hampshire
Re: One man photo guide to removing a late Petrol van gearbox.
This is the crown from my gearbox, Aidan ran it with some engineers blue to show where it was touching,
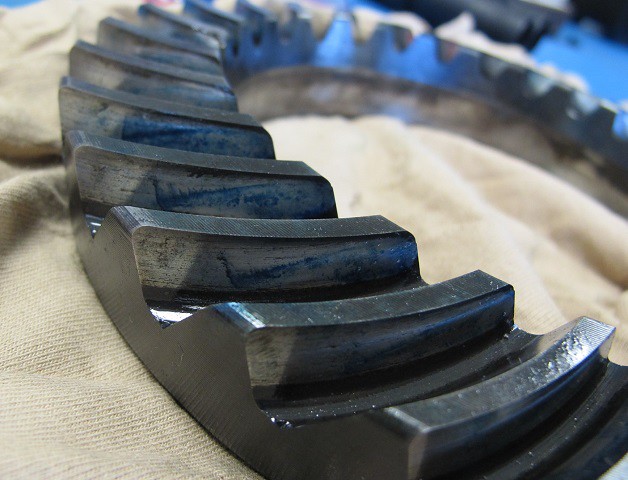 IMG_0082 by Paul_Barr, on Flickr
0.38mm shim fitted in place of 0.32 and end float rechecked at 0.1mm
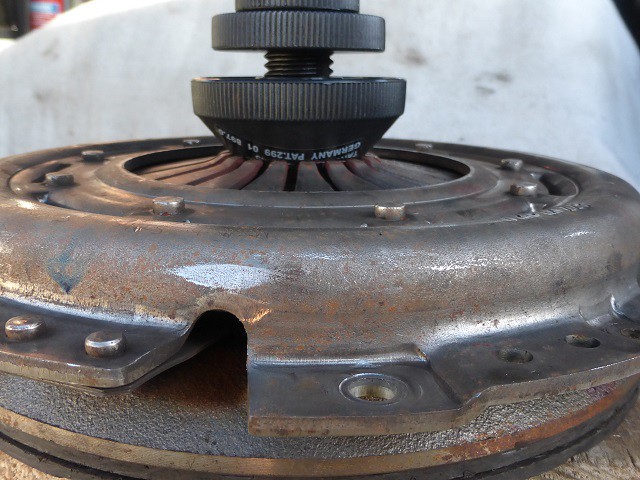
O ring and felt seal replaced, make sure o ring groove is cleaned out, you can see the Oil seal groove here, most flywheels will have one worn from high mileage, ideally I fit the seal in a different position to avoid the groove.
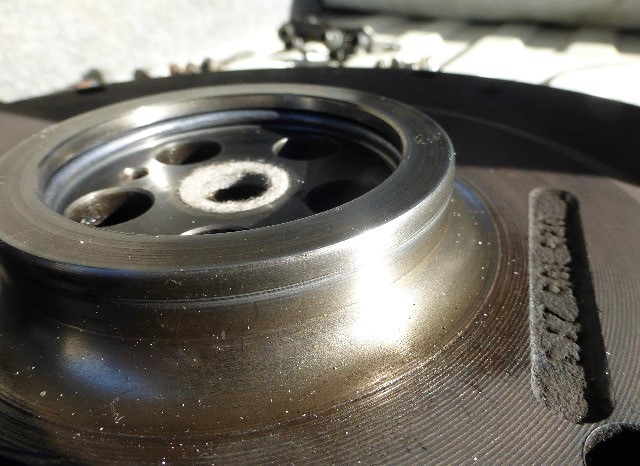 P1020883 by Paul_Barr, on Flickr
I measured up the Elring seal dimensions and calculated if I fit the seal 1mm under flush it will be over 1mm off the groove, last time I changed the seal I tried flush and it was binding slightly. Other manufacturers of seal may be thicker and not enable any positioning.
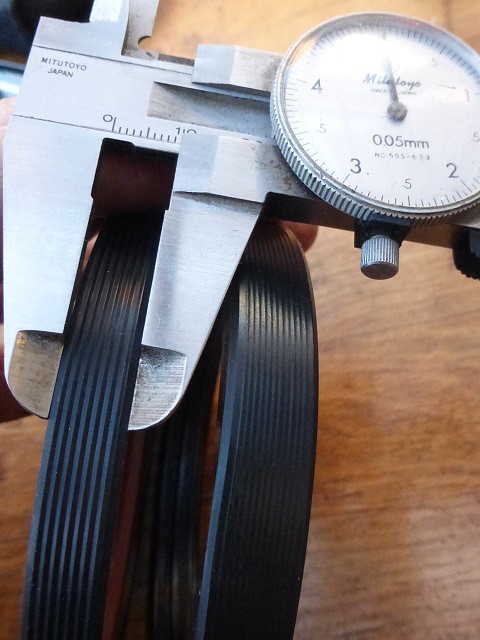 P1020888 by Paul_Barr, on Flickr
hammer the seal in with a block of wood then use the old seal to gently tap it under flush.
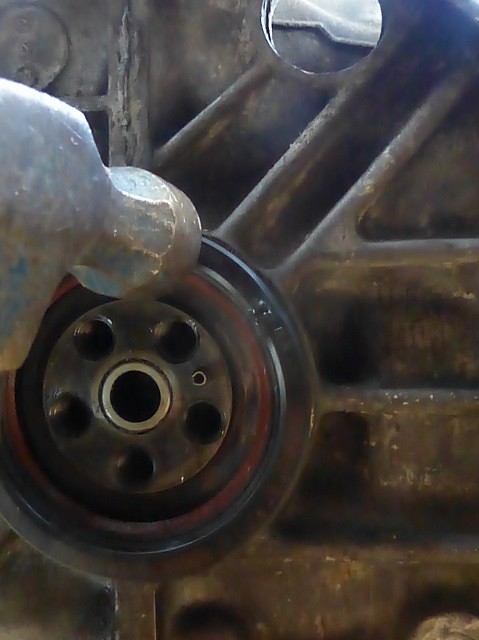 P1020908 by Paul_Barr, on Flickr
refit flywheel, add the anti rotation bolt and torque to 110Nm ( as per Bentley) not Haynes.
Using a clutch alignment tool place the parts together, clamp and check it's concentric and bolt back on, 20Nm
 P1020920 by Paul_Barr, on Flickr
IMG_0082 by Paul_Barr, on Flickr0.38mm shim fitted in place of 0.32 and end float rechecked at 0.1mm
O ring and felt seal replaced, make sure o ring groove is cleaned out, you can see the Oil seal groove here, most flywheels will have one worn from high mileage, ideally I fit the seal in a different position to avoid the groove.
P1020883 by Paul_Barr, on FlickrI measured up the Elring seal dimensions and calculated if I fit the seal 1mm under flush it will be over 1mm off the groove, last time I changed the seal I tried flush and it was binding slightly. Other manufacturers of seal may be thicker and not enable any positioning.
P1020888 by Paul_Barr, on Flickrhammer the seal in with a block of wood then use the old seal to gently tap it under flush.
P1020908 by Paul_Barr, on Flickrrefit flywheel, add the anti rotation bolt and torque to 110Nm ( as per Bentley) not Haynes.
Using a clutch alignment tool place the parts together, clamp and check it's concentric and bolt back on, 20Nm
P1020920 by Paul_Barr, on Flickr
Last edited by itchyfeet on 10 Feb 2018, 16:19, edited 2 times in total.
-
itchyfeet
- Registered user
- Posts: 12427
- Joined: 23 Jul 2007, 17:24
- 80-90 Mem No: 12733
- Location: South Hampshire
Re: One man photo guide to removing a late Petrol van gearbox.
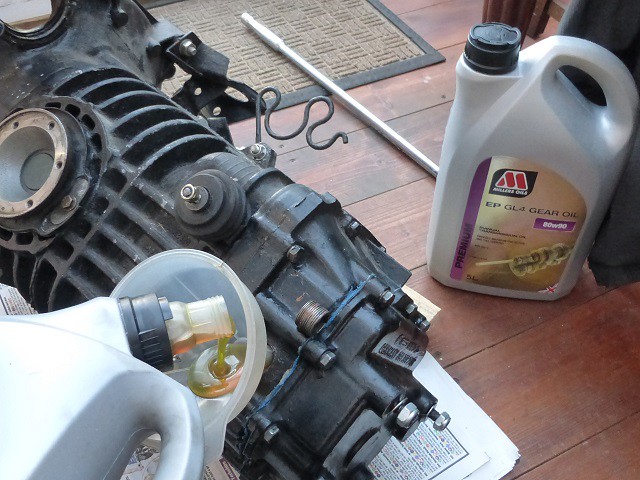
Change the oil while it's out, easier to refill when out, this is a 4 speed 3.5L of GL4
 P1020932 by Paul_Barr, on Flickr
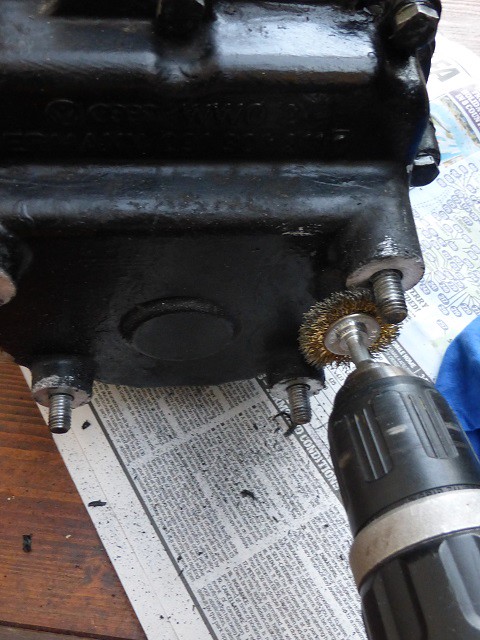
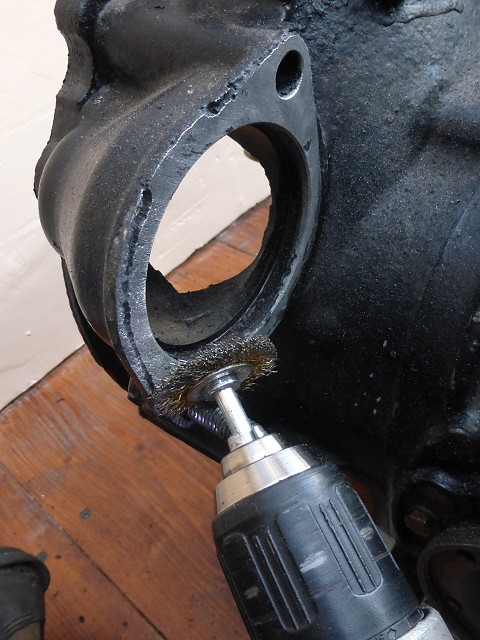
good time to clean up the gearbox earths, all these mating surfaces have really made a big difference, use Vaseline/petroleum jelly on reassembly.
 P1020942 by Paul_Barr, on Flickr
 P1020943 by Paul_Barr, on Flickr
 P1020945 by Paul_Barr, on Flickr
some copper grease on the release bearing arms and some high temp grease on the input shaft.
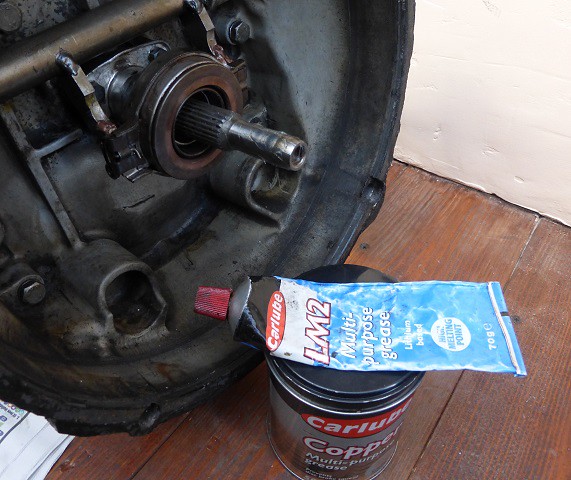 P1020946 by Paul_Barr, on Flickr
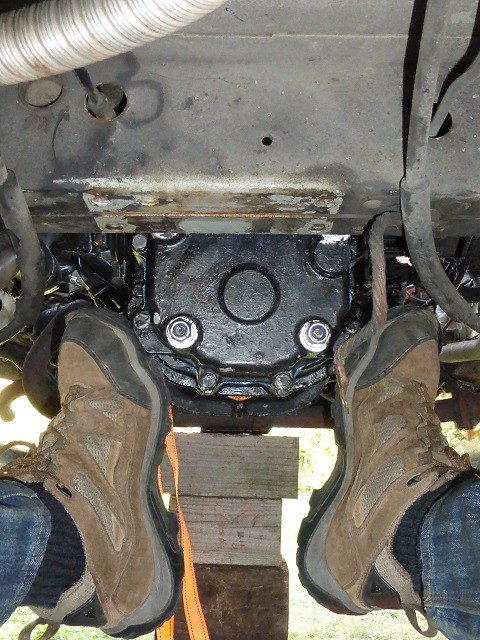
good time to check the torque on the outer CVs as it's easy to get to them, 45Nm
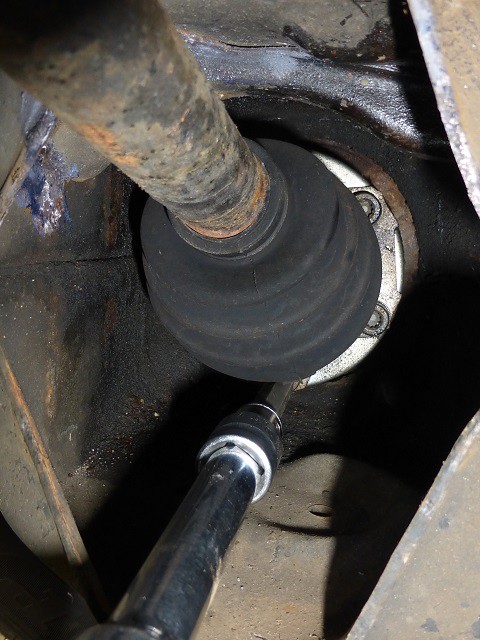 P1020951 by Paul_Barr, on Flickr
drag the box under in a piece of wood or skateboard (or a tarp)
 P1020948 by Paul_Barr, on Flickr
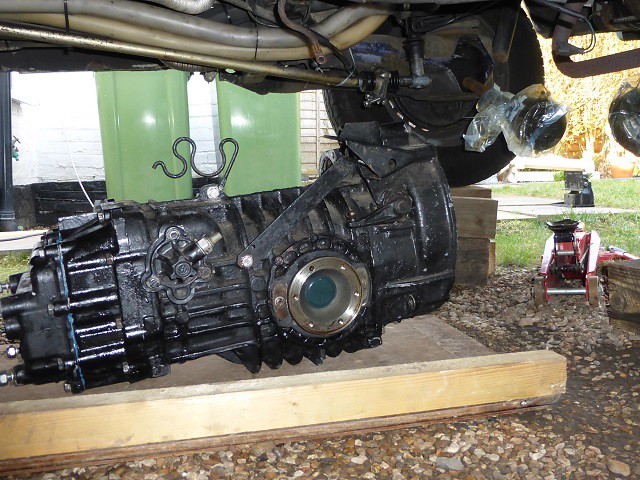
Put the engine back on a hydraulic jack, get the box up on the ratchet straps ( same as lowering) and align the gearbox and engine so it's dead parallel
 P1020957 by Paul_Barr, on Flickr
P1020932 by Paul_Barr, on Flickrgood time to clean up the gearbox earths, all these mating surfaces have really made a big difference, use Vaseline/petroleum jelly on reassembly.
P1020942 by Paul_Barr, on FlickrP1020943 by Paul_Barr, on FlickrP1020945 by Paul_Barr, on Flickrsome copper grease on the release bearing arms and some high temp grease on the input shaft.
P1020946 by Paul_Barr, on Flickrgood time to check the torque on the outer CVs as it's easy to get to them, 45Nm
P1020951 by Paul_Barr, on Flickrdrag the box under in a piece of wood or skateboard (or a tarp)
P1020948 by Paul_Barr, on FlickrPut the engine back on a hydraulic jack, get the box up on the ratchet straps ( same as lowering) and align the gearbox and engine so it's dead parallel
P1020957 by Paul_Barr, on Flickr
Last edited by itchyfeet on 10 Feb 2018, 16:22, edited 1 time in total.
-
itchyfeet
- Registered user
- Posts: 12427
- Joined: 23 Jul 2007, 17:24
- 80-90 Mem No: 12733
- Location: South Hampshire
Re: One man photo guide to removing a late Petrol van gearbox.
push the box home with your feet and fit lower Nuts to engine studs.
 P1020958 by Paul_Barr, on Flickr
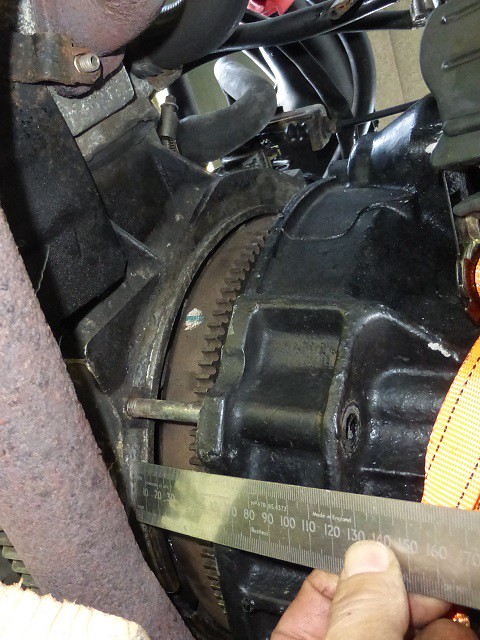
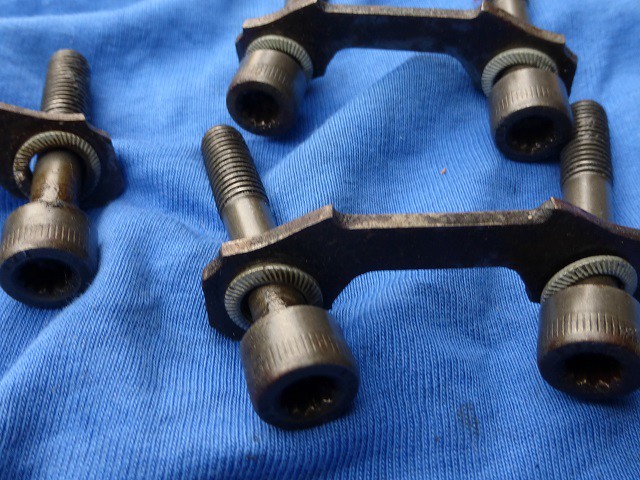
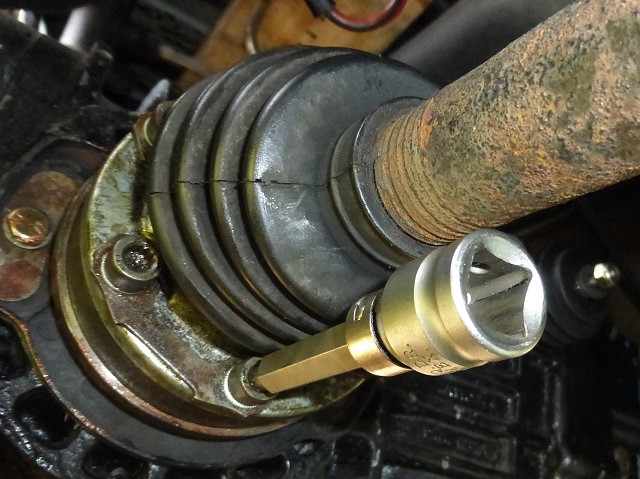
fit gearbox mount and remove jack, clean bolts new washers if possible and fit drive shafts, torque to 45Nm, don't try and torque if the bit is not square, if you can't get a torque wrench on square rotate the wheel.
 P1020964 by Paul_Barr, on Flickr
 P1020966 by Paul_Barr, on Flickr
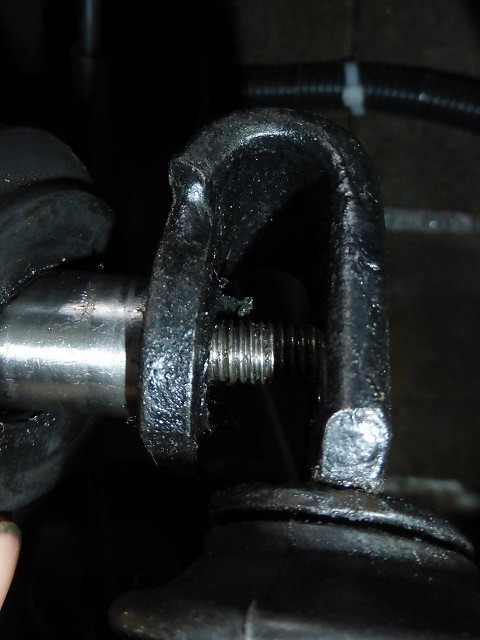
starter motor back with both top bolts, gear linkage back, make sure the bush plate is to the front of the vehicle and make sure the relay leave is home on the spines before tightening or it will slip and damage the lever
 P1020967 by Paul_Barr, on Flickr
slave cylinder on, a thin square of plastic or beer can hold the tricky rear bolt in place while you fit the nut, best to bleed clutch, it's self bleeding, just open the nipple ( preferably add a pipe to the nipple so the fluid does not run down the gearbox) and watch/ top up the reservoir.
 P1020969 by Paul_Barr, on Flickr
coolant pipes back in the clip on top of gearbox, reverse light switch connected, battery reconnected, test drive Job done.
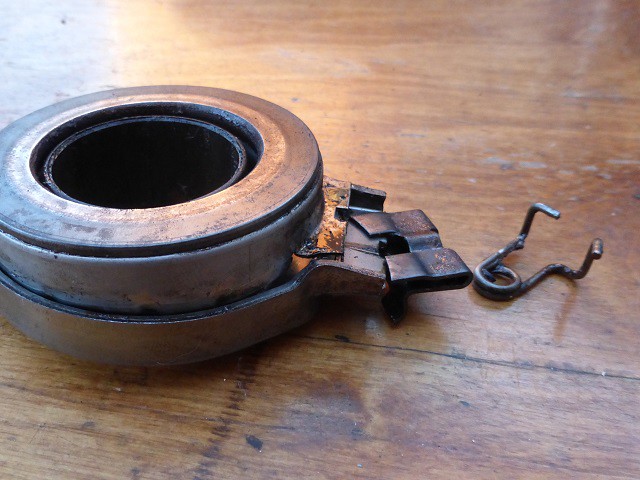
This was the point I found out the clutch release bearing was not fitted right, one press of the clutch a thud and the lever was stuck bearing clip/spring had come off.
I think what happened is I accidently moved the release arm while raising the box (I was working from the other side so would not have noticed) and that pushed the bearing too far forward and off the forks, when the box was pushed on the bearing and lever were pushed back but one spring came off.
So take care not to move the lever, maybe tie it up.
So 3.5 hours later box off again, bearing replaced and box refitted, grrrrr
Job done
 P1030002 by Paul_Barr, on Flickr
P1020958 by Paul_Barr, on Flickrfit gearbox mount and remove jack, clean bolts new washers if possible and fit drive shafts, torque to 45Nm, don't try and torque if the bit is not square, if you can't get a torque wrench on square rotate the wheel.
P1020964 by Paul_Barr, on FlickrP1020966 by Paul_Barr, on Flickrstarter motor back with both top bolts, gear linkage back, make sure the bush plate is to the front of the vehicle and make sure the relay leave is home on the spines before tightening or it will slip and damage the lever
P1020967 by Paul_Barr, on Flickrslave cylinder on, a thin square of plastic or beer can hold the tricky rear bolt in place while you fit the nut, best to bleed clutch, it's self bleeding, just open the nipple ( preferably add a pipe to the nipple so the fluid does not run down the gearbox) and watch/ top up the reservoir.
P1020969 by Paul_Barr, on Flickrcoolant pipes back in the clip on top of gearbox, reverse light switch connected, battery reconnected, test drive Job done.
This was the point I found out the clutch release bearing was not fitted right, one press of the clutch a thud and the lever was stuck bearing clip/spring had come off.
I think what happened is I accidently moved the release arm while raising the box (I was working from the other side so would not have noticed) and that pushed the bearing too far forward and off the forks, when the box was pushed on the bearing and lever were pushed back but one spring came off.
So take care not to move the lever, maybe tie it up.
So 3.5 hours later box off again, bearing replaced and box refitted, grrrrr
Job done
P1030002 by Paul_Barr, on Flickr-
Bigface
- Registered user
- Posts: 34
- Joined: 05 Sep 2020, 08:09
- 80-90 Mem No: 17265
- Location: North Yorks
Re: One man photo guide to removing a late Petrol van gearbox.
Awesome thread, explains the process so easily and fully (having just used it to pull the GB on mine), so thanks for that Itchy.
Only thing I would add to anyone using this as a reference guide would be when lowering the engine at the front to take care that you're not stretching/stressing any cables, especially at the fwd near side - a cable break on mine had me chasing a horrendous misfire/backfire for weeks. I learnt a lot, but it was an expensive process......
Only thing I would add to anyone using this as a reference guide would be when lowering the engine at the front to take care that you're not stretching/stressing any cables, especially at the fwd near side - a cable break on mine had me chasing a horrendous misfire/backfire for weeks. I learnt a lot, but it was an expensive process......
1986 Holdsworth, 1.9 DG