Replacing the dashboard plastic PCB
Moderators: User administrators, Moderators
-
CovKid

- Trader
- Posts: 8409
- Joined: 30 Apr 2006, 13:19
- 80-90 Mem No: 3529
- Location: Ralph - Coventry (Retired)
- Contact:
Re: Replacing the dashboard plastic PCB
One thing you might like to add to PDF (unless I missed it) was connection for oil light. Mines an early DG so only has the one wire.
Roller paint your camper at home: http://roller.epizy.com/55554/" onclick="window.open(this.href);return false; for MP4 download.

Re: Replacing the dashboard plastic PCB
CovKid wrote:One thing you might like to add to PDF (unless I missed it) was connection for oil light. Mines an early DG so only has the one wire.
Ok, maybe the instructions need to be more specific - Table 1 shows the pinouts of the early multiplug, and since there's only one (0.3 bar) oil pressure wire you simply connect that one to the 'Low Oil Pres' input and leave the 'High Oil Pres' input empty.
"I'm a man of means, by no means....King of the Road!"
1983 Viking Xplorer, 2.1DJ
1983 Viking Xplorer, 2.1DJ
-
Oldiebut goodie

- Registered user
- Posts: 7313
- Joined: 18 Apr 2008, 01:19
- 80-90 Mem No: 11135
- Location: Eastern Angle
Re: Replacing the dashboard plastic PCB
CJH wrote: Before I tackled my first proper project some years ago (a hifi pre-amp) I bought some cheap kits from Maplin to practice on, but unfortunately that's no longer an option.
Good luck.
Velleman kits are still going - ideal for learning with and you end up with something usable afterwards. https://quasarelectronics.co.uk/Categor ... r-stockist
1.6D 2019 VW T-Cross
200hp VW T6
1̶Y̶ ̶1̶9̶8̶7̶ ̶H̶i̶-̶t̶o̶p̶ ̶C̶a̶r̶a̶v̶e̶l̶l̶e̶
5̶0̶8̶d̶ ̶M̶e̶r̶c̶
200hp VW T6
1̶Y̶ ̶1̶9̶8̶7̶ ̶H̶i̶-̶t̶o̶p̶ ̶C̶a̶r̶a̶v̶e̶l̶l̶e̶
5̶0̶8̶d̶ ̶M̶e̶r̶c̶
Re: Replacing the dashboard plastic PCB
Yep - that was them! I made some little power supply kits if I remember correctly.
"I'm a man of means, by no means....King of the Road!"
1983 Viking Xplorer, 2.1DJ
1983 Viking Xplorer, 2.1DJ
Re: Replacing the dashboard plastic PCB
Does anyone have a suggestion as to how I could have authentic-looking symbols made for the LED panel? If the experiment in this thread works out then one use for one of the spare LEDs could be a 'low fuel' warning lamp, so a little fuel pump symbol would be nice. Even if it doesn't work out, then whatever use people find for the spare LEDs it would be good to be able to make up appropriate symbols that look they were original.
The originals seem to be a white translucent plastic with a black layer over the top. I would think laser printing onto white card might look close, but I doubt it would match the originals, especially when backlit at night.
So is there a good way to make these?
The originals seem to be a white translucent plastic with a black layer over the top. I would think laser printing onto white card might look close, but I doubt it would match the originals, especially when backlit at night.
So is there a good way to make these?
"I'm a man of means, by no means....King of the Road!"
1983 Viking Xplorer, 2.1DJ
1983 Viking Xplorer, 2.1DJ
-
937carrera

- Registered user
- Posts: 3599
- Joined: 05 Apr 2015, 19:29
- 80-90 Mem No: 16333
- Location: N Yorks.
Re: Replacing the dashboard plastic PCB
Here's a possible idea, from a 2001 Polo.
These are illuminated by LED's the dial is simply a black mask with the symbol etched out clear.... unless some bodger has been at it and painted over the ABS icon to get through an MOT. (between the brake warning and seat belt warning icons) The photo was taken against a bright white background

These are illuminated by LED's the dial is simply a black mask with the symbol etched out clear.... unless some bodger has been at it and painted over the ABS icon to get through an MOT. (between the brake warning and seat belt warning icons)
1981 RHD 2.0 Aircooled Leisuredrive project, CU engine
1990 RHD 1.9 Auto Sleeper with DF/DG engine
1990 RHD 1.9 Auto Sleeper with DF/DG engine
Re: Replacing the dashboard plastic PCB
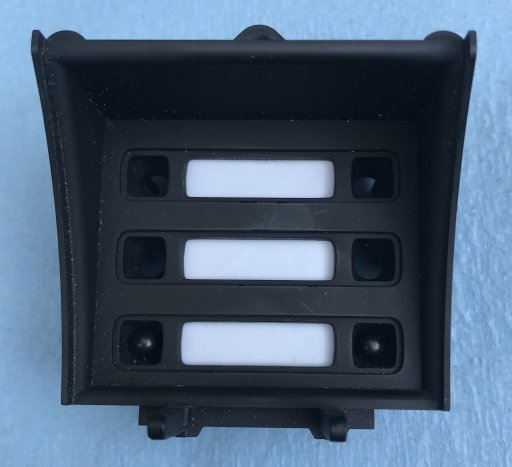
The T25 dash uses a white plastic insert, approx 0.5mm thick, with what looks like black screen printing to create the mask.


It's important that the white symbols are visible even when not backlit - the backlighting is a single bulb that illuminates all the symbols so they're visible at night.
I think I could probably 3D print a white plastic insert, but I don't know how I'd go about making the symbols. It is possible to have black vinyl cut this intricately?
"I'm a man of means, by no means....King of the Road!"
1983 Viking Xplorer, 2.1DJ
1983 Viking Xplorer, 2.1DJ
Re: Replacing the dashboard plastic PCB
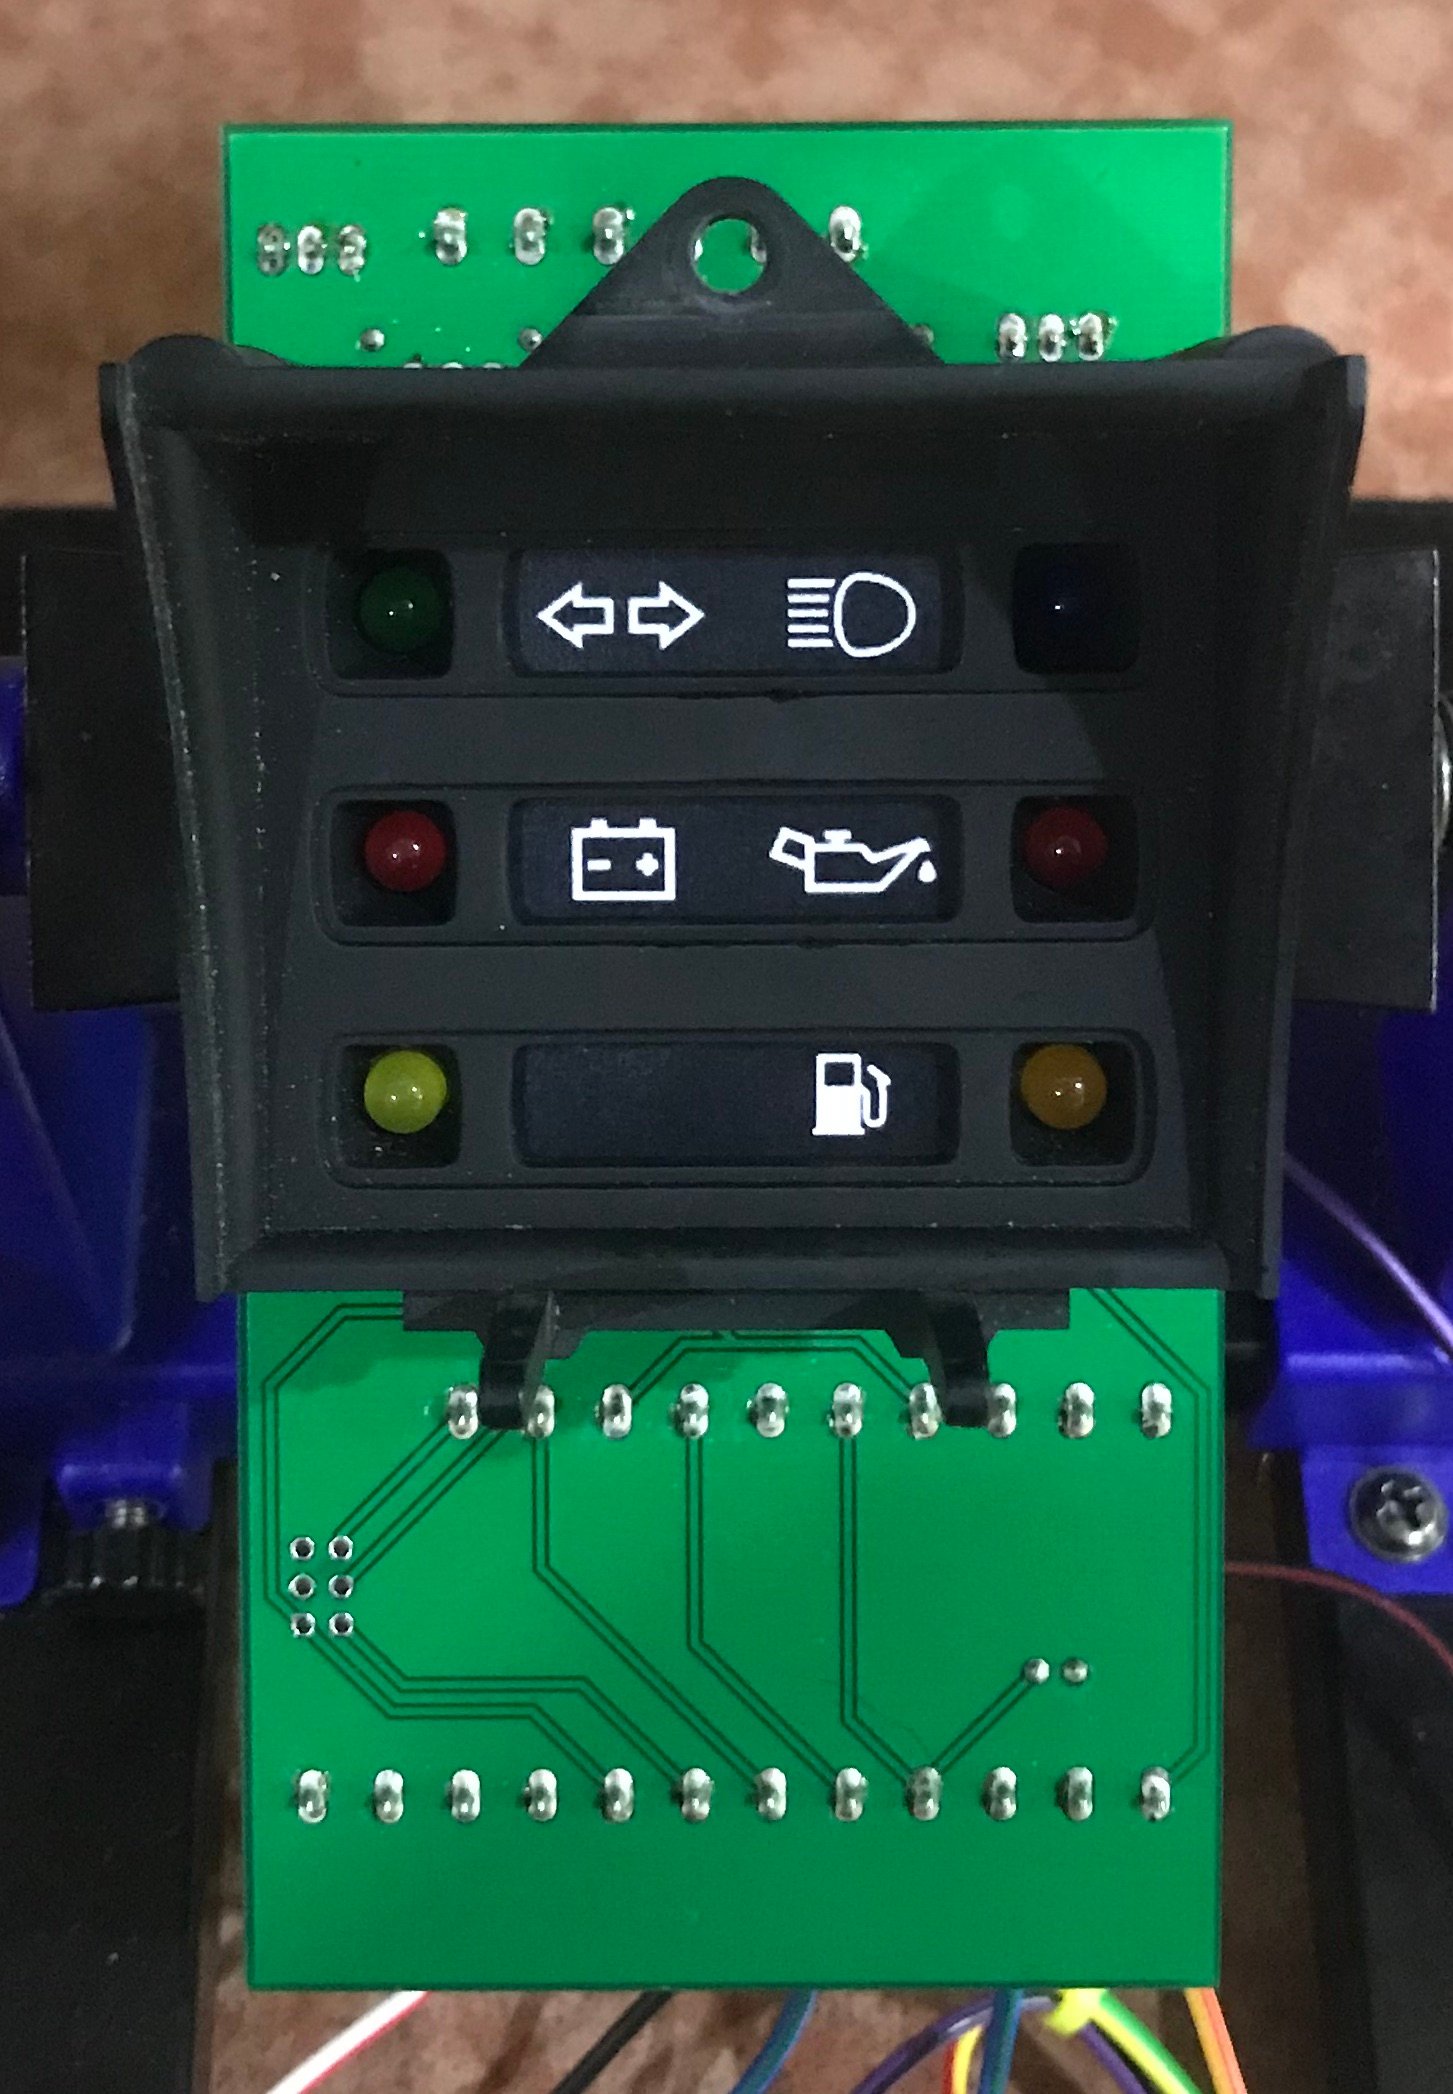
It needs a bit more tweaking, but a 3D printed part would be a good starting point I think, provided the symbols can be printed/cut onto a black vinyl overlay. The white PLA gives a nice even appearance when backlit.


"I'm a man of means, by no means....King of the Road!"
1983 Viking Xplorer, 2.1DJ
1983 Viking Xplorer, 2.1DJ

Re: Replacing the dashboard plastic PCB
This thread is getting better every day
Keep up the good work Chris
Regards
Rick
Keep up the good work Chris
Regards
Rick
____________________________________________
84 CaravelleGL 1.9 DG WBX Bronze Beige Metallic auto
84 CaravelleGL 1.9 DG WBX Bronze Beige Metallic auto
Re: Replacing the dashboard plastic PCB
I wonder if printing onto a laser printer transparency would create a dense enough black to look acceptable - it could be an overlay on top of the white 3D printed background. That would be something that anyone could do at home, depending on what functions they chose for the spare LEDs.
"I'm a man of means, by no means....King of the Road!"
1983 Viking Xplorer, 2.1DJ
1983 Viking Xplorer, 2.1DJ
Re: Replacing the dashboard plastic PCB
Hi Chris
I managed to print a speedo face onto descent glossy sticker paper
Hardest part was getting the scale right
Looked fine and backlighting worked great
For one of my many Motorcycles
Regards
Rick
I managed to print a speedo face onto descent glossy sticker paper
Hardest part was getting the scale right
Looked fine and backlighting worked great
For one of my many Motorcycles
Regards
Rick
____________________________________________
84 CaravelleGL 1.9 DG WBX Bronze Beige Metallic auto
84 CaravelleGL 1.9 DG WBX Bronze Beige Metallic auto
Re: Replacing the dashboard plastic PCB
Cobra88 wrote: I managed to print a speedo face onto descent glossy sticker paper
Hardest part was getting the scale right
Looked fine and backlighting worked great
That's a good idea. Yes, I think the key to this is going to be printing something at home. I could make a powerpoint template for people to start from, and I could perhaps include the white backing piece in the kit.
"I'm a man of means, by no means....King of the Road!"
1983 Viking Xplorer, 2.1DJ
1983 Viking Xplorer, 2.1DJ
Re: Replacing the dashboard plastic PCB
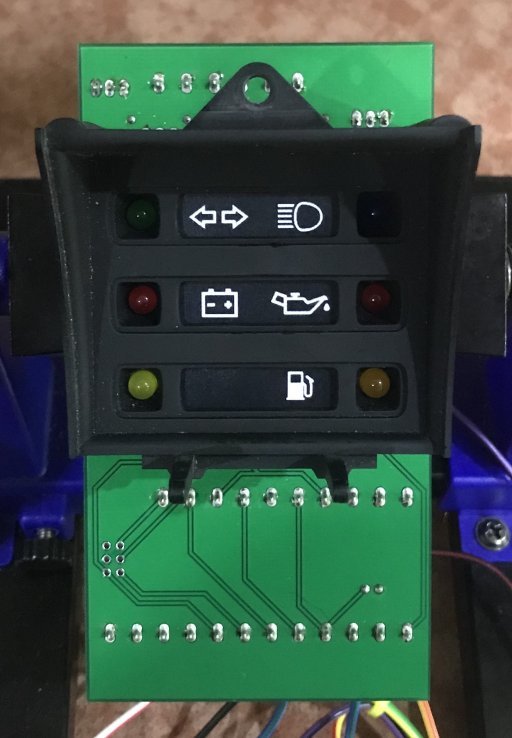
This is a print made on ordinary office paper on a cheap laser printer, and then backed up/held in place with the white 3D-printed panel. It looks OK I think. I'll test the backlighting later when it gets dark. If it works it would be easy to use other symbols - the ones I used for this test aren't particularly high resolution.
"I'm a man of means, by no means....King of the Road!"
1983 Viking Xplorer, 2.1DJ
1983 Viking Xplorer, 2.1DJ
Re: Replacing the dashboard plastic PCB
Perfect Chris
Put me down for a Full kit of everything please
Regards
Rick
Put me down for a Full kit of everything please
Regards
Rick
____________________________________________
84 CaravelleGL 1.9 DG WBX Bronze Beige Metallic auto
84 CaravelleGL 1.9 DG WBX Bronze Beige Metallic auto
Re: Replacing the dashboard plastic PCB
Cobra88 wrote:
Put me down for a Full kit of everything please
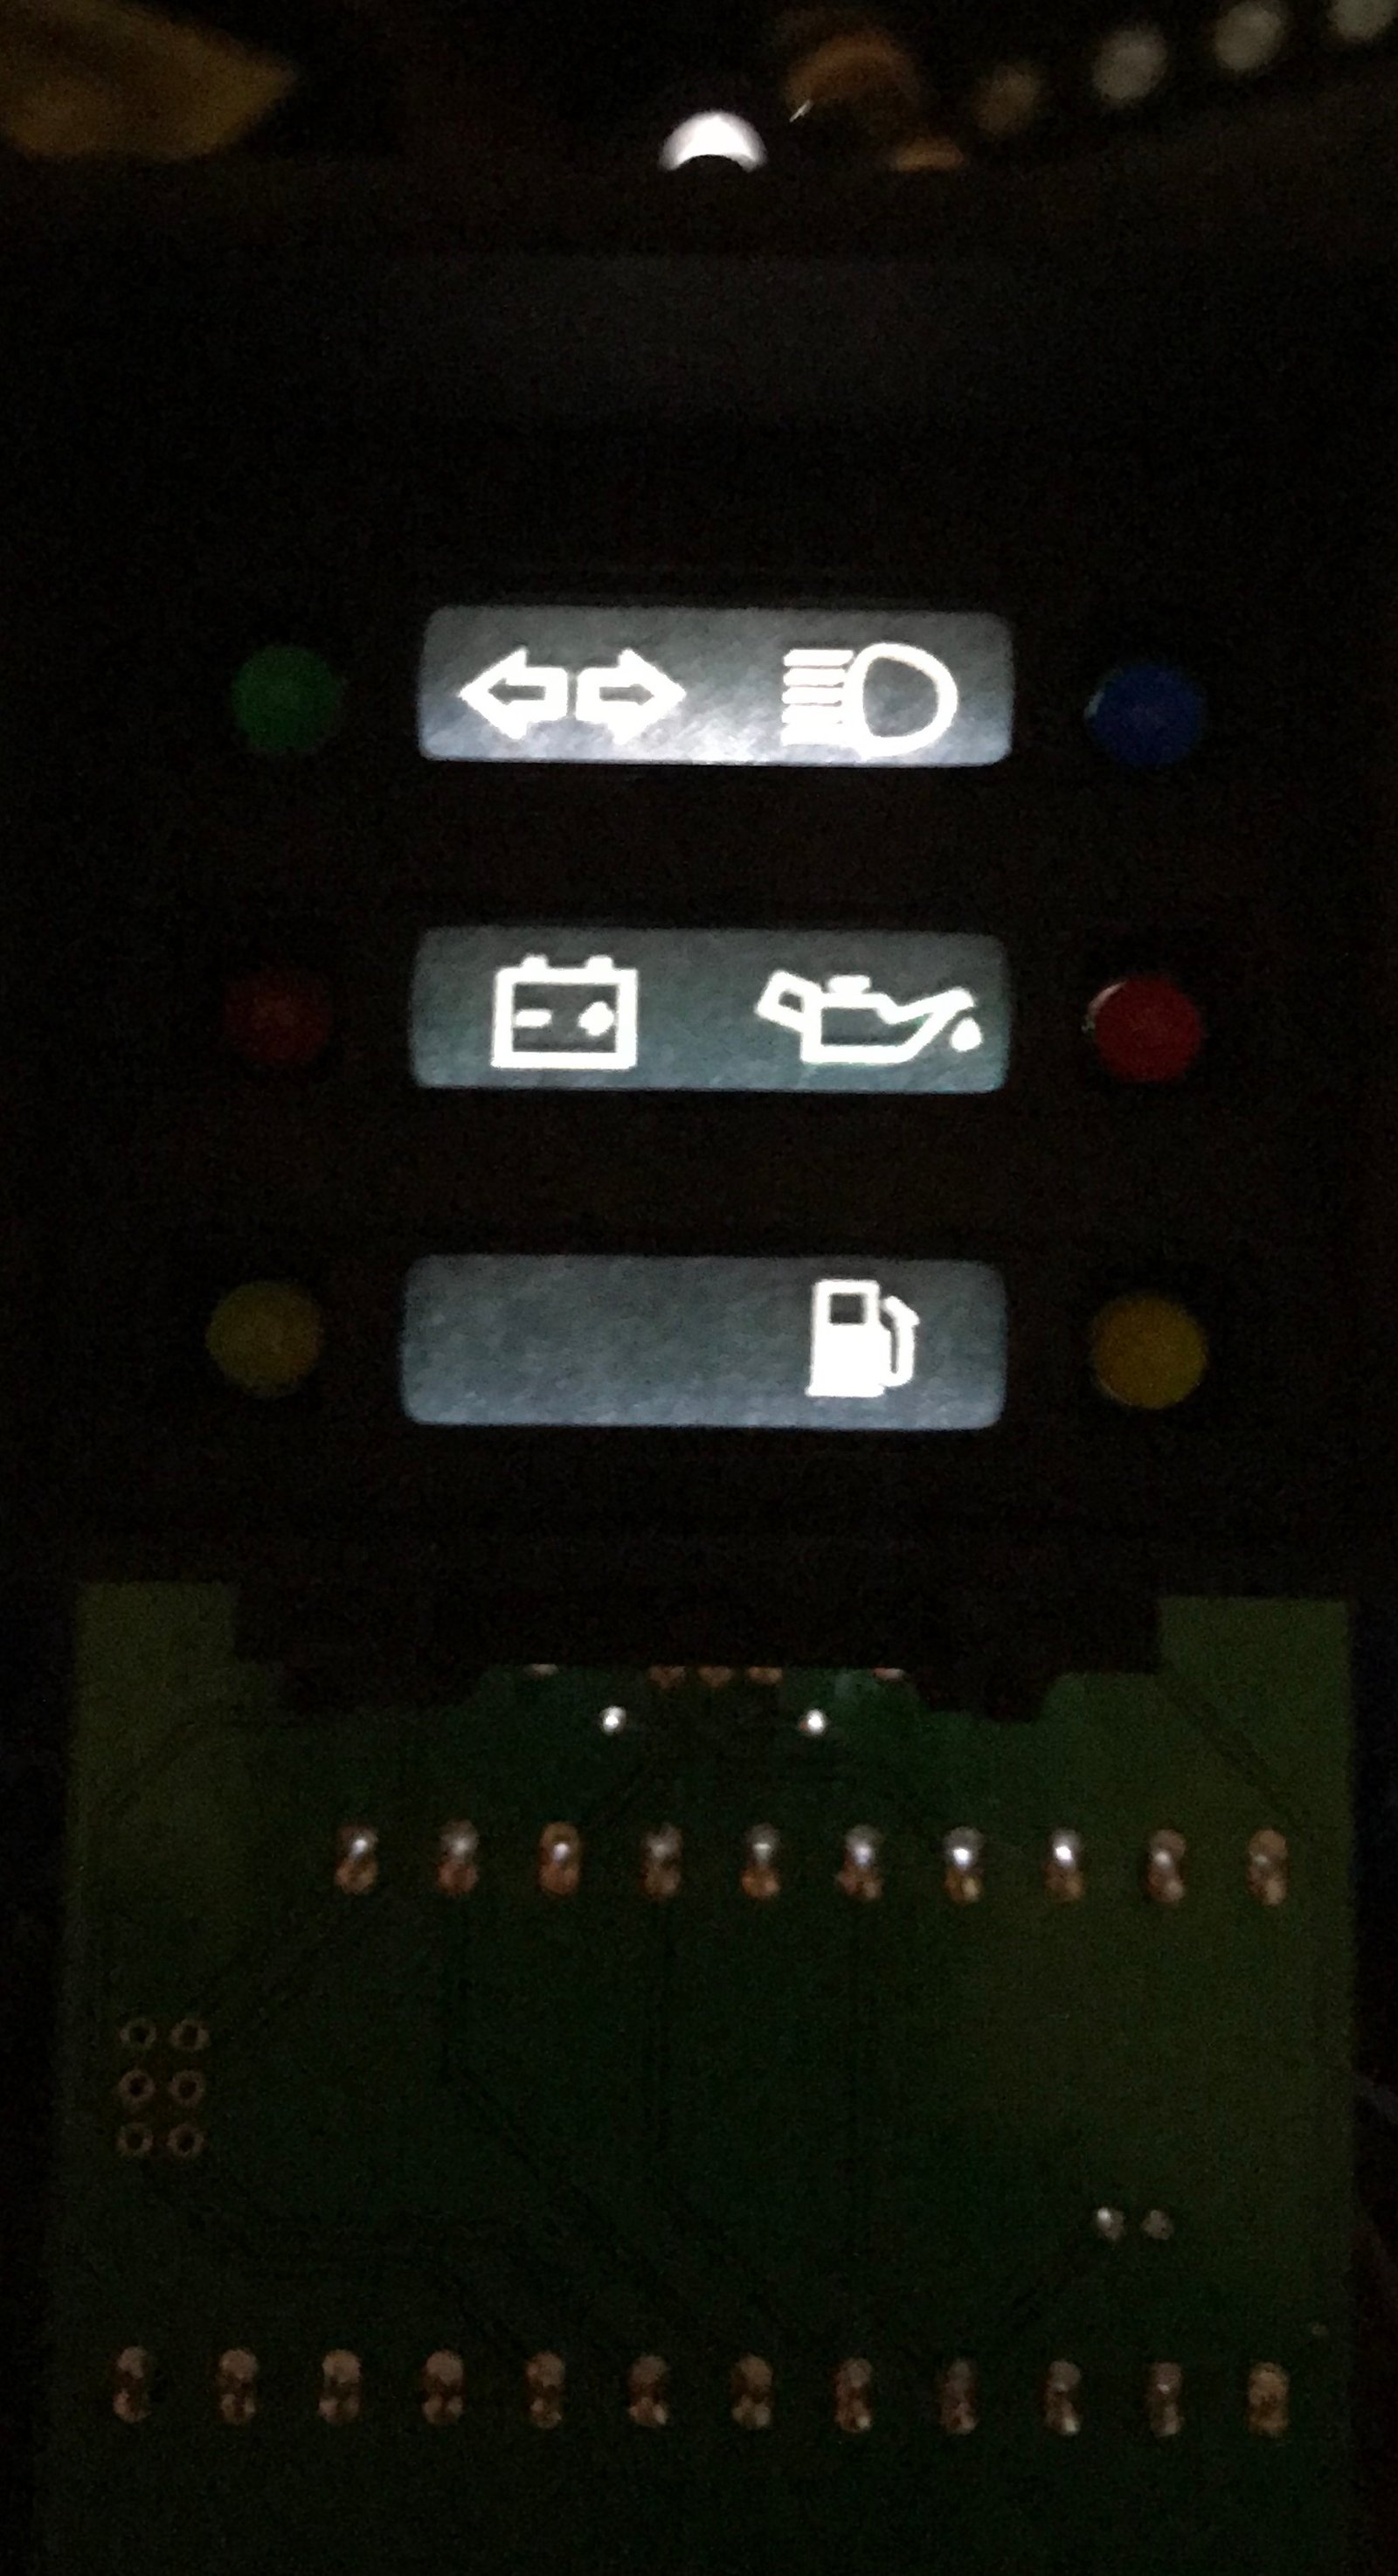
Not quite there yet!
As I feared, the black laser toner isn't opaque enough. I don't want to use thicker paper as that would dim the white parts too. I'll see if there's a setting in my printer driver to increase the amount of toner deposited, but it looks like another approach might be needed.
"I'm a man of means, by no means....King of the Road!"
1983 Viking Xplorer, 2.1DJ
1983 Viking Xplorer, 2.1DJ