Leaking water gasket & top end rebuild how to

Big lumps of metals and spanners.

Moderators: User administrators, Moderators

mm289
Registered user
Posts: 314
Joined: 31 Dec 2010, 22:00
80-90 Mem No: 9111
Location: Dover, Kent

Leaking water gasket & top end rebuild how to

Post by mm289 »

Always seems to be lots of questions coming up about water leaks from the wasserboxer (1.9 & 2.1 watercooled) engine so, as I was rebuilding the top end on an engine for mine I thought I would try and document it as it might help others and its a good excuse for some engine "porn" :D

Not saying what is included here is exhaustive or that it is 100% correct, some of the stuff here is included from experience and a lot from reading about others experiences on great forums like ours! Given I tend to be a bit "fussy" with my rebuilds it may go further than others would, but hey - we are all individuals otherwise we wouldn't spend so long keeping these things on the road :D

This follows on from my engine strip down thread here http://forum.club8090.co.uk/viewtopic.p ... 7&start=15 and there are a few other threads around on the same subject e.g. here http://forum.club8090.co.uk/viewtopic.php?f=37&t=52374

Please feel free to add to this thread or ask questions/make suggestions - I am always learning new stuff so no good ideas ignored. :rollin

WBX Water Leaks

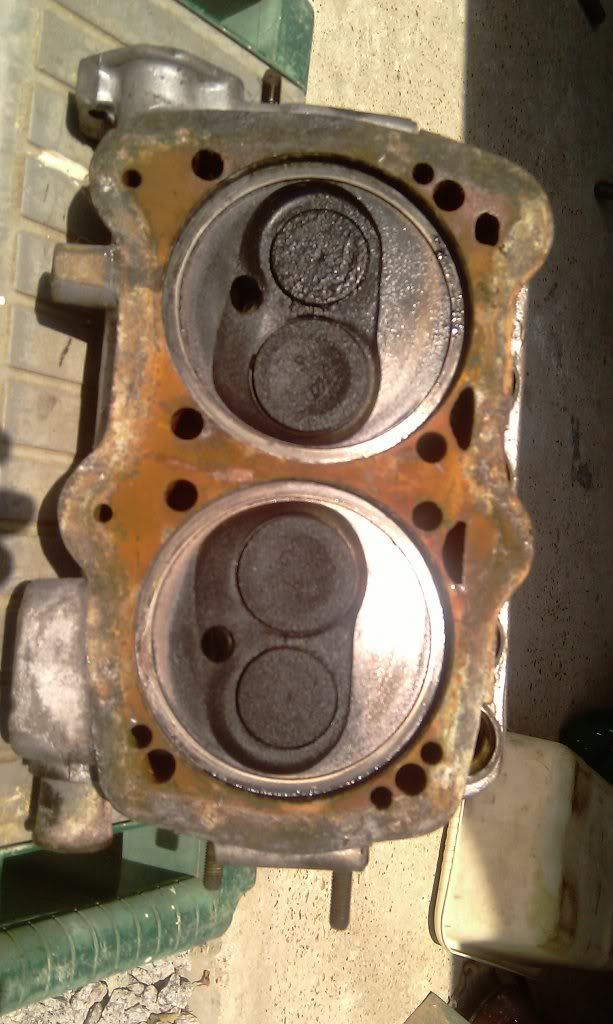
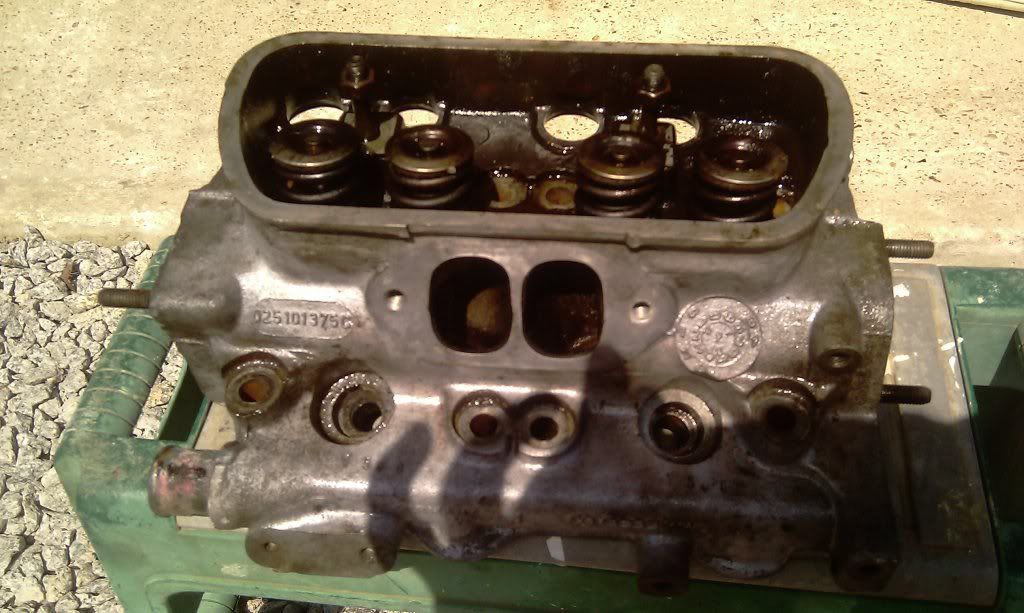
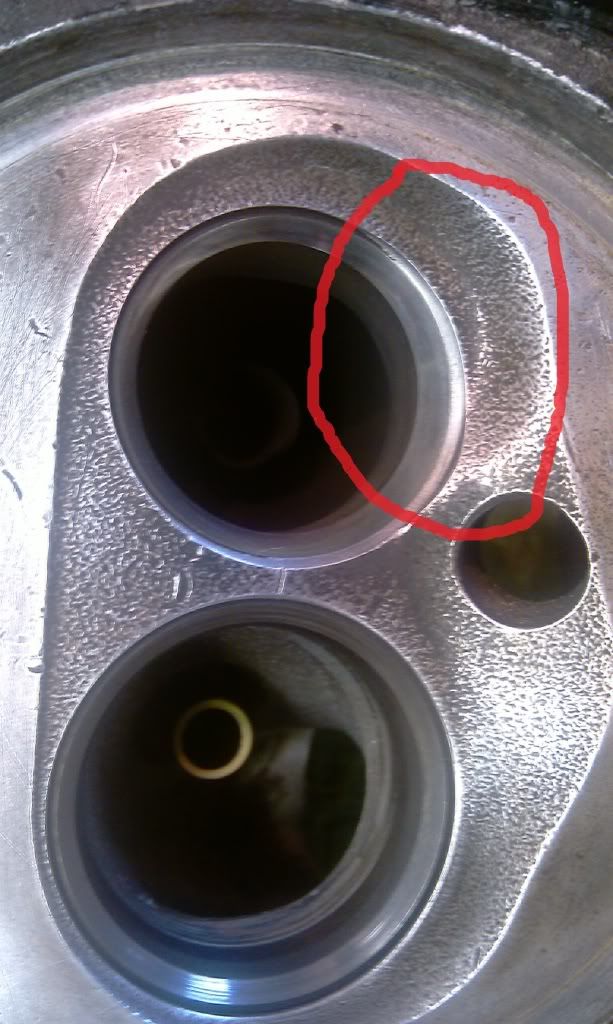
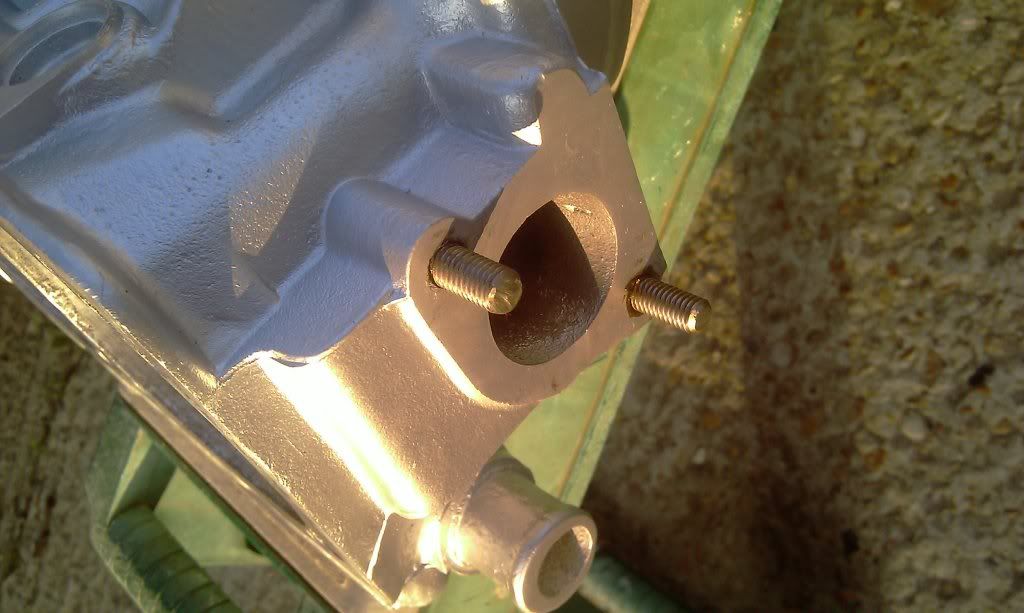
If your reading this you are probably interested like me in the WBX engine (sad bunny) or you have a van with a WBX and are having problems with overheating/water leaks. There are loads of reasons why this might happen, I don't claim to know them all but most are documented on here somewhere, but when you have ruled out leaky pipes, stuck thermostats, blocked rad etc you usually end up by narrowing to down to a leak coming from the cylinder head water (jacket) seal, a large u-channel seal that sits ontop of the block/water jacket and seals against the surface of the cylinder head. Typically you will find a water trail/signs of coolant from this area often at the back of the engine.

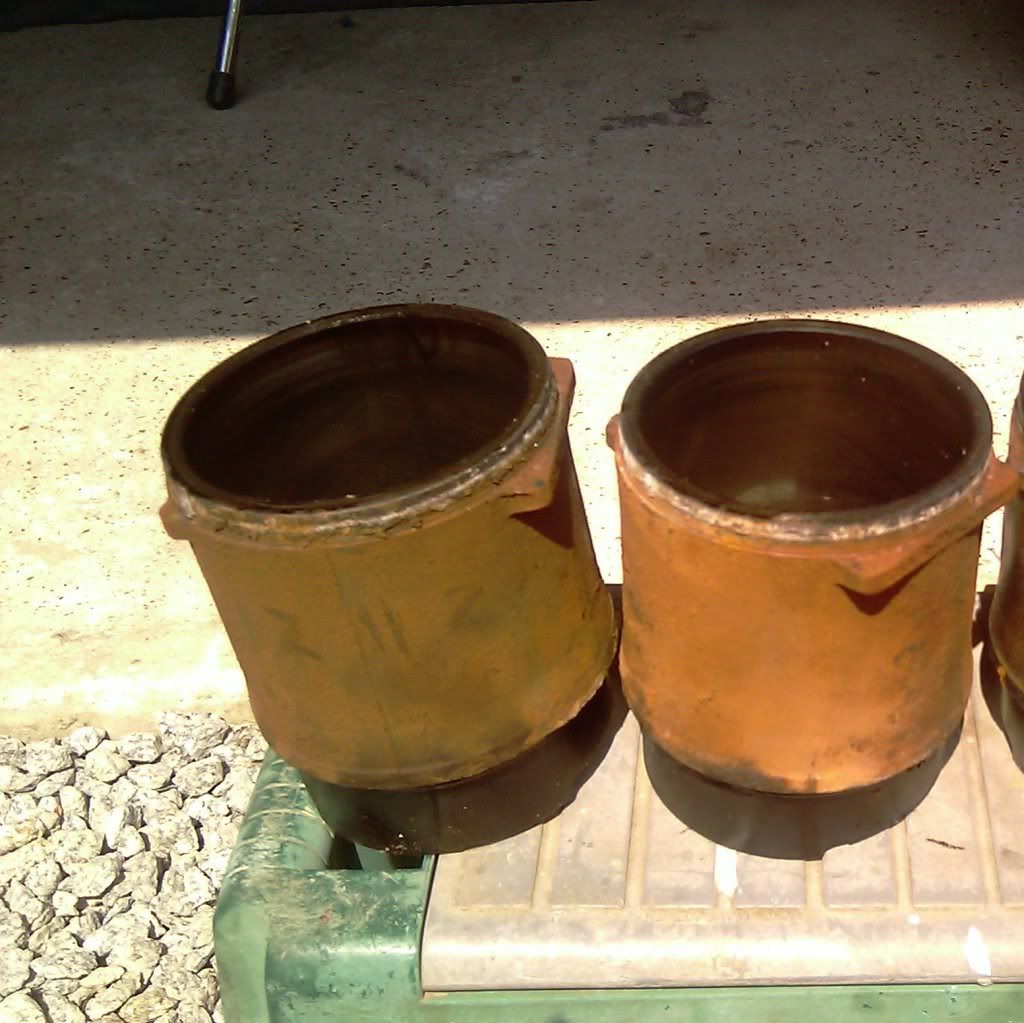
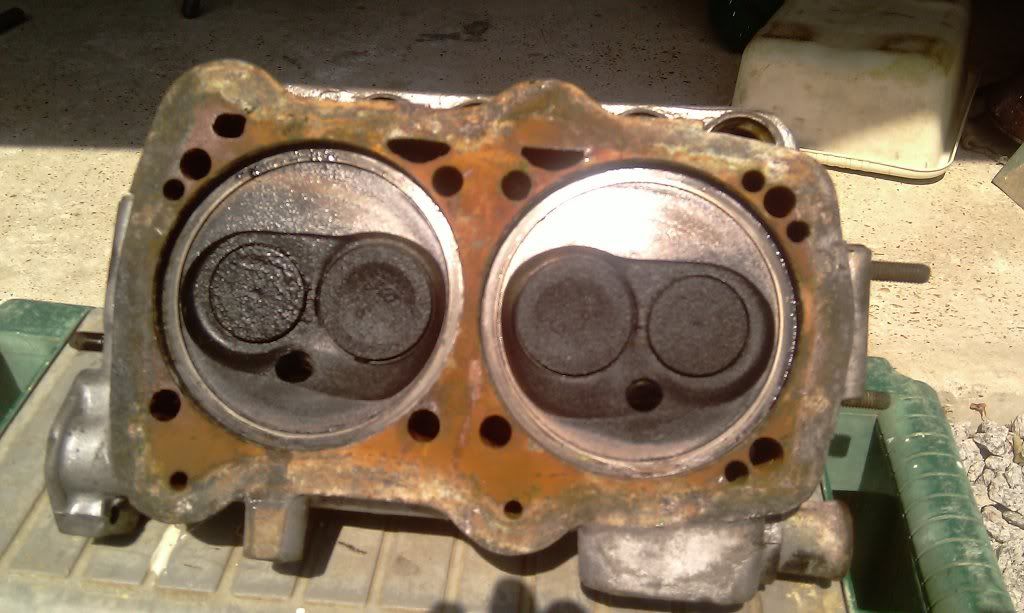
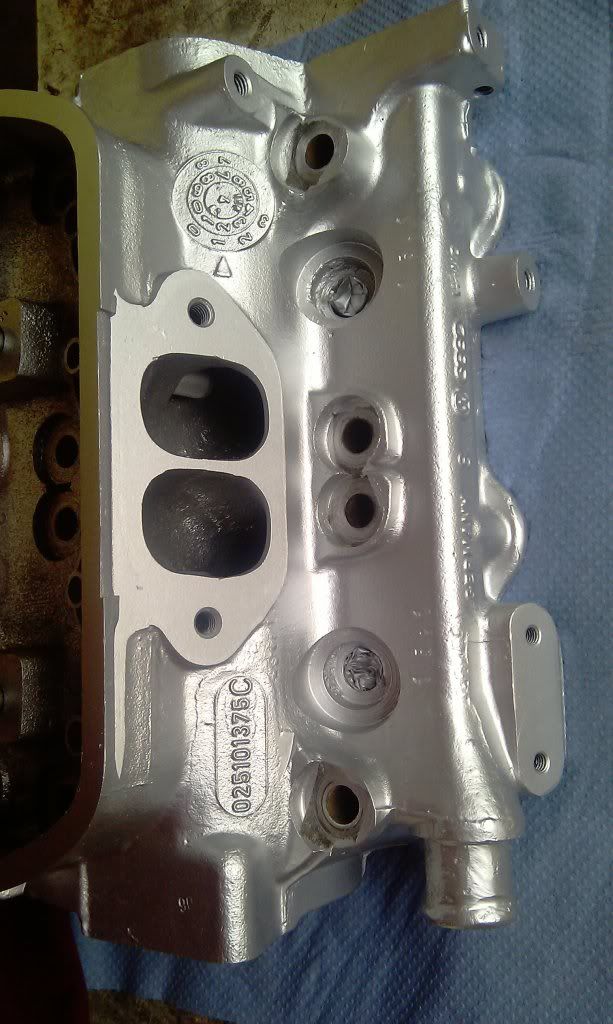
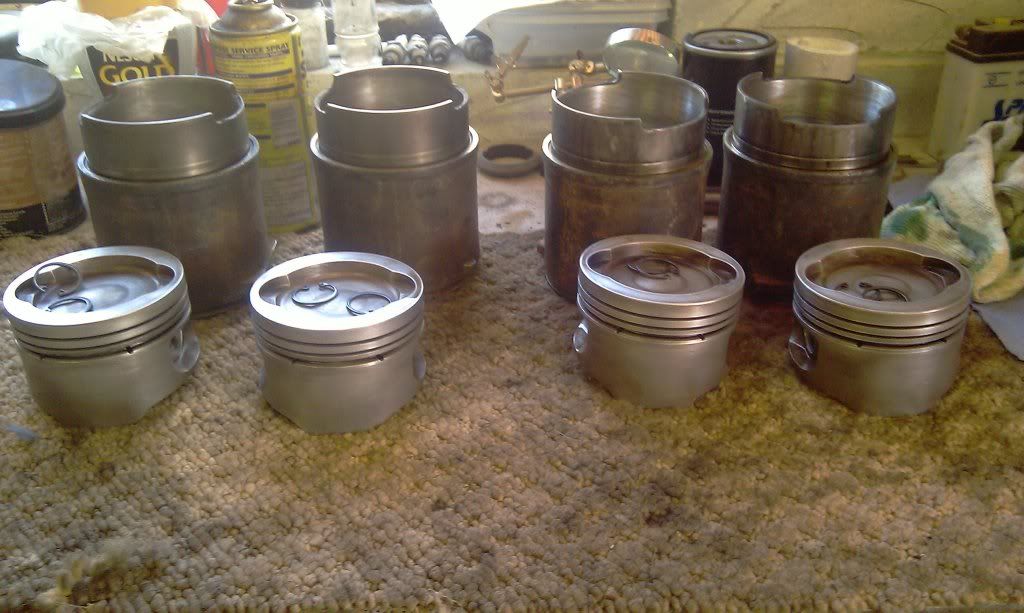
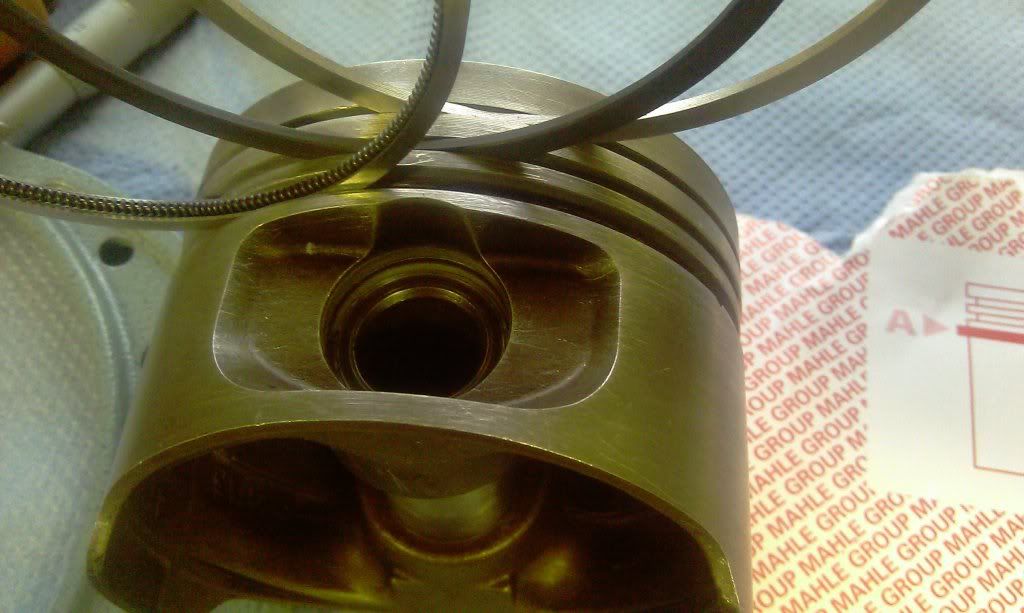
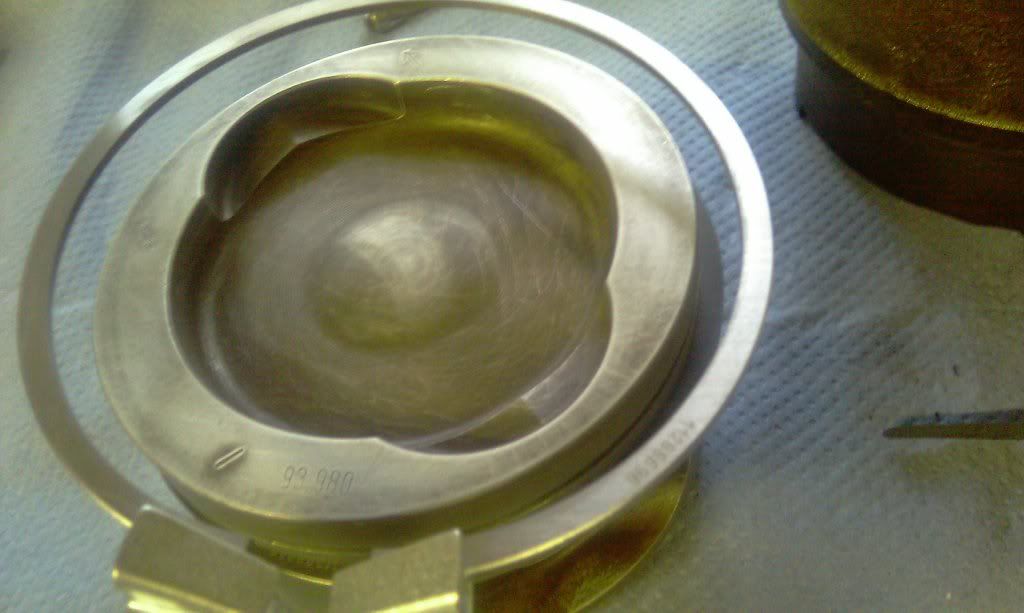
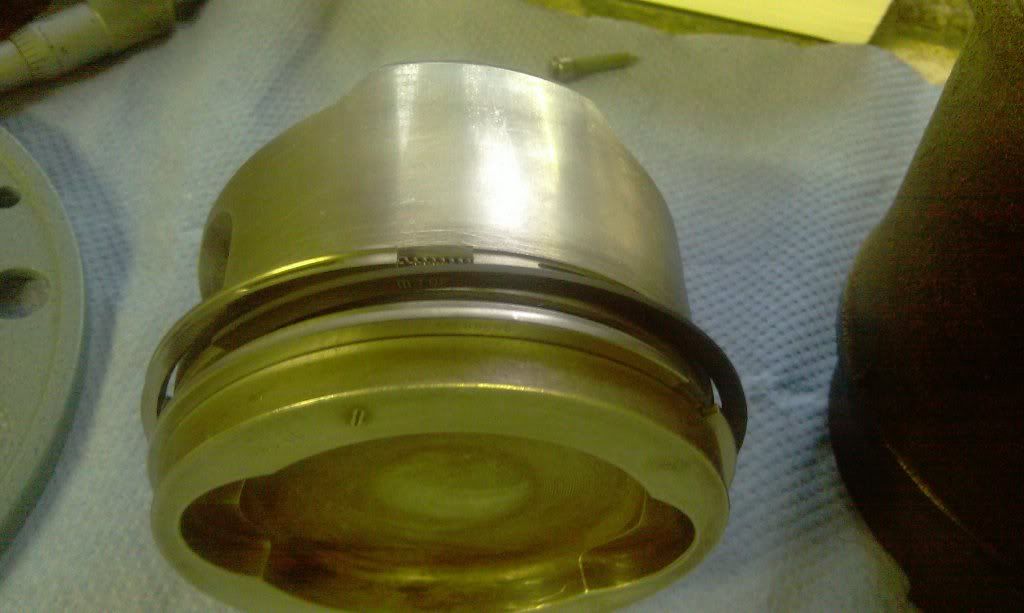
These engines don't have a cylinder head gasket as such (all though your AA man or un-knowledgable local mechanic will often diagnose cylinder head gasket failure), as rather than boring a big hole in a block of metal to make the cylinder the piston runs in (like most engines) - these beauties have a liner that sits inside the case surrounded by water and sealed top and bottom. Looks something like this:
Image

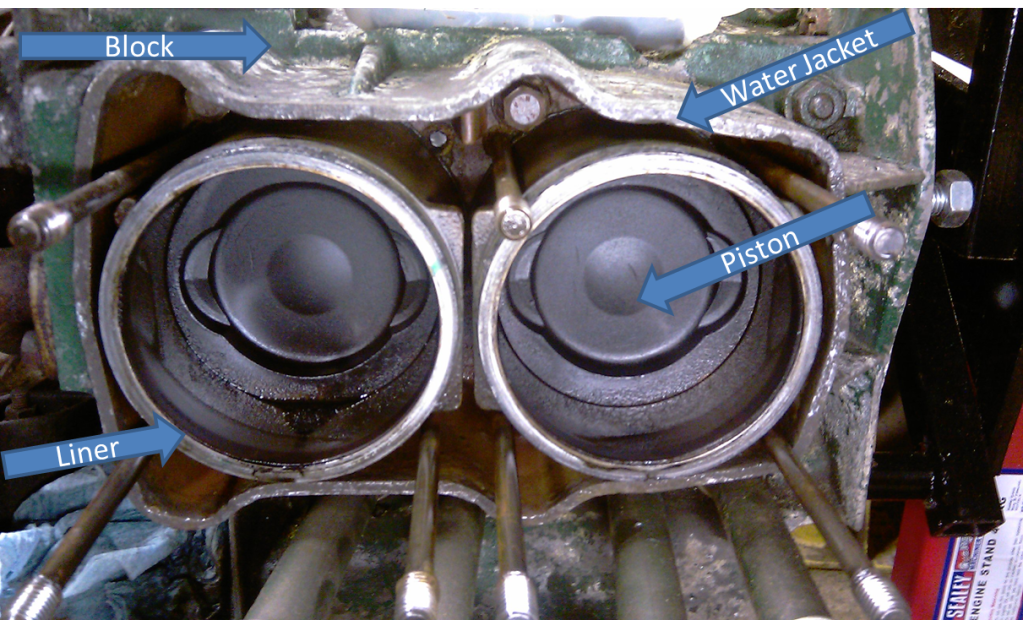
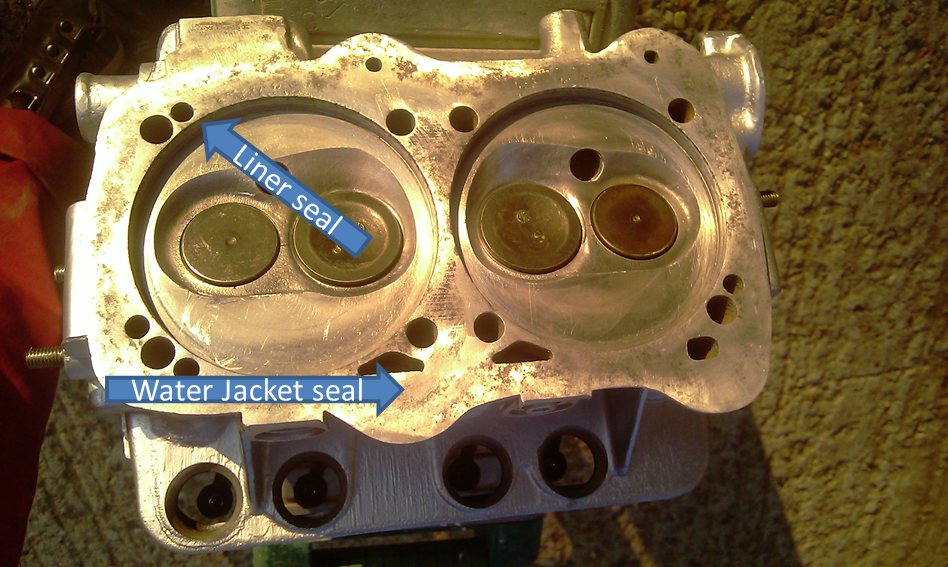
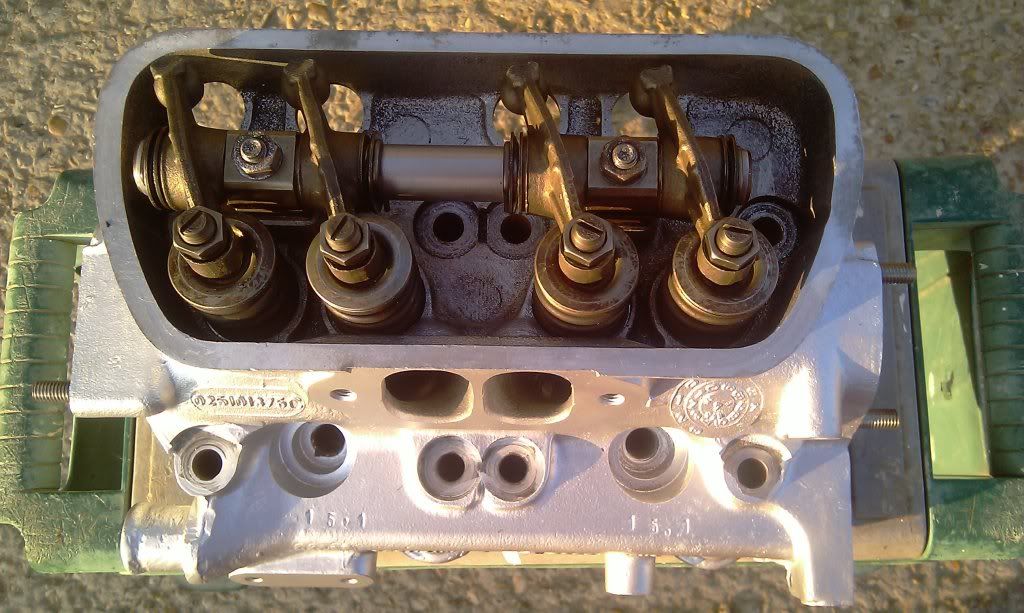
"Only" problem with this is there a lot more places to seal, and hence seals to fail! The approach shown in this thread will actually work for sorting problems with any of the 4 primary seals in the cylinder head area (liner bottom, liner top, compression and water jacket) but from here in I will just be talking about the water jacket seal.

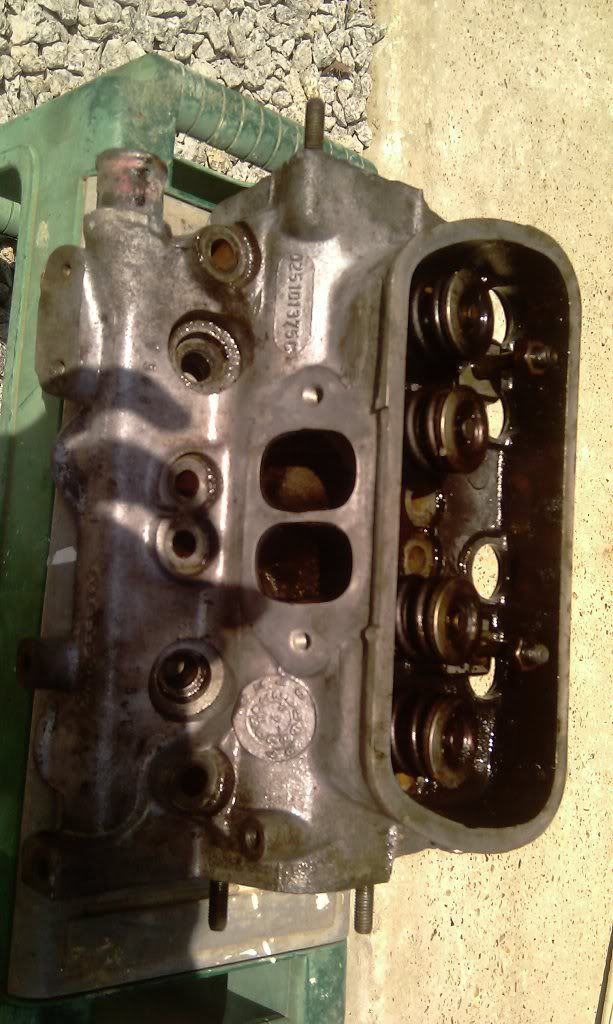
The seal is rubber and deteriorates over time given it is in a pretty hostile environment and will eventually perish and look like this:
Image

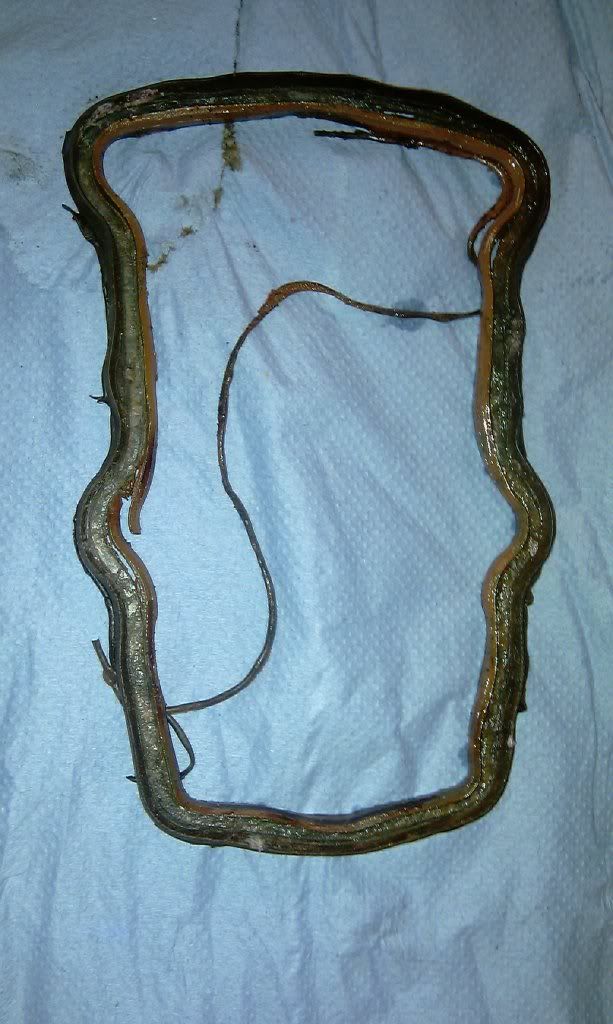
At this point no amount of Radweld, K-seal or any other rad sealant will help (IMHO) as we are not fixing a pin prick hole in a radiator, but a split/tear in a rubber component, so replacement is your only option.

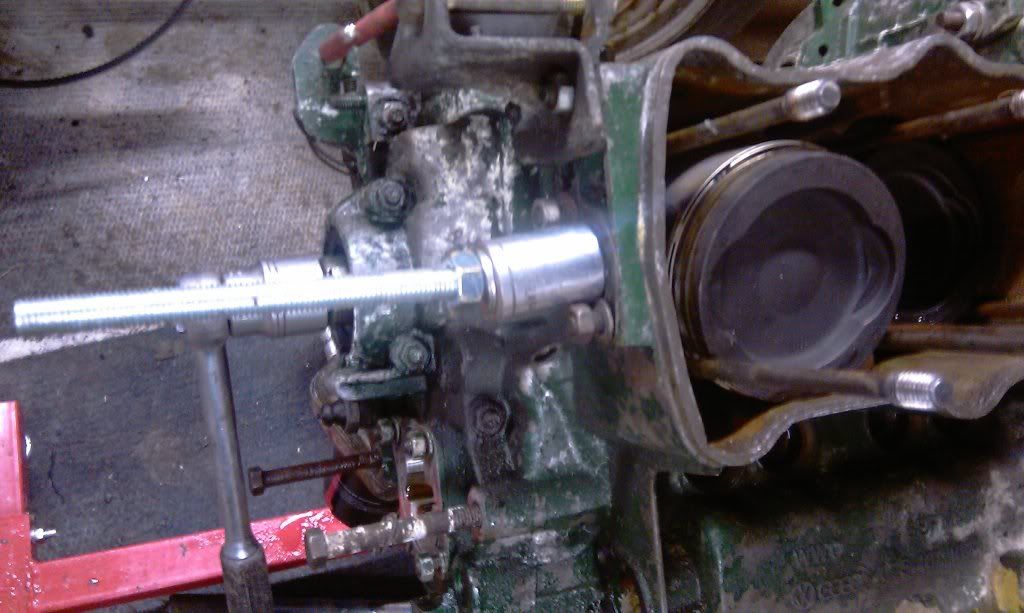
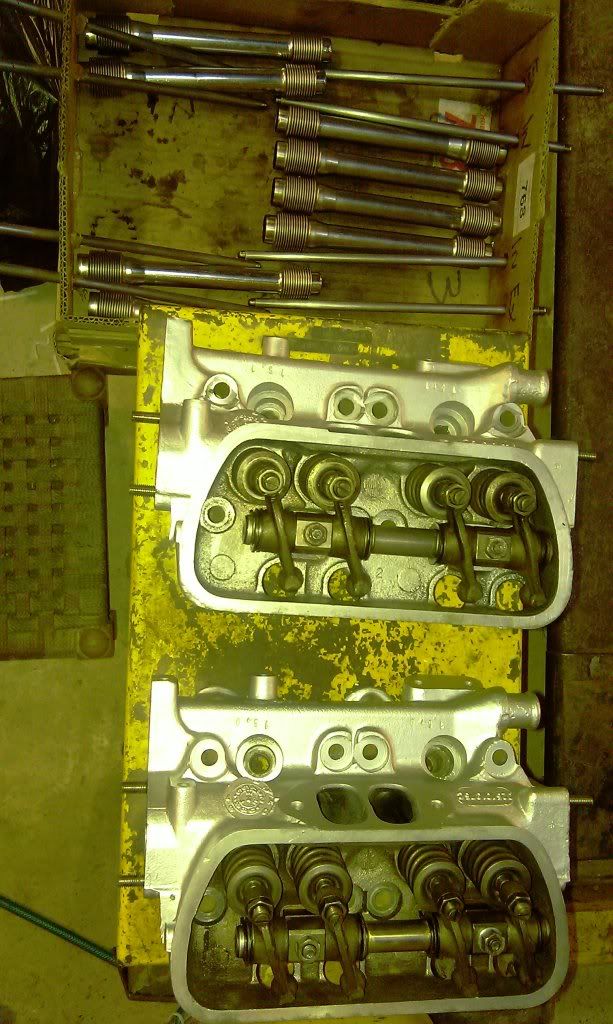
Replacement involves taking the heads off, which has its own challenges, and so you have a number of options at this point including:
1. Replace seals yourself
2. Give it to a garage
3. Buy a recon engine
4. Pray :shock:

...and probably a few others as well.

I don't like buying "blind" so tend to do all my work myself where I can (especially on engines) so this is my story.

Hope you enjoy

MM
Last edited by mm289 on 11 Jun 2011, 22:41, edited 1 time in total.
'89 Autosleeper Trident
2.1 DJ
Member 9111

mm289
Registered user
Posts: 314
Joined: 31 Dec 2010, 22:00
80-90 Mem No: 9111
Location: Dover, Kent

Re: Leaking water gasket & top end rebuild thread

Post by mm289 »

1st job is to remove the engine. You can take the heads off in situ but it is a real PITA, and just about everyone ends up removing the engine. Should only take about 1 1/2 hours and will save you 10 x that in visits to the chiropracter to sort out your back if you try to do work in situ :lol:

Once your engine is out you can decide how far to strip down. I am doing a full top end rebuild so took the easy option and put the engine on a stand to strip and clean it. Again all the stuff on engine removal and stripping is covered in my other thread and elsewhere so I am skipping those procedures.

To remove the heads, pop off the rocker cover and remove the rocker arm. Also remove the pushrods at this stage and remember which cylinder/valves they came from. I use an old cardboard veg/orange box and punch 4 holes in each end then number the holes etc. or lay them out and mark up the wall!
Image

If you have the time soak the head nuts in penetrating fluid (not WD40 but something decent like PlusGas or a mix of auto transmission fluid and paraffin works really well). Applying heat to the nuts with a normal plumbing propane/butane torch helps to loosen them as well just before you undo. they are usually on pretty tight so you will need a good fitting socket and a breaker bar. I use an air impact wrench (as used for wheel nuts) which I have found really good as the impact breaks the nut loose whereas constant pressure on a breaker bar tends to apply more of a twisting motion to the nut and can lead to a snapped stud.

The snapped stud is the risk here as this can be a pig to remove and is the reason a lot of people would rather replace the engine or give it to a shop to do.

I then tap/hit the head with a rubber mallet to break the seal around the water jacket. if the head has not been off before the likelihood is the cylinder liners will be stuck in the head so be very carefull when you pull the head off. Ease it up gently and you will gradually slide the liners off the rings/pistons. Catch the pushrod tubes as you lift as well.

The liners sticking in the head is another reason some don't try this at home as it presents a number of further options/dilema's such as:
1. how do I seperate the liners from the heads without damage
2. how do I re-seal the liners in the block/head
3. how do I get the liners back over the piston/rings

If the liners don't stick to the heads then you get a lot easier life! In my experience this has only happened on heads that have been off recently however, engines that haven't been opened before always stuck :cry:

So, know you have a head off, with or without liners attached, and are ready to do your top end rebuild.

Sorry for all the text, didn't take many pictures of this part of the process as it has been covered many times elsewhere :lol:

MM
'89 Autosleeper Trident
2.1 DJ
Member 9111

mm289
Registered user
Posts: 314
Joined: 31 Dec 2010, 22:00
80-90 Mem No: 9111
Location: Dover, Kent

Re: Leaking water gasket & top end rebuild thread

Post by mm289 »

So know you have a head off, and in my case have the liners still attached, so lets start answering some of those questions from above.

1. how do I seperate the liners?

There is a VW special tool :roll: , or other suggestions include applying heat to the head and cooling the liner, bashing the liners with a rubber mallet, or levering against the tabs you will see on the liners (thats what they are there for).

Personally I have found leverage to be the best solution. I use a long wrecking bar and CAREFULLY push it between the two liners and apply leverage. Then do the same on the tabs/lugs being carefull to put something between the bar and the head to prevent damage to the sealing surface. I have found by gradually working my way around I can displace the liners quite easily and it is more controlled than hitting with a hammer :D

You are then left with a head that looks like this:
Image

Answering question 2 - how do I re-seal the liners, becomes a bit of a no brainer as you have no choice but to replace all the seals (top-green, bottom-black, compression-metal) You may be able to re-use the black bottom seal apparantly but i have never tried that. i will cover the seals later in the thread.

Question 3 concerns re-fitting the liners over the pistons. In theory this can be done with the pistons and rings in situ (still attached to the con rod) but i had already decided that I wanted to re-ring the pistons as part of a full top end rebuild so this wasn't relevant for me.

This meant I also had to remove the pistons. Not difficult but a bit fiddly. Again covered elsewhere but basically need to remove the water pump and r/h water pipe as a minimum to allow access to the gudgeon pin and the get a good pair of circlip pliers and a piece of M12 threaded rod and nuts to act as a puller for the pins. looks something like this:
Image
When you do this, REMEMBER to put some lint free cloth/paper towels around the pistons as you WILL DROP A CIRCLIP and if it falls into the sump your buggered :shock:

You will then have your liners out, pistons out and heads out and are ready to start cleaning, checking, re-furbing your top end.
Image
Image

Next step is overhauling the heads.....

MM
'89 Autosleeper Trident
2.1 DJ
Member 9111

User avatar
ermie571
Registered user
Posts: 4970
Joined: 11 Oct 2005, 11:11
80-90 Mem No: 2129
Location: Minster-on-Sea, Kent: Member 2129 07784052288

Re: Leaking water gasket & top end rebuild thread

Post by ermie571 »

Thanks for this!

Great photos and good explanations! Prob won't ever do it myself....but at least I know what a garage would be doing!!

ta

Em
xx
2.1 DJ 1990 Caravelle (died and gone to heaven)
2.0 AGG (1997 ish) 1984 transporter LPG

mm289
Registered user
Posts: 314
Joined: 31 Dec 2010, 22:00
80-90 Mem No: 9111
Location: Dover, Kent

Re: Leaking water gasket & top end rebuild thread

Post by mm289 »

Thanks Em's,

thats part of the reason for documenting as well. Lots of debate at the moment about engine re-builders, pro's and con's so to speak.

I figure if you do go for a rebuild, you should at least be armed with enough knowledge to ask some sensible questions and ascertain exactly what they are doing :ok

MM
'89 Autosleeper Trident
2.1 DJ
Member 9111

User avatar
toomanytoys
Trader
Posts: 2850
Joined: 11 Oct 2005, 18:37
80-90 Mem No: 41
Location: Boston area, South Lincolnshire

Re: Leaking water gasket & top end rebuild thread

Post by toomanytoys »

I'd also suggest, supporting between the water jacket and piston so as not to bend a rod.. they dont like too much sideways force... and pins can be a bit tight as the circlips create a small burr on their groove..

mm289
Registered user
Posts: 314
Joined: 31 Dec 2010, 22:00
80-90 Mem No: 9111
Location: Dover, Kent

Re: Leaking water gasket & top end rebuild thread

Post by mm289 »

Totally agree, I use a wooden block between the piston crown and the case to hold the piston upright.

I have found the pins too be really tight so you do need to hold the piston firmly. VW do another special tool for de-burring the circlip groove prior to pulling the pin out :roll:

MM
'89 Autosleeper Trident
2.1 DJ
Member 9111

User avatar
toomanytoys
Trader
Posts: 2850
Joined: 11 Oct 2005, 18:37
80-90 Mem No: 41
Location: Boston area, South Lincolnshire

Re: Leaking water gasket & top end rebuild thread

Post by toomanytoys »

I am pretty sure the tool went obsolete some time ago.. could be wrong mind...

mm289
Registered user
Posts: 314
Joined: 31 Dec 2010, 22:00
80-90 Mem No: 9111
Location: Dover, Kent

Re: Leaking water gasket & top end rebuild thread

Post by mm289 »

..and to be honest, I can't think of an OEM tool I have ever bought - we used to sell full tool kits too new dealers when they took on the franchise - cost a fortune :D

Just fitted the new rings etc tonight - need to catch up with the rebuild thread - been a bit busy last few days :roll:

MM
'89 Autosleeper Trident
2.1 DJ
Member 9111

mm289
Registered user
Posts: 314
Joined: 31 Dec 2010, 22:00
80-90 Mem No: 9111
Location: Dover, Kent

Re: Leaking water gasket & top end rebuild thread

Post by mm289 »

So the heads are now off and on the bench and the next step is too clean them up.

I had already spent about 5 hours cleaning the engine with chemicals, soft abrasives, soda blasting and brass "wire" brushes to get the outside reasonably clean. :shock: and the end result looked something like this :
]Image

Now believe it or not this is a million miles better than it started out as! Unfortunately the inside still looks like this:
Image

Pretty standard for an old head, but you really need to get them a lot cleaner to see what you are dealing with. I use a combination of a soft abrasive similar to scotchbrite and wire brushes depending on which area I am cleaning. There are a couple of key sealing surfaces on these heads that you have to be pretty careful with namely, the area the water jacket seals onto and the lip that the liner seats in.
Image

Consensus of opinion seems to be that you can get away with light pitting in the water jacket seal area as the sealant will fill this on refitting. Heavy pitting needs to be filled with liquid metal and sanded.

Heavy pitting of the lip the liner fits in is a scrappage issue though from all accounts. I haven't had that problem yet with the lip and just clean it up with some light wet 'n dry.

Next up is removing the valves - normal procedure but make sure you have a meaty valve compressor as they have dual springs and I found them quite strong! A tap on the top of the spring/compressor with a rubber mallet when you start to load up the compressor helps to "break" the initial bond/stick of the retaining cap to the valve head/collets.

Once you have got the valves out you can then inspect the head for wear - and this is what the classic WBX head cracks look like.
Image

Now I am rebuilding this engine as an interim to keep me going whilst I build a "full" engine from scratch so, seeing as how the worst crack hasn't breached the valve seat (l/h side), I am going to re-use these heads. TBH, I also want to see how much this issue has worsened after a few thousand miles when I will probs strip this engine out again :lol: A lot of the WBX engine building threads would recommend scrapping heads with cracks like these although some say you can get them welded/repaired. I have no view on this as I haven't personally done it to WBX heads.

Having cleaned up the head the next job was to clean and then inspect the valves. All the valves passed a visual inspection and were then checked for wear in the valve guide. the Bentley procedure for this is to push the valve into its guide until the end of the stem is flush with the end of the guide. Then put a dial gauge on the edge of the valve "hat" which is now an inch or so out of the head and check the movement - upto 1.2 mm is allowed. Mine were way below this and generally the valve gear was in pretty good nick (sorry no pics of this procedure :()

A final check is to see if the collets are a good fit on the retaining rings on the valve stem. It is reported that even valves in new heads can come with the collets "loose", where the sides are touching each other and therefore even under load don't "grip" the retainer rings. This leads to premature wear of the rings and eventually failure potentially resulting in a dropped valve. I relieve a little off each side of the collets so they grip the valve stem tightly - for a better explanation look here http://www.benplace.com/amc.htm (courtesy of Ben in Toronto who together with Tencentlife also from the US are a fantatsic source of info - respect to them both. Don't see Ben on here but occassionally 10c drops by with mind blowing explanations on Lambda and AFR for example!! :shock: )

Out of interest, a common fault on these is burnt valves (especially exhaust) - indeed most WBX builders suggest replacing/upgrading the exhaust valves even on new AMC heads to beef up this area. This is a common cause of low/no compression and should be part of your inspection of a head - its not real easy to see but the pictures below shows a good valve seat (1st) and a burnt valve seat (2nd) from one of my other engines.
ImageImage

The valve seat is noticeably flattened/flared where it has burnt out meaning the valve can no longer seat.

All cleaned up and looking good :
ImageImage

Now I am happy with all the parts the final task is to lap the valves into the seats. I use a valve lapper in a cordless drill with some fine grinding paste to get a nice clean, matt finish on the valve and seat.

As I said earlier I am a bit fussy so am replacing all the exhaust studs with stainless steel items. You can buy these made up or, like me, make them from some stainless threaded rod:
ImageImage

At the same time I clean all the threads/bolts with a tap/die and then it is in the parts washer with everything for a thorough clean, then into a bucket of soapy water for a scrub before being carefully dried. It is essential to do this thoroughly to get any residue from sanding, lapping etc of the head and components before reassembly. I also stripped down the rocker assembly and cleaned all of that before wiping everything with cellulose thinners and then spraying the heads to leave them looking like ..........
ImageImage
Image

There, I said there would be some engine "porn" on this thread - just took a while to get there :ok

Two heads and associated valve gear cleaned. painted and ready for assembly - now onto the pistons and liners.
Image
MM
'89 Autosleeper Trident
2.1 DJ
Member 9111

mm289
Registered user
Posts: 314
Joined: 31 Dec 2010, 22:00
80-90 Mem No: 9111
Location: Dover, Kent

Re: Leaking water gasket & top end rebuild thread

Post by mm289 »

So pistons and liners - hope your finding this useful - not many replies, maybe it is just tooooo long to read, but wanted to put something together that would give a kinda step by step guide.

Having taken the liners out (coz they were stuck to the head) I decided to replace piston rings as well, so ordered up some new Mahle (OE) rings from Germany. Not the cheapest, probably the most expensive actually - but they were what was in from new so..... trying not to scrimp on quality :roll:

First job was to clean the liners, wire brush on the outside and wet 'n dry soaked in parafin on the top (be careful not to damage the sealing surfaces as expained earlier with the head) and this is the before and after......
Image

Need to carefully clean out the bottom groove where the black o-ring sits and the top groove where the green o-ring sits as well.

Next similar treatment on the pistons having removed the rings with a piston ring expander. Use a broken ring to scrape out the grooves the rings sit in and when they are all cleaned up they should look like this.
Image

MAKE SURE YOU HAVE NUMBERED THE PISTONS AND LINERS so you know which goes where!

Once you have done the harsh cleaning be sure to thoroughly wash/dry components. I wash them through my parts washer, dry them off then wash & scrub them in soapy water before drying off again. It is critical that any traces of abrasive/dirt/metal are cleaned off before re-assembly.

Next job is to check the components for wear. The 4 basic measurements that you can do are:
1. Piston ring end gap
2. Piston ring side clearance
3. Piston diameter/wear/ovality
Image
4. Liner diameter/wear/ovality
Image

I won't cover how to do these measurements but if you look in Bentley it is in section 13.46. You will need a micrometer and a bore gauge (preferably both measuring to .001mm or .0001 inch)

Another check I picked up from Tencent is to the piston, drop it in the liner inverted and measure the gap between the skirt and liner with a feeler gauge - .002 -.003" is OK
Image

Next to fit the new rings.
One nice new set of Mahle rings.
Image

Check the rings are the right size (thickness) by trial fitting in grooves. (1.9 rings are different to 2.1) - this also allows you to check you don't have any nics or irregularities in the grooves that would snag a ring and stop it from seating properly.
Image

Installing the rings with a ring expander is straight forward but you MUST observe the orientation of the rings - they will have TOP printed on the side that goes up :shock:
Image

Also make sure you set the rings so the gaps are staggered as per the instructions from the ring manufacturer. i say this coz different manufacturers specify different orientations - the oil ring gap seems to always be facing up when the piston is lying in the cylinder, but the way the other rings stagger around this is different with different manufacturers.
Image

Must be time for a break :ok
Image

MM
Last edited by mm289 on 11 Jun 2011, 22:16, edited 1 time in total.
'89 Autosleeper Trident
2.1 DJ
Member 9111

mm289
Registered user
Posts: 314
Joined: 31 Dec 2010, 22:00
80-90 Mem No: 9111
Location: Dover, Kent

Re: Leaking water gasket & top end rebuild thread

Post by mm289 »

and so, onto the liners.......

As I was fitting new rings I de-glazed the liners as well. You can skip this step if you are not fitting new rings.

Use a de-glazing/honing tool that runs in a drill and looks something like this.
Image

The idea is to break through the glaze and re-establish the fine grooves/cuts that are put in the liner to aid lubrication - I struggle to call it honing 'cause if you were honing the bore properly you would use one of these
http://www.youtube.com/watch?v=HQfh6AZxL08

I use it in the parts washer with a stream of fluid running over the stones to lubricate and wash away debris. The speed of rotation and up/down movement will dictate the way the "cross hatching" cuts look, but an angle of about 30-40 degrees seems to be what is recommended by most.

Almost impossible to get a decent picture of this but maybe this gives you the idea.
Image

Having done all the liners then meticulous cleaning is again the order of the day before assembly of pistons into liners with a piston ring compressor. This is done before the liners are re-assembled into the engine (I find it easier this way).

The last prep job I do is to clean the gudgeon/wrist pin with some wet 'n dry soaked in paraffin and clean any burs from the piston where the pin fits. Remember how hard it was to remove the pin? Well it should be possible to push it in and out with finger pressure, so cleaning the oil/glaze from the pin until this is possible will make re-assembly will be MUCH easier. :lol:

MM
Last edited by mm289 on 12 Jun 2011, 21:36, edited 1 time in total.
'89 Autosleeper Trident
2.1 DJ
Member 9111

User avatar
Hacksawbob
Registered user
Posts: 4443
Joined: 11 Oct 2005, 07:11
80-90 Mem No: 1168
Location: Lancs UK member 1168

Re: Leaking water gasket & top end rebuild how to

Post by Hacksawbob »

Brilliant write up :ok something for the wiki when you get done!
member 1168

mm289
Registered user
Posts: 314
Joined: 31 Dec 2010, 22:00
80-90 Mem No: 9111
Location: Dover, Kent

Re: Leaking water gasket & top end rebuild how to

Post by mm289 »

Thanks Bob, was beginning to wonder if anyone was reading it :D

Have written the next piece but the page crashed and I lost 45 minutes typing :cry:

Will update again when I get a mo.

MM
'89 Autosleeper Trident
2.1 DJ
Member 9111

User avatar
toomanytoys
Trader
Posts: 2850
Joined: 11 Oct 2005, 18:37
80-90 Mem No: 41
Location: Boston area, South Lincolnshire

Re: Leaking water gasket & top end rebuild how to

Post by toomanytoys »

Nice write up, but dont want to many replies as the info will get pushed down the pages and makes for very hard reading :wink:

My opinion on the valve seat wear/burning, is the preload on the adjusters is far to high at 2 turns.. 1/4 to 1/2 is what I use..

And the wear I have seen on lots and lots of adjuster scews bears testament to that too.. out of the 8 or 9 pairs of rocker assemblies I have on the bench only 3 scres are servicable...

Locked