ajsimmo wrote:Nice bead of sealant there on the water jacket seal - not put on with a trowel like some I see! Good work. Were you twitching at the 50Nm stage?
Sent from my ONEPLUS A3003 using Tapatalk
not enough dirko in my opinion, risky.
Moderators: User administrators, Moderators

ajsimmo wrote:Nice bead of sealant there on the water jacket seal - not put on with a trowel like some I see! Good work. Were you twitching at the 50Nm stage?
Sent from my ONEPLUS A3003 using Tapatalk

ajsimmo wrote:Nice bead of sealant there on the water jacket seal - not put on with a trowel like some I see! Good work. Were you twitching at the 50Nm stage?
itchyfeet wrote:not enough dirko in my opinion, risky.
937carrera wrote:Do you guys run a bead, apply the seal, and allow the bead to spread under assembly force, or, run a bead, spread the bead across the sealing surface evenly and then assemble and tighten.
Yes, this ^Ciaraneng wrote:itchyfeet wrote:not enough dirko in my opinion, risky.
It was enough to cause it to seep out both sides of the seal. Is the idea to have a sort of a 'fillet weld' style bead of dirko on the inside of the seal/head to act as self-sealing gasket?
I was afraid that having too much could result in a string of sealant getting loose in the coolant.
itchyfeet wrote:No right or wrong just personal choice.
I'd rater have a bit splurged out than not enough, see water jacket failures all too often when there is nothing else wrong, leaky water jacket lets air in then studs corrode.
Sounds like you got it right if it came out all around.
both sides of gasket too.
It will be next weekend at the earliest before it's back in the bay so the dirko should be well cured by then...itchyfeet wrote:I let Dirko set before running an engine also, some people fire them up immediately, Dirko is silicone based and while it skins over quick it takes a while to throughly set under the skin.
ajsimmo wrote:937carrera wrote:Do you guys run a bead, apply the seal, and allow the bead to spread under assembly force, or, run a bead, spread the bead across the sealing surface evenly and then assemble and tighten.
The former. Just enough to squidge out a tiny bit both sides on assembly.
Actually, degrease everything, then degrease again just to make sure, run a bead inside the seal and fit to the case, degrease again where I've touched it, run a single thin uniform bead to the middle of the seal face, degrease the head again (just in case), pop a tiny bit into any significant pitting, smooth with a razor blade to ensure no air pockets, assemble and torque within 30 mins. Then do something else for at least the rest of the day. That stuff needs to be properly set before it sees any moisture or heat, IMHO.
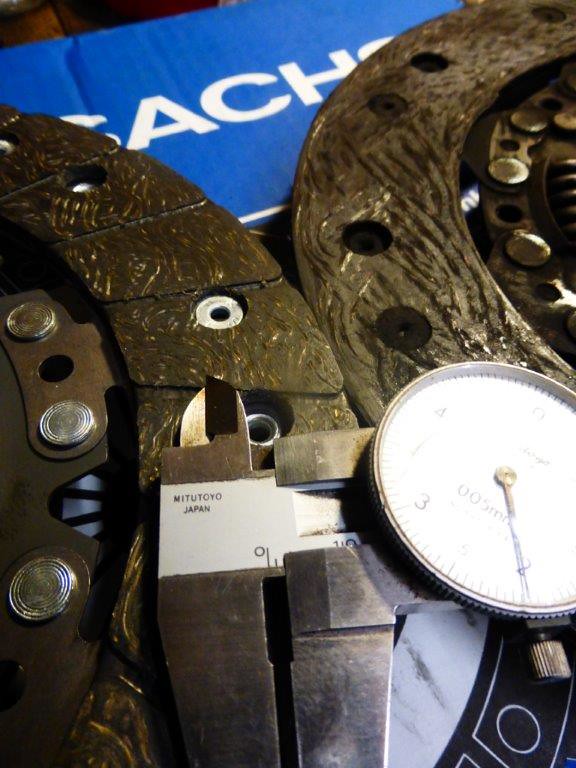
Ciaraneng wrote:On a separate topic. Does anyone know what the wear limit is for the clutch? Is it measured face-to-face?
937carrera wrote:Ciaraneng wrote:On a separate topic. Does anyone know what the wear limit is for the clutch? Is it measured face-to-face?
Such a simple question.....
Ideally you should be checking the clutch diaphragm to make sure it isn't distorted, clutch disc for run out and wear.
I could not see a specification for wear in the bentley manual so went back in time to the VW 412 manual where it is stated to be 0.6mm min from lining surface to rivets.
From a non technical perspective, for all the hassle of taking an engine out to replace a clutch, and the cost of a replacement, then unless the existing one is in good condition then replace the whole assembly with a good quality item.
A few different types have been used so you will need to measure yours first, diameter can vary.