Page 4 of 15
Re: WBXmayo
Posted: 17 Jan 2017, 19:35
by itchyfeet
Back on this
It's on the bench tonight and pulled the flywheel off, not much wear in the oil seal surface which is good, says to me low mileage engine.
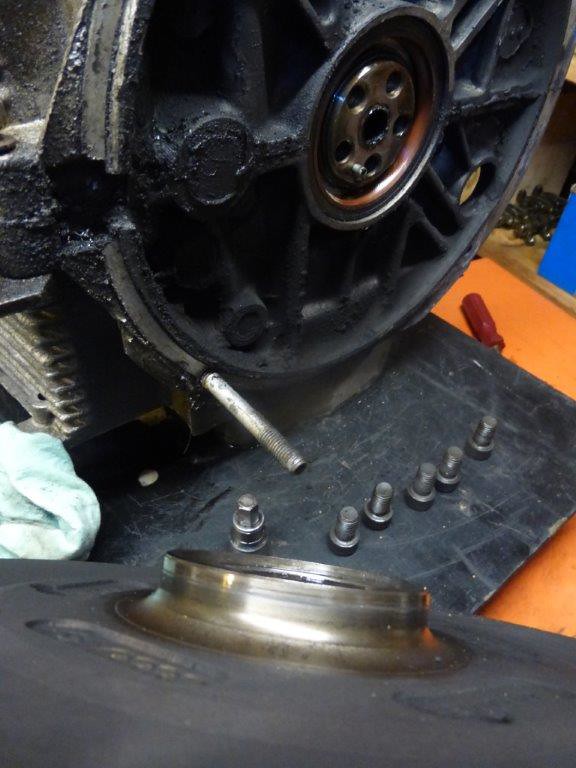 P1060878
 by
Paul_Barr, on Flickr
pulled the oil seal out and noticed the o ring and a ring of metal on the cranks, at least one shim destroyed.
I seems the flywheel o ring groove is made from an insert and this is now stuck on the crank, not seen this before
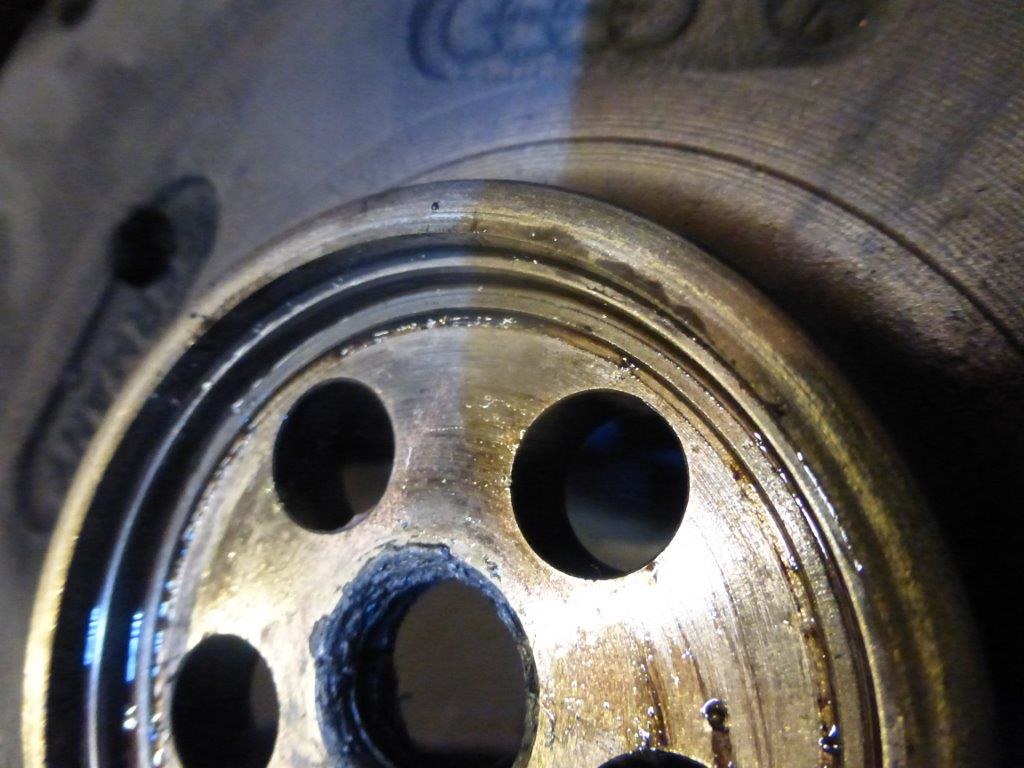 P1060886
 by
Paul_Barr, on Flickr
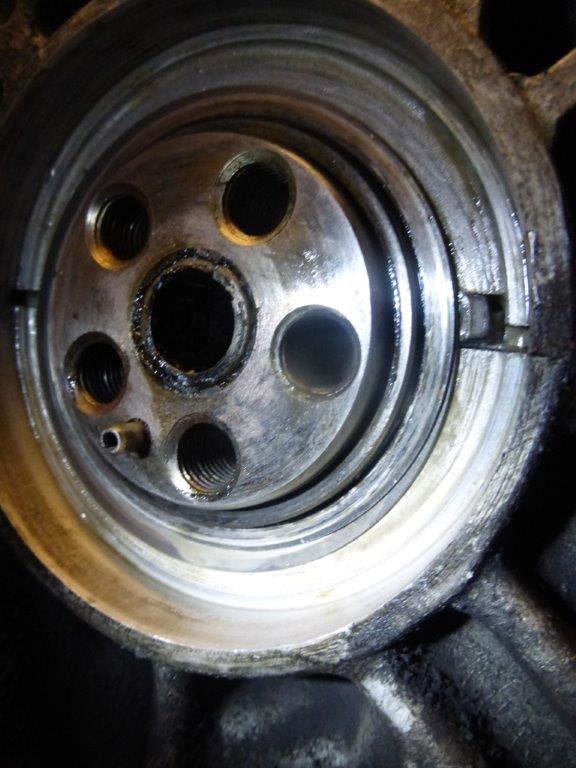 P1060887
 by
Paul_Barr, on Flickr
flywheel should look like this and you can see the insert line.
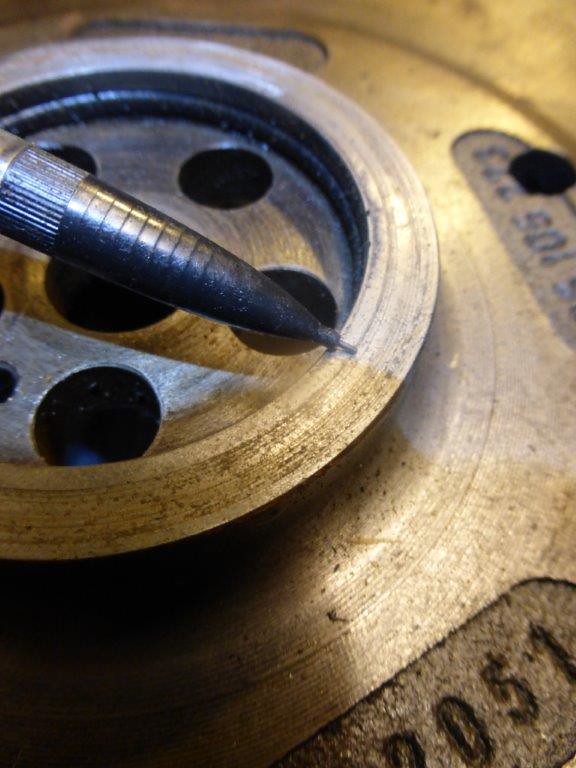 P1060885
 by
Paul_Barr, on Flickr
Re: WBXmayo
Posted: 15 Feb 2017, 19:41
by itchyfeet
A discussion on Facebook ( yeh I know but there is quite a useful WBX page frequented by people like Marco Mansi, Andrew Simmons, Simon Baxter, Ian Holman... the list goes on and so I signed up just for that) they came to the conclusion this is a modified flywheel, now bearing in mind the silicone it's likely done by whoever reconditioned it.
Two conflicting comments were:
...VEGE= Elite
...As far as I know then vege don't build them. They are subcontracted to a Welsh man called Adrian who runs a Vw engine business in Deptford. It wasn't elite as far as I know but seeing as ever vege flat four I've fitted has had problems then that's the reason I no longer supply engines.
So It may not be a one off, I doubt a reconditioner would go to this effort to set up for one so I suspect there may be more.
The line on the good flywheel in the picture is a red herring, it's in a different place it's a score mark.
Stud removal next....
Re: WBXmayo
Posted: 15 Feb 2017, 21:16
by itchyfeet
Next I want to try my hand at stud removal.
The mayo engine has one broken stud which is why it was full of mayo, it also has one stud that's too gone to put back.
So there are two methods I have read, one is weld a nut on , the other heat with a blow torch and a self tightening stud extractor. With both impact wrench is recommended
Using a self tightening stud extractor means you have to work on a longer stud because it just won't fit low down and that means flex in the stud, if you weld a nut on you can cut the stud off low down reducing any flex in it and transferring the torque to the thread better.
So I started with an old early DG case and had a go, the early DG so I'm told had a different steel composition so more prone to corrosion but worth a go.
I'm starting with the blowtorch and self tightening stud extractor method.
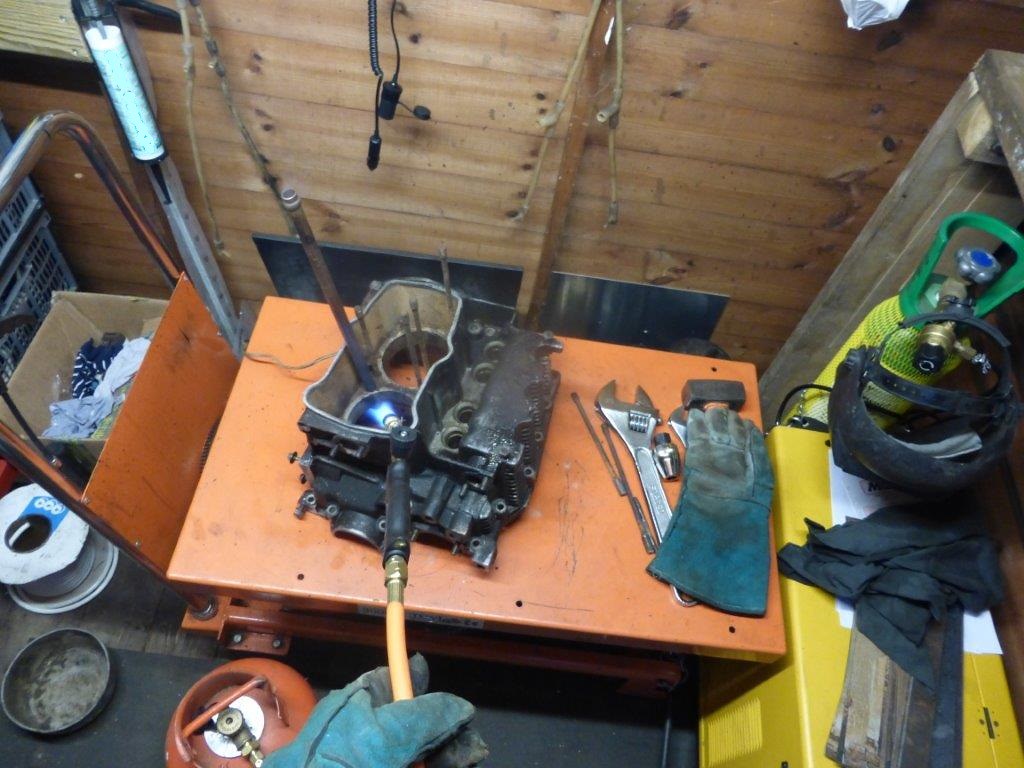
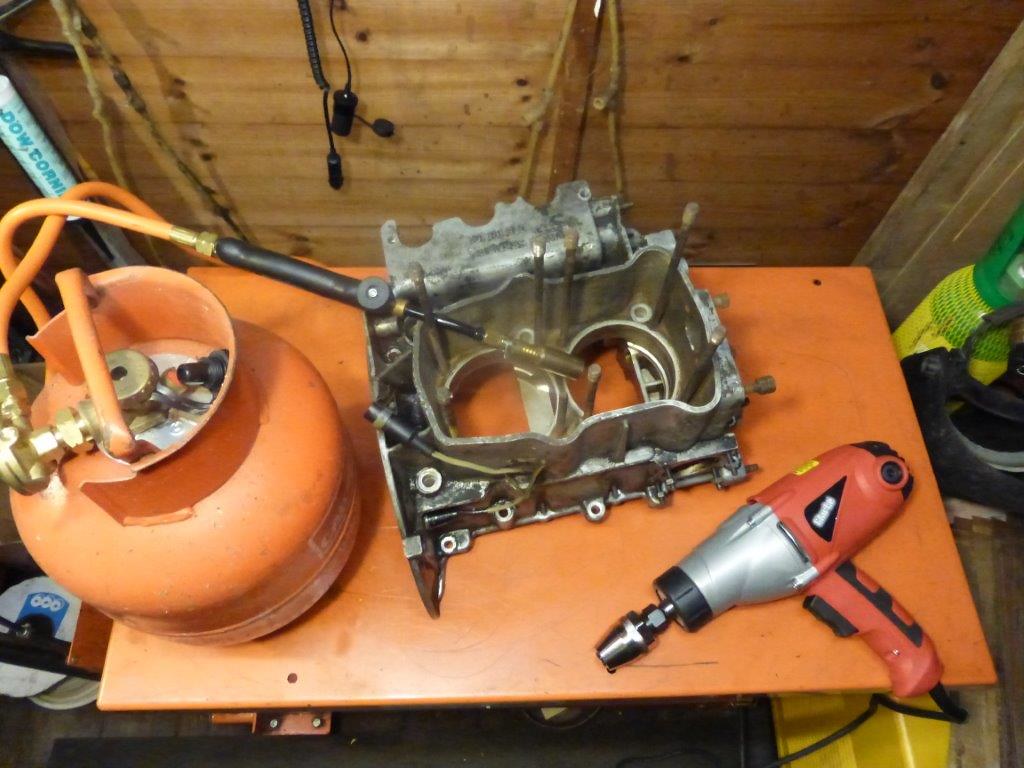 P1060973
 by
Paul_Barr, on Flickr
I clamped on the extractor first, probably not a good idea as it got a bit too hot, next time I will add it after heating.
10 minutes with burner on full chat
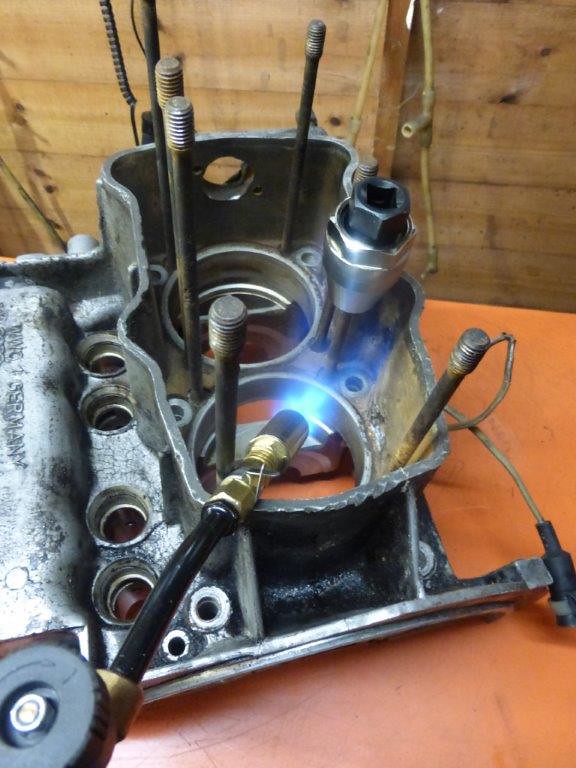 P1060975
 by
Paul_Barr, on Flickr
impact wrench on
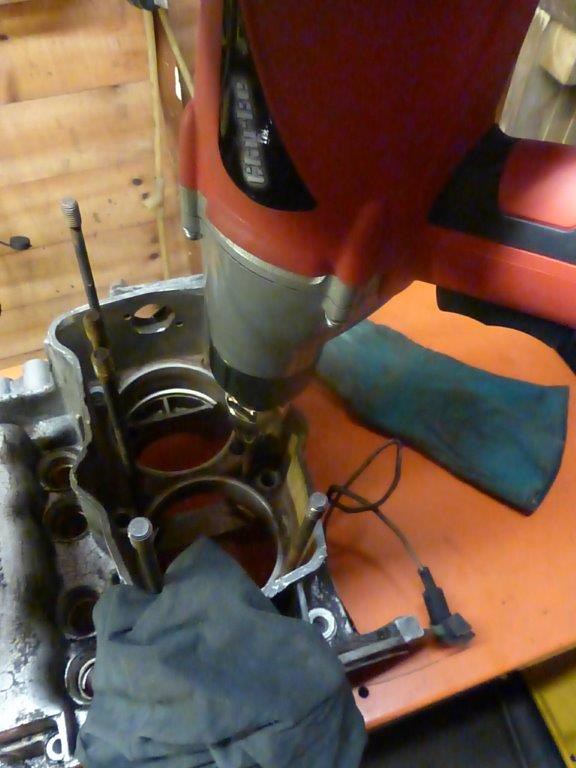 P1060976
 by
Paul_Barr, on Flickr
and after quite a while not moving....
 P1060977
 by
Paul_Barr, on Flickr
time for another go
Re: WBXmayo
Posted: 15 Feb 2017, 22:14
by what2do
Did you try both directions with the impact wrench? What figures have you for the tool and is the extractor gripping firmly? I'd be inclined to cut the stud lowish (about one inch protrusion), weld a nut on, heat it up and then try again. It will come out for sure, it's just a case of developing your technique. Rotating in both directions is a definite help I can assure you. Bonne chance.
Re: WBXmayo
Posted: 16 Feb 2017, 07:58
by itchyfeet
You can't tighten the thread with a self tightening chuck, it just releases.
Torque is 450Nm quite good but not adjustable, I must have ben on it for 30 seconds or more before it broke.
Going to try welding a nut yes but I want to try another couple of studs first this way, it must be possible, I have another DJ case with broken studs too for practice.
I have seen a different type of stud extractor that grips down low but can't find it for sale, any ideas where to get one?

Re: WBXmayo
Posted: 16 Feb 2017, 09:49
by dave friday
Have you tried a ( hammer) tap/taps whilst unscrewing/tightening the stud?
Re: WBXmayo
Posted: 16 Feb 2017, 09:57
by Woodyyellow
Hi Itchyfeet
Been following your rebuild threads with great interest over the last few months or so, some great work being done.
Have found what I think is what you need;
http://www.demon-tweeks.co.uk/Product.d ... Ao1H8P8HAQ" onclick="window.open(this.href);return false;
Hope this helps, keep up the good work.
Re: WBXmayo
Posted: 16 Feb 2017, 10:25
by itchyfeet
dave friday wrote:Have you tried a ( hammer) tap/taps whilst unscrewing/tightening the stud?
Not yet, first attemp was last night with the impact wrench.
Does an impact wrench hammer down or just impact in torque?
Re: WBXmayo
Posted: 16 Feb 2017, 10:27
by itchyfeet
Woodyyellow wrote:Hi Itchyfeet
Been following your rebuild threads with great interest over the last few months or so, some great work being done.
Have found what I think is what you need;
http://www.demon-tweeks.co.uk/Product.d ... Ao1H8P8HAQ" onclick="window.open(this.href);return false;
Hope this helps, keep up the good work.
Thanks, the one in the pic is 3/8" there is so little space I suspect a 1/2" will be too big, keep looking

Re: WBXmayo
Posted: 16 Feb 2017, 11:07
by dave friday
I don't know! My thought is as the stud has spent its life being pulled from the crankcase,a tap/taps in the opposite direction might break the corrosion!
Re: WBXmayo
Posted: 16 Feb 2017, 13:00
by itchyfeet
This is the only 3/8" drive tool I can find but it's American and will cost a lot to ship
KD Tools KDS1708
http://www.denlorstools.com/home/dt1/pa ... ds_ca.html" onclick="window.open(this.href);return false;
Re: WBXmayo
Posted: 16 Feb 2017, 13:21
by MGP
I would heat the area around the stud, once it was as hot as I could get it is would quench the stud with wet rags, it's the method I always use on bleed nipples and it's never let me down yet.
Sent from my SM-G920F using Tapatalk
Re: WBXmayo
Posted: 16 Feb 2017, 13:26
by Oldiebut goodie
As above but get a can of freeze spray for the stud, the shock of the extreme temp change can make quite a difference. I use the spray that is supposed to be for checking for cold solder joints on circuit boards.
Re: WBXmayo
Posted: 16 Feb 2017, 13:43
by itchyfeet
Good idea chaps^^
Re: WBXmayo
Posted: 16 Feb 2017, 20:18
by itchyfeet
Thanks for all the tips today, had another go tonight with a lot of success.
I can't say which thing I changed helped.
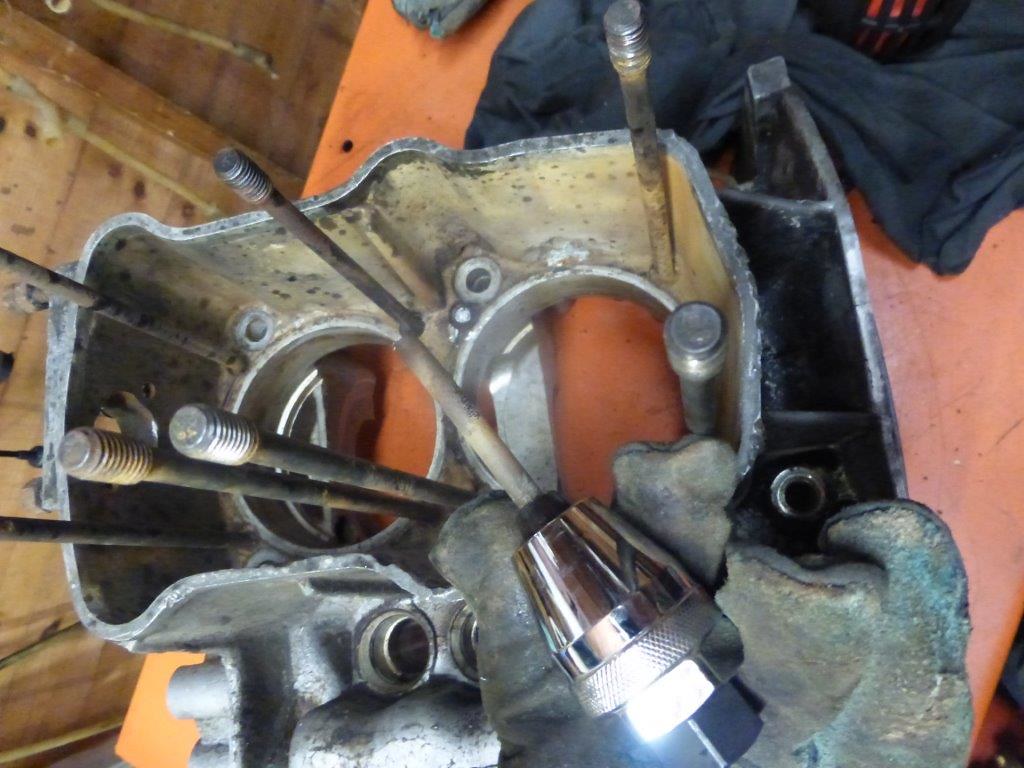
First I tried a DJ block to rule out early DG lower quality studs.
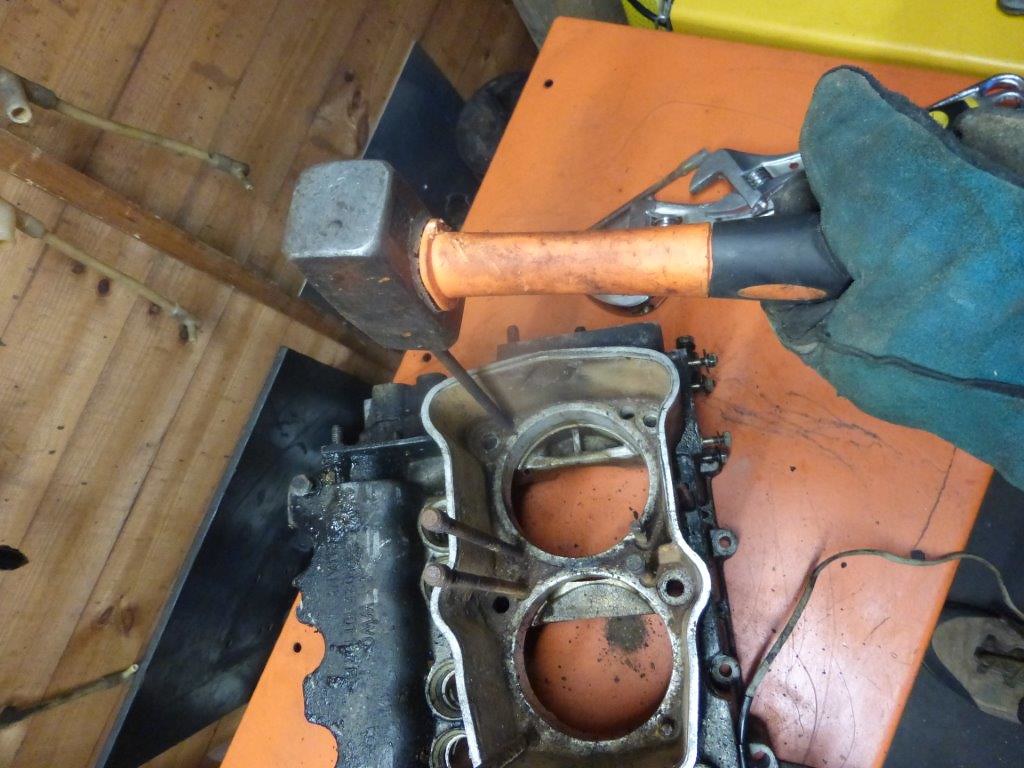
Next I placed a tube over the stud and headed the aluminium avoiding heating the stud.
I only heated for 5 minutes, my logic being the longer you heat the more the stud heats ( and it was oily and smoking badly

)
I hit the stud 5 times with a lump hammer.
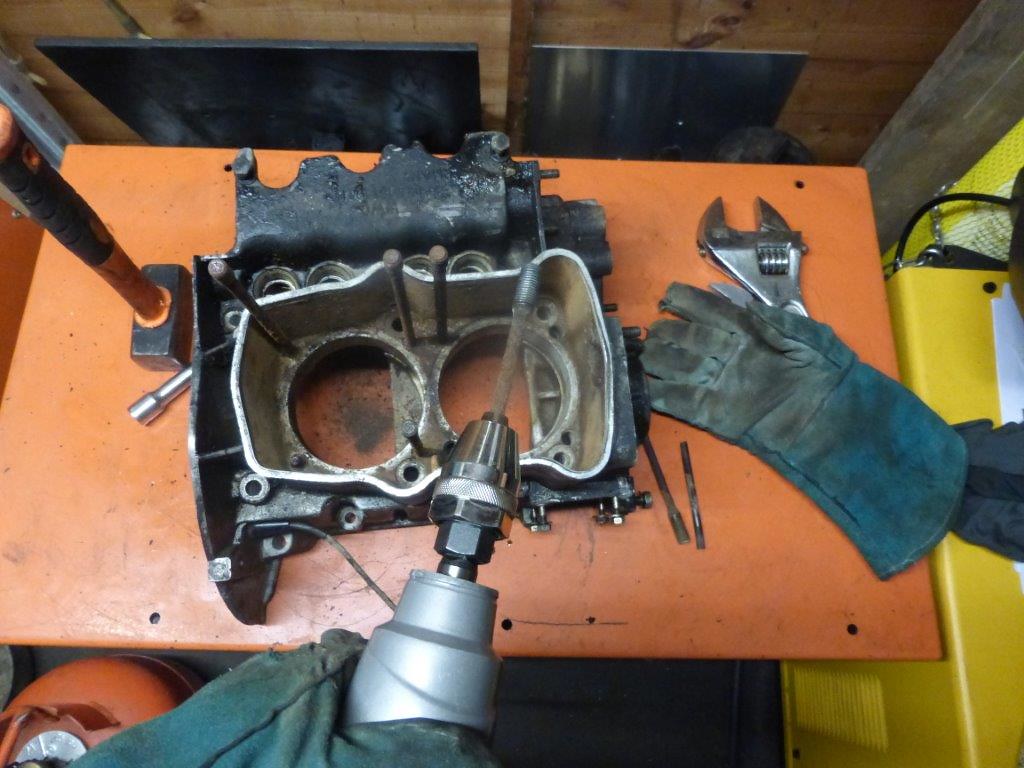
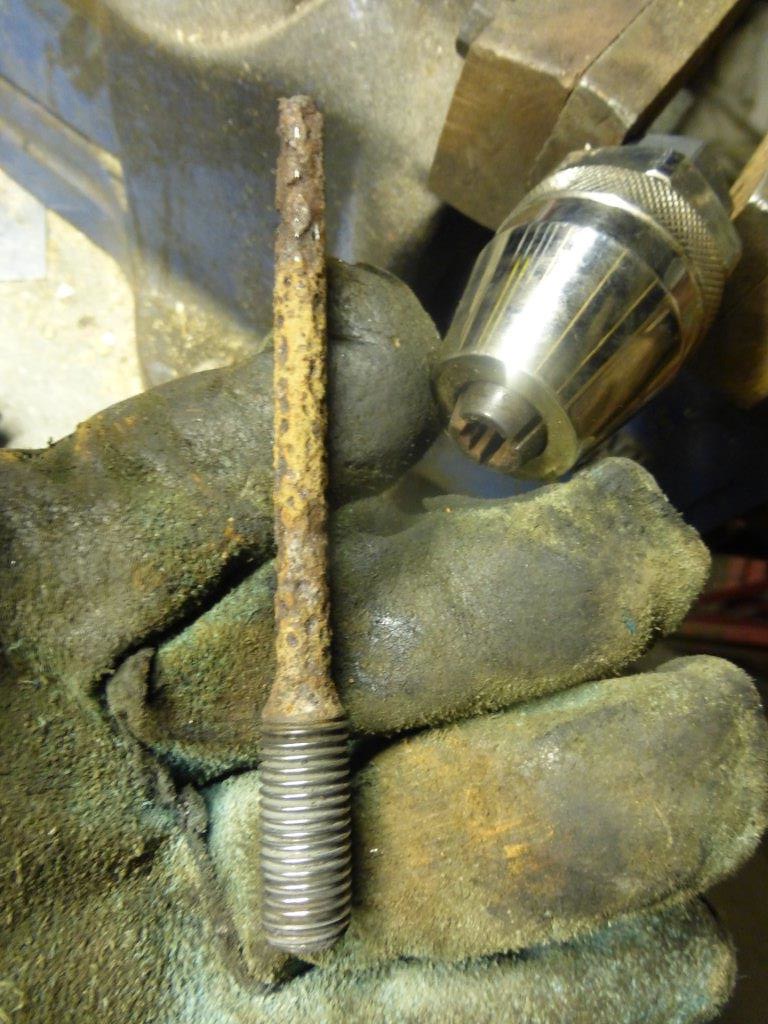
All three I tried came out, two were full length and one a stubby rotten thing, all with the chuck remover and electric impact driver, one long stud took a while to come out.
This has given me every confidence in getting them out of mayo engine but I will keep practising on these two old cases first over the weekend before trying.
 P1060986
 by
Paul_Barr, on Flickr
 P1060981
 by
Paul_Barr, on Flickr
 P1060988
 by
Paul_Barr, on Flickr
 P1060989
 by
Paul_Barr, on Flickr
