Engine carrier - orientation
Moderators: User administrators, Moderators
-
CovKid

- Trader
- Posts: 8409
- Joined: 30 Apr 2006, 13:19
- 80-90 Mem No: 3529
- Location: Ralph - Coventry (Retired)
- Contact:
Engine carrier - orientation
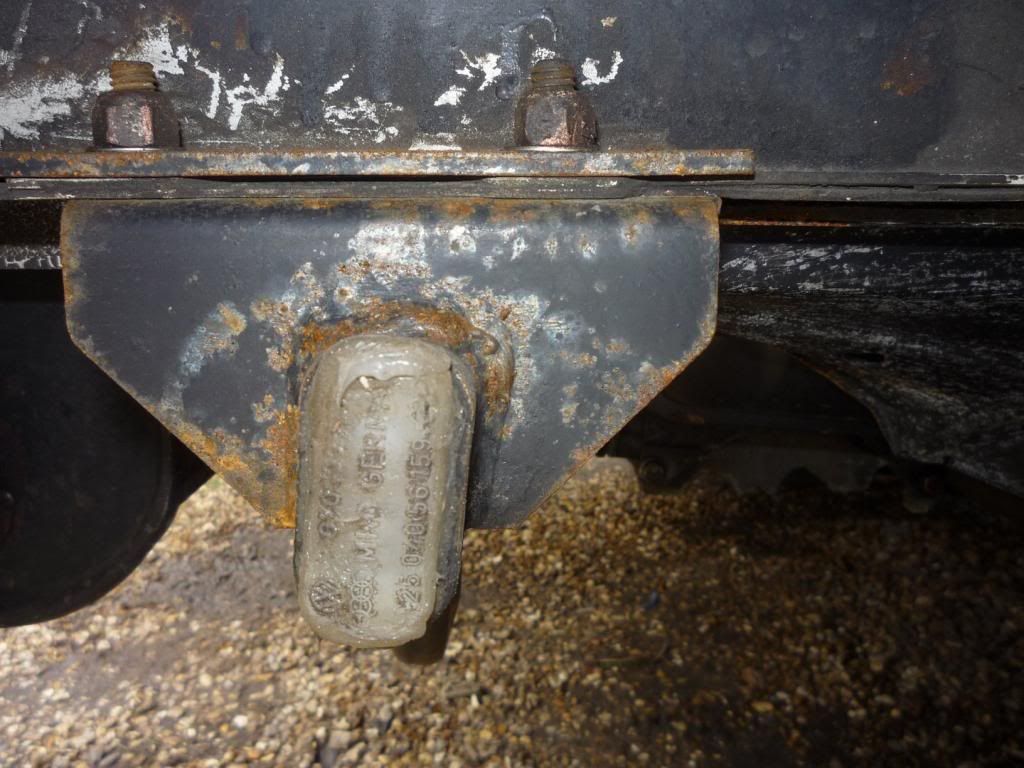
Never quite figured this out. Some say there are arrows on the engine support bar (once stripped of the cast support and mounts) to ensure it isn't put in back to front but never seen any arrows. Theres a slight rake to the bar but couldn't find a definitive method for checking whether it is correctly installed. Any thoughts?
Roller paint your camper at home: http://roller.epizy.com/55554/" onclick="window.open(this.href);return false; for MP4 download.
-
itchyfeet

- Registered user
- Posts: 12427
- Joined: 23 Jul 2007, 17:24
- 80-90 Mem No: 12733
- Location: South Hampshire
Re: Engine carrier - orientation
arrows are on the end brackets by the bolt holes stamped in points to front iirc


Re: Engine carrier - orientation
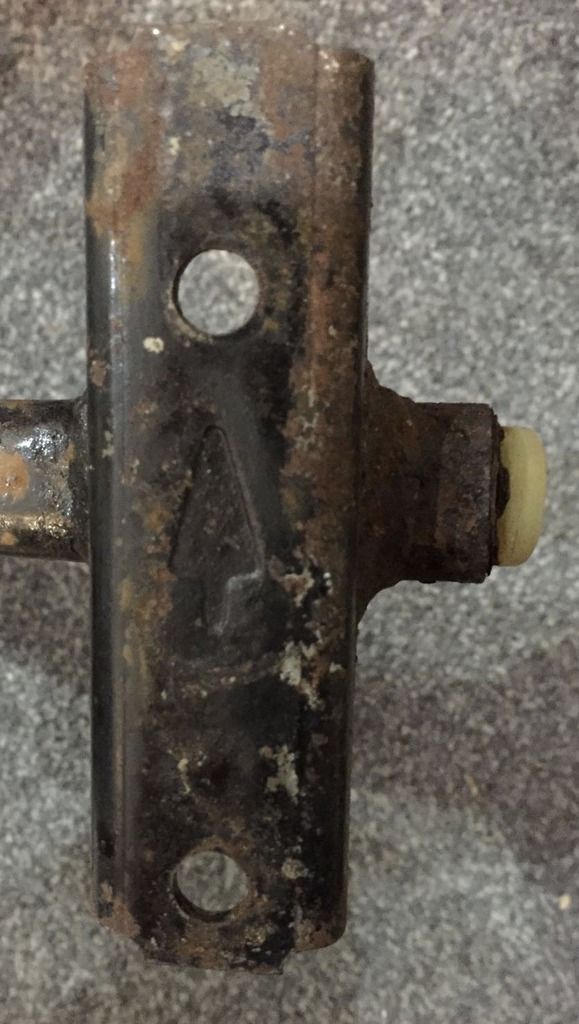
That's correct - they're on the top face, and they point to the front of the van. This from Bentley:
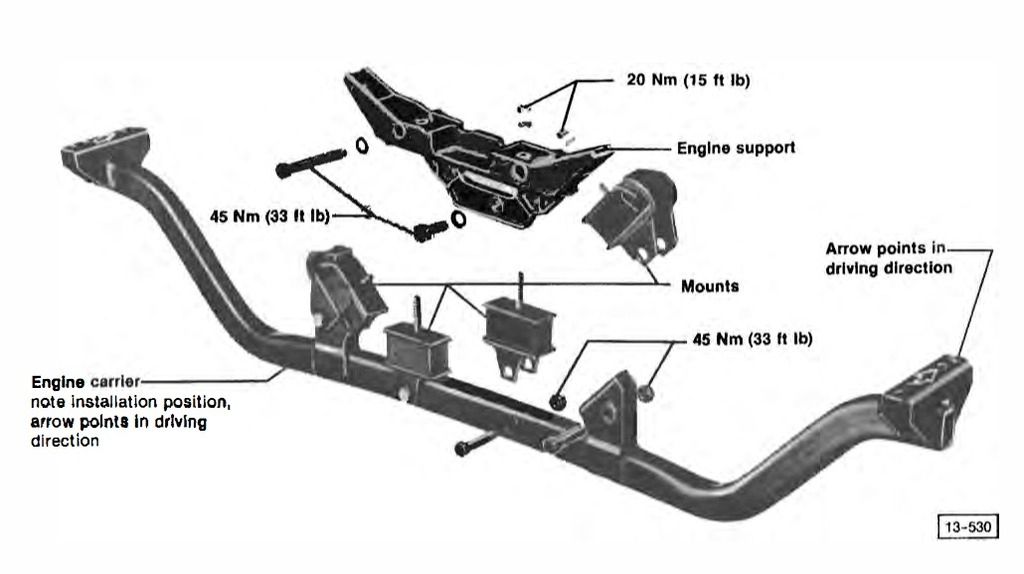
And in case yours aren't visible for some reason, note that the arrow points towards the bolt hole that's furthest from the edge, so the bolt hole that's closest to the edge is at the back of the van.
And in case yours aren't visible for some reason, note that the arrow points towards the bolt hole that's furthest from the edge, so the bolt hole that's closest to the edge is at the back of the van.
"I'm a man of means, by no means....King of the Road!"
1983 Viking Xplorer, 2.1DJ
1983 Viking Xplorer, 2.1DJ
-
bigherb

- Registered user
- Posts: 2579
- Joined: 27 Mar 2008, 13:50
- 80-90 Mem No: 5789
- Location: West Kent
Re: Engine carrier - orientation
Not always, it depends on the engine.CJH wrote: And in case yours aren't visible for some reason, note that the arrow points towards the bolt hole that's furthest from the edge, so the bolt hole that's closest to the edge is at the back of the van.

1982 Camper 1970 1500 Beetle Various Skoda's, Ariel Arrow
Re: Engine carrier - orientation
D'Oh! Well there you go.
Anything else I can help you with Ralph?
Anything else I can help you with Ralph?
"I'm a man of means, by no means....King of the Road!"
1983 Viking Xplorer, 2.1DJ
1983 Viking Xplorer, 2.1DJ
-
CovKid
- Trader
- Posts: 8409
- Joined: 30 Apr 2006, 13:19
- 80-90 Mem No: 3529
- Location: Ralph - Coventry (Retired)
- Contact:
Re: Engine carrier - orientation
Well its a step in the right direction. Assuming everything is fairly stock, and mine is, I think I can suss it out from there. Thanks Chris. Illustrations throw much light on the subject.
Roller paint your camper at home: http://roller.epizy.com/55554/" onclick="window.open(this.href);return false; for MP4 download.
-
markbradley
- Registered user
- Posts: 37
- Joined: 04 Sep 2015, 12:30
- 80-90 Mem No: 0
Re: Engine carrier - orientation
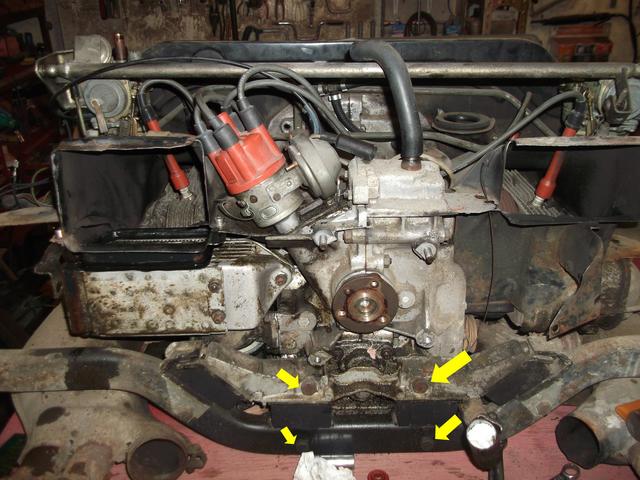
Hi guys, I can’t get the engine support off my 2l CU engine. I’ve undone 2 bolts that attach it to the engine and give it a few taps with a hammer, but it won’t budge.
Anyone have an idea what to do?
Thanks!
Anyone have an idea what to do?
Thanks!
@wilmaontheroad '82 2.0l Aircooled campervan
-
bigherb
- Registered user
- Posts: 2579
- Joined: 27 Mar 2008, 13:50
- 80-90 Mem No: 5789
- Location: West Kent
Re: Engine carrier - orientation
There are four bolts the upper two are behind the fan housing.markbradley wrote:Hi guys, I can’t get the engine support off my 2l CU engine. I’ve undone 2 bolts that attach it to the engine and give it a few taps with a hammer, but it won’t budge.
Anyone have an idea what to do?
Thanks!
1982 Camper 1970 1500 Beetle Various Skoda's, Ariel Arrow
-
markbradley
- Registered user
- Posts: 37
- Joined: 04 Sep 2015, 12:30
- 80-90 Mem No: 0
Re: Engine carrier - orientation
bigherb wrote:There are four bolts the upper two are behind the fan housing.markbradley wrote:Hi guys, I can’t get the engine support off my 2l CU engine. I’ve undone 2 bolts that attach it to the engine and give it a few taps with a hammer, but it won’t budge.
Anyone have an idea what to do?
Thanks!
Is the only way to get to them removing the fan housing?
Thanks!
@wilmaontheroad '82 2.0l Aircooled campervan
-
bigherb
- Registered user
- Posts: 2579
- Joined: 27 Mar 2008, 13:50
- 80-90 Mem No: 5789
- Location: West Kent
Re: Engine carrier - orientation
Yes. It not hard to do.markbradley wrote:
Is the only way to get to them removing the fan housing?
Thanks!
1982 Camper 1970 1500 Beetle Various Skoda's, Ariel Arrow
-
markbradley
- Registered user
- Posts: 37
- Joined: 04 Sep 2015, 12:30
- 80-90 Mem No: 0
Re: Engine carrier - orientation
bigherb wrote:Yes. It not hard to do.markbradley wrote:
Is the only way to get to them removing the fan housing?
Thanks!
Ok, can I just remove part of the housing? Or even better is there a step by step guide how to do it? Haynes doesn’t say much about it.
Cheers!
@wilmaontheroad '82 2.0l Aircooled campervan
-
bigherb
- Registered user
- Posts: 2579
- Joined: 27 Mar 2008, 13:50
- 80-90 Mem No: 5789
- Location: West Kent
Re: Engine carrier - orientation
Remove the top part of the oil filler neck and plug the hole with a bit of cloth. Unclamp the thermostat cable. Remove the grill over the fan. Slacken off the alternator belt and remove from fan pulley. Undo the bolt in the centre of the fan and remove fan. Undo the four nuts that hold the fan housing on and the bolt that holds the oil cooler and the one the other side that goes to the exhaust if it is still there. Then tap the fan housing backwards off the alignment dowels.
1982 Camper 1970 1500 Beetle Various Skoda's, Ariel Arrow
-
markbradley
- Registered user
- Posts: 37
- Joined: 04 Sep 2015, 12:30
- 80-90 Mem No: 0
Re: Engine carrier - orientation
Cheers! Managed to access the bolts without removing the entire fan housing, I just shimmied it backwards a couple inches. Mounts replaced.bigherb wrote:Remove the top part of the oil filler neck and plug the hole with a bit of cloth. Unclamp the thermostat cable. Remove the grill over the fan. Slacken off the alternator belt and remove from fan pulley. Undo the bolt in the centre of the fan and remove fan. Undo the four nuts that hold the fan housing on and the bolt that holds the oil cooler and the one the other side that goes to the exhaust if it is still there. Then tap the fan housing backwards off the alignment dowels.
Thanks for the help everyone!
@wilmaontheroad '82 2.0l Aircooled campervan