Front Wheel Bearing replacement

Big lumps of metals and spanners. Including servicing and fluids.

Moderators: User administrators, Moderators

User avatar
pionte
Registered user
Posts: 549
Joined: 17 Oct 2009, 10:35
80-90 Mem No: 8209
Location: Tonbridge Kent

Front Wheel Bearing replacement

Post by pionte »

Recently there have been quite a few posts on here about wheel bearings and issues associated with them, as I needed to change mine I have taken some pictures and written this quick guide to hopefully help... :ok

so how do you know that your wheel bearing requires replacement ? Usually it starts with a noise, this can be very subtle, it can creep up on you slowly so you dont really notice it.

It can be a droning sound.... imagine the sound of a plane speeding down the runway about to take off, it is directly proportional to speed .Although with my van above 50 mph I couldnt hear it because of all the other noises !

Trying to identify which side that is making the noise can be tricky ... holding a constant arc around a corner at a constant speed can help you determine what side it is, as you go round a right corner weight is transferred to the left side, if the noise increases then its the left side that is faulty and vice versa.

In my experience its the left side ( in this country ) that will fail first/more often , as this is where most of the pot holes are and this side gets the toughest time of it... if in doubt I always start this side first.

My van is a 1985 2wd , this is relevant as it is very important to work out which bearing is the correct one for your vehicle . VW had a component change around 1984 and the bearings are a different size and NOT interchangeable .

Have a look here.... https://www.brickwerks.co.uk/index.php/ ... l?___SID=U" onclick="window.open(this.href);return false;

This link explains the chassis number change over .

Another thing to realise that the 2wd front bearings are tapper bearings, this is fairly unusual on the front of vehicles , luckily for us as it makes changing them much simpler than on the Syncro where they are pressed in and require a hydrophilic press.

Being tapper roller bearings does confuse some MOT testers , who wrongly feel slight play and think its a problem.

To change the bearings I would allow 1.5 hours per side the first time you do one, no point rushing, it is critical that you get everything correct as a wheel falling of will spoil your day. Having said this , it is basic nuts and bolts stuff so very doable for a confident home DIY mechanic.


Tools required.

19 mm socket
axle stand
jack
Breaker bar
Torque wrench
T bar ( optional )
large flat blade screwdriver
small flat blade
hammer
drift
bungee chord
rags

jack the van up and put the axle stand securely underneath. ( it amazes me that some people dont bother.... its your life, your choice )
Grab hold of the wheel top and bottom and see if you can rock it, there should be very slight movement , its hard to derscibe just how much but you should feel it.

I always do this before I take it apart so that I can compare with what I have after reassembly... that way if there is a huge difference I know that something is wrong .

Next remove the wheel .
Image


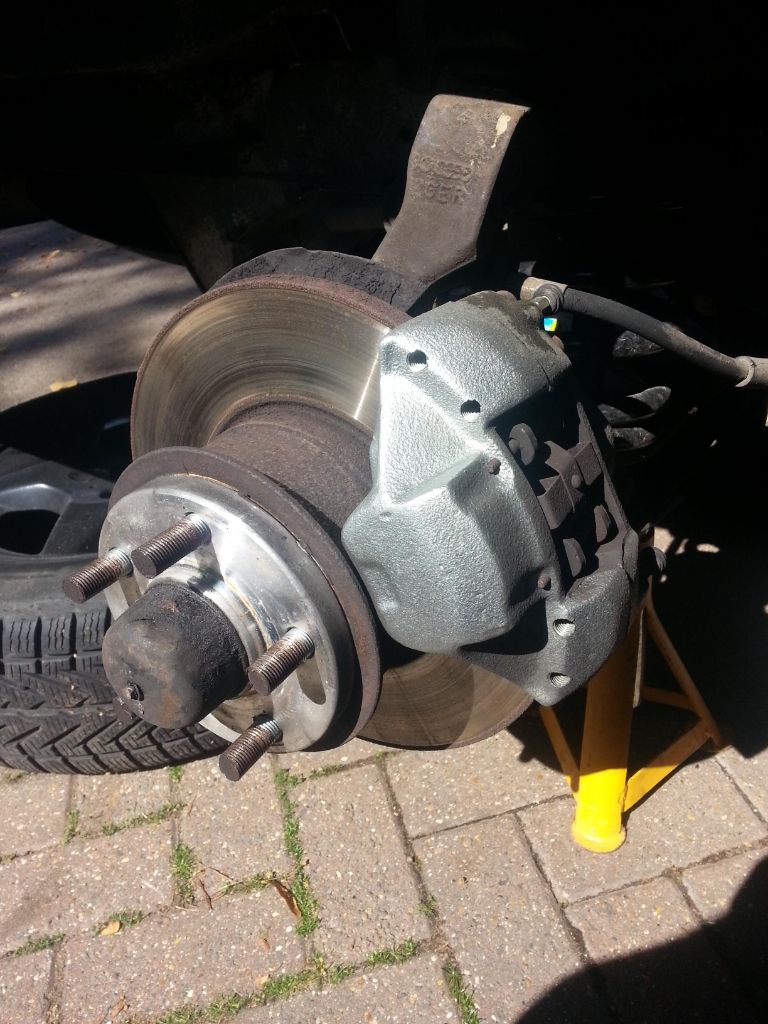
As I am doing the nearside you will see that the speedo drive is located in the bearing cover, with a small flatblade remove the c clip holding it in place, dont lose it !

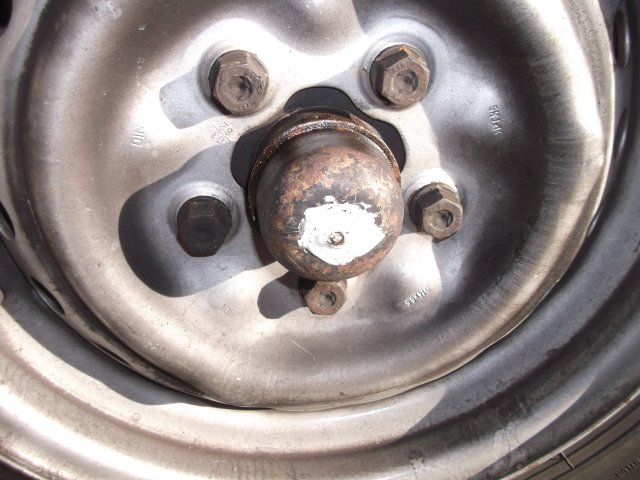
next use the large flat blade to prise of the bearing cap
Image

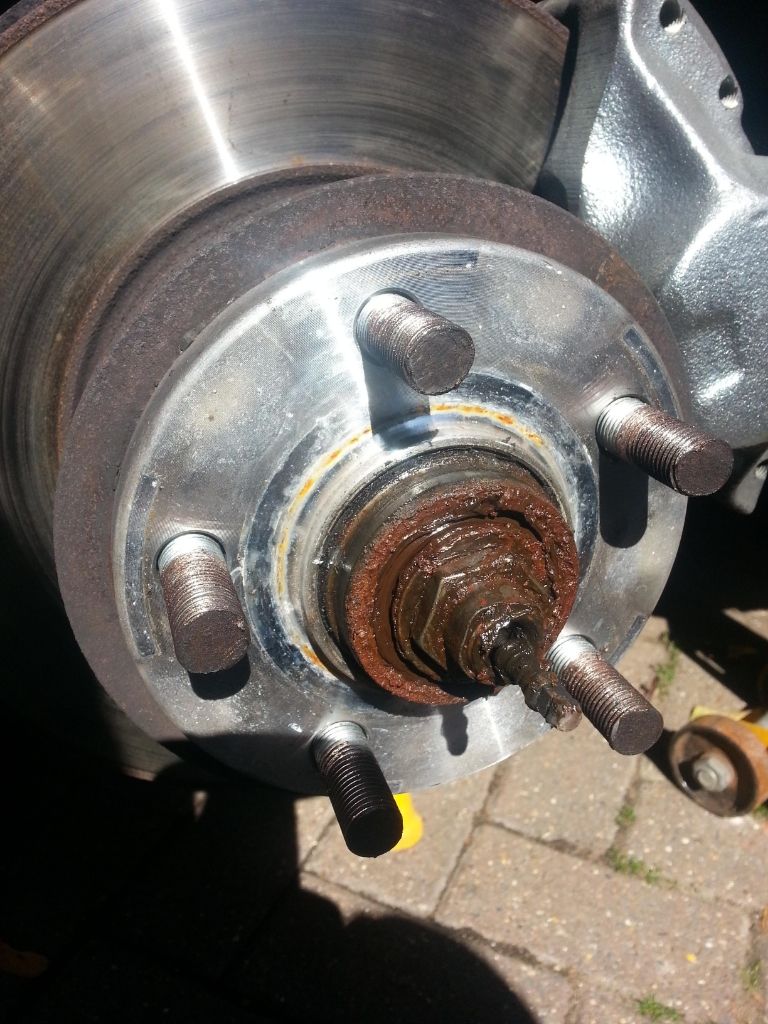
you will notice how brown the grease looks... this is because water has got into the bearing, causing it to rust and ultimately fail.

next it is necissary to remove the brake calliper

With the large flat blade, gently move the pads away from the disk a few mm, this will help with removal and refitting of the calliper.
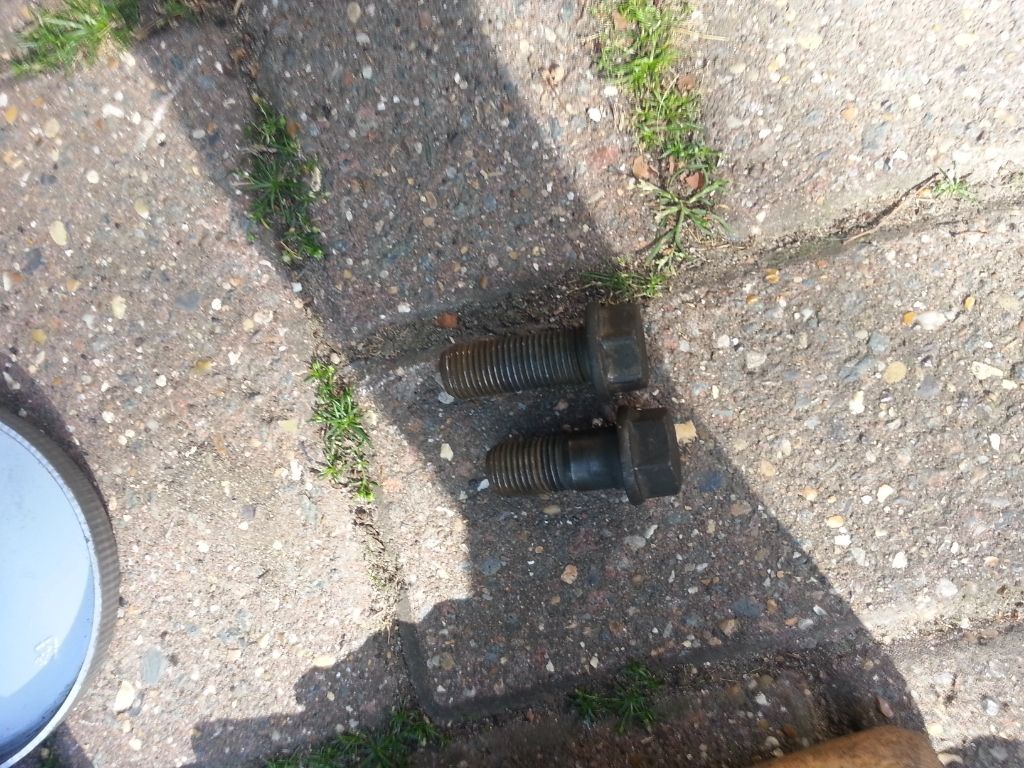
Then undo the 2 19mm bolts holding the brake calliper on, Image
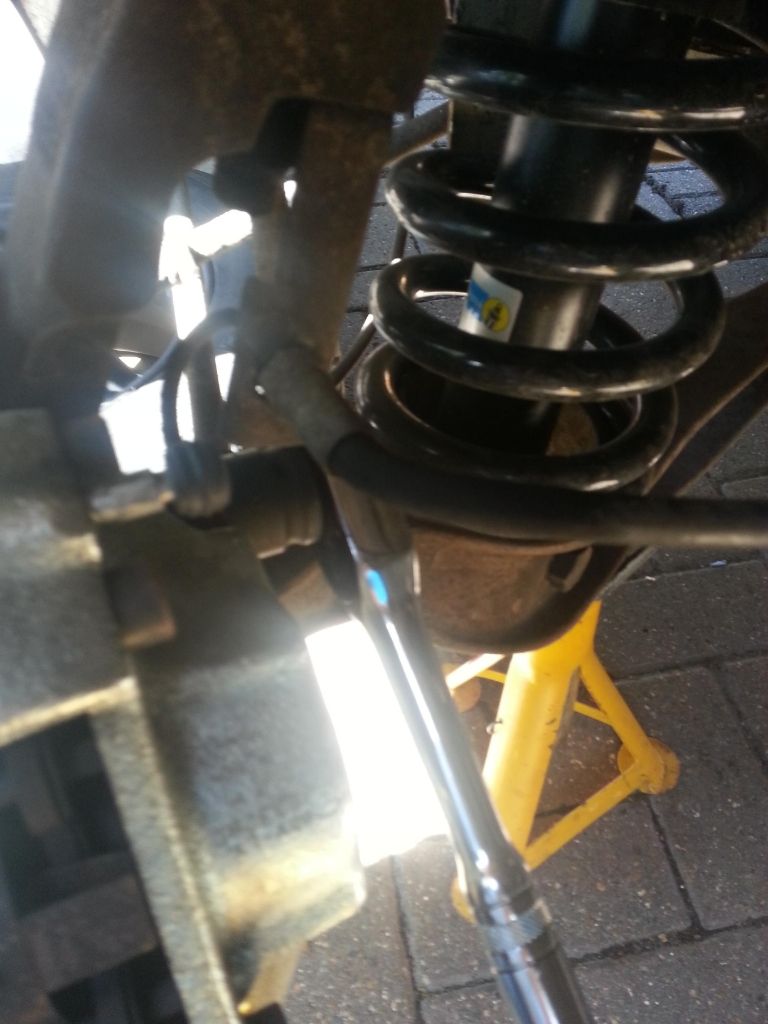

These bolts are different so remember which one goes where.
Image


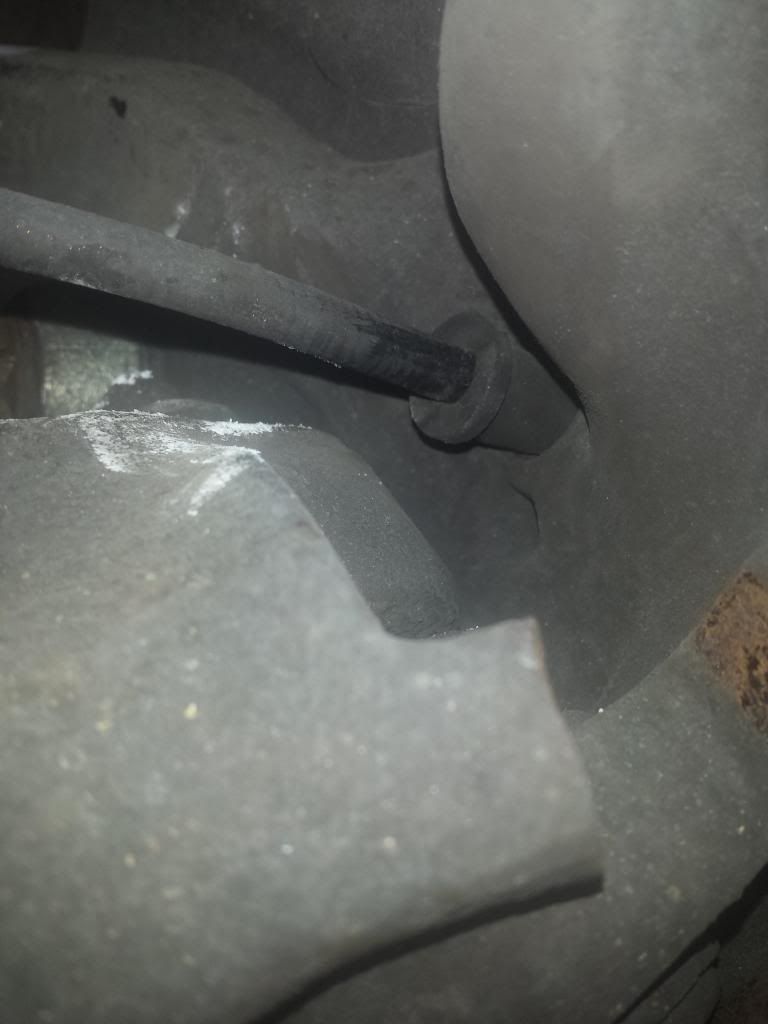
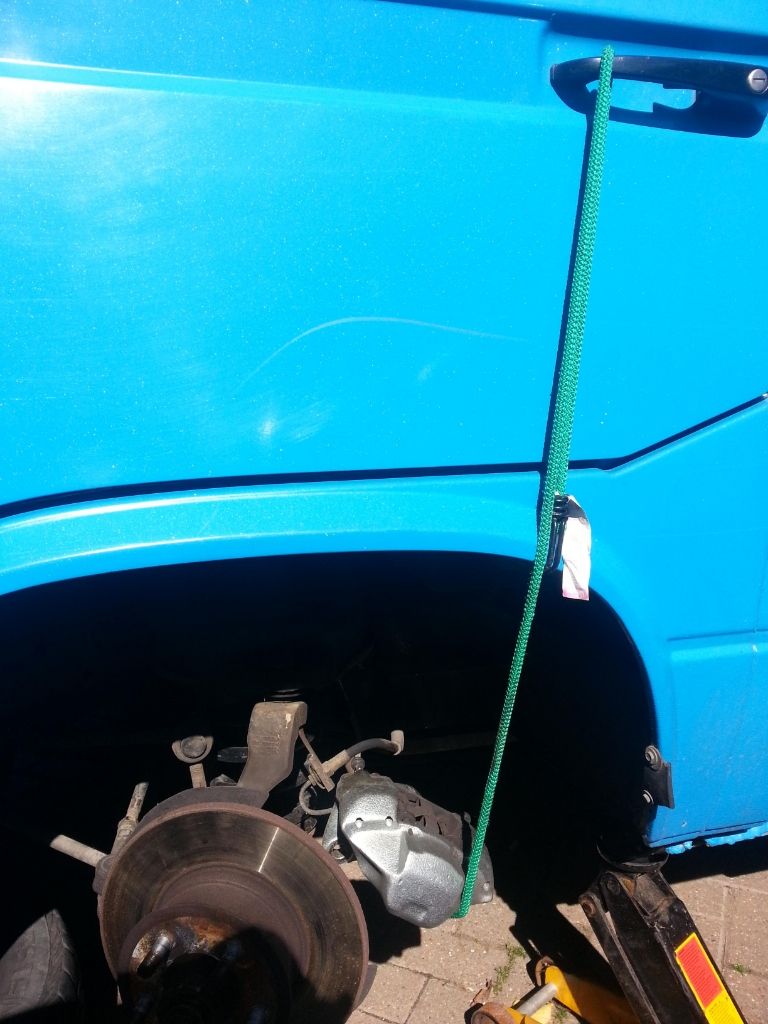
the metal brake pipe is held in place by a bracket, to save removing the pipe then having to re bleed the system, gently bend this bracket away to give yourself room to swing the calliper away. Support the calliper with the bungee strap

Image


next undo the nut holding the brake disk and bearing assembly on.


The nut holding it in place is called a peen nut, basically a nut with a long skirt on that you bend into a recess on the spline to stop it coming loose . Another method is a split pin and castle nut, both work well.

Use the screwdriver and hammer to lift the bent metal on the peen nut out of the recessed area, then undo the nut, it may be slightly stiff because of the mis shaped part of the nut .

remove the nut and take notice of a flat washer , this will need to be replaced and you wont get a spare with the new bearing kit.

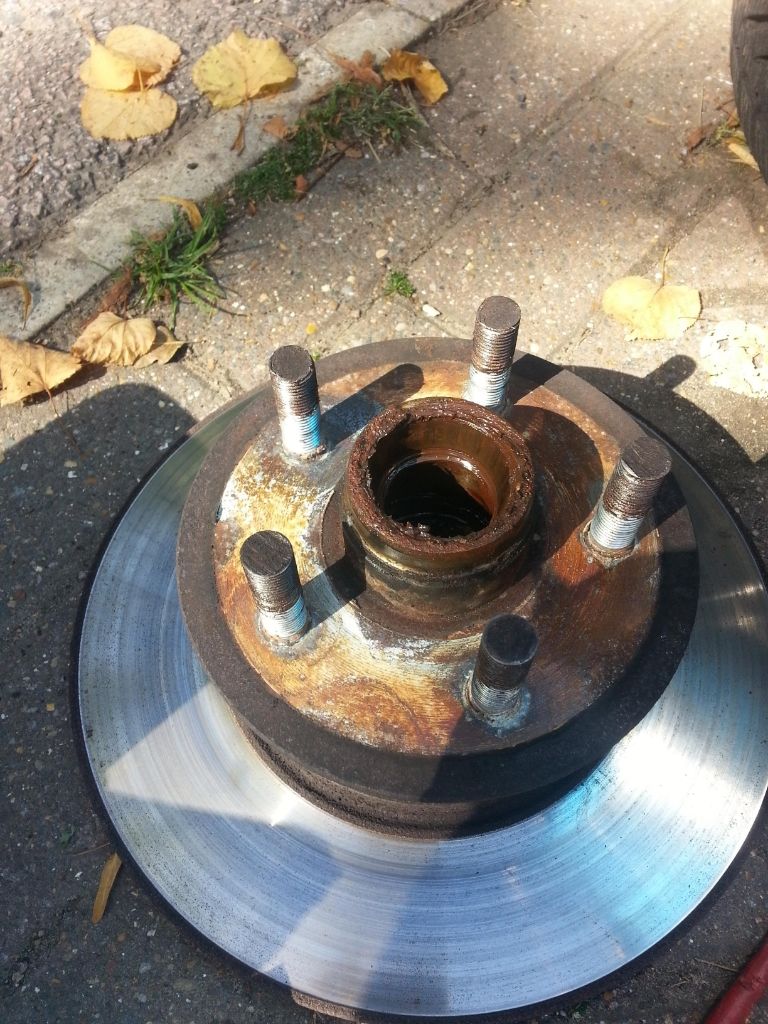
lift of the disk assembly
Image

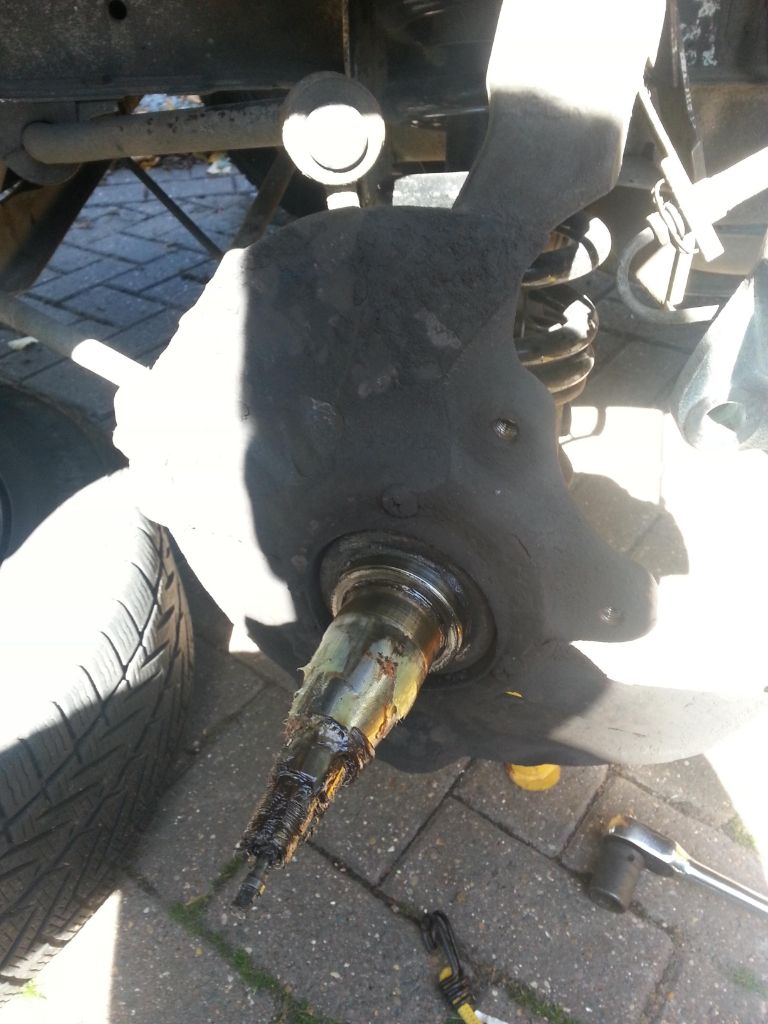
leaving the stub axle

Image


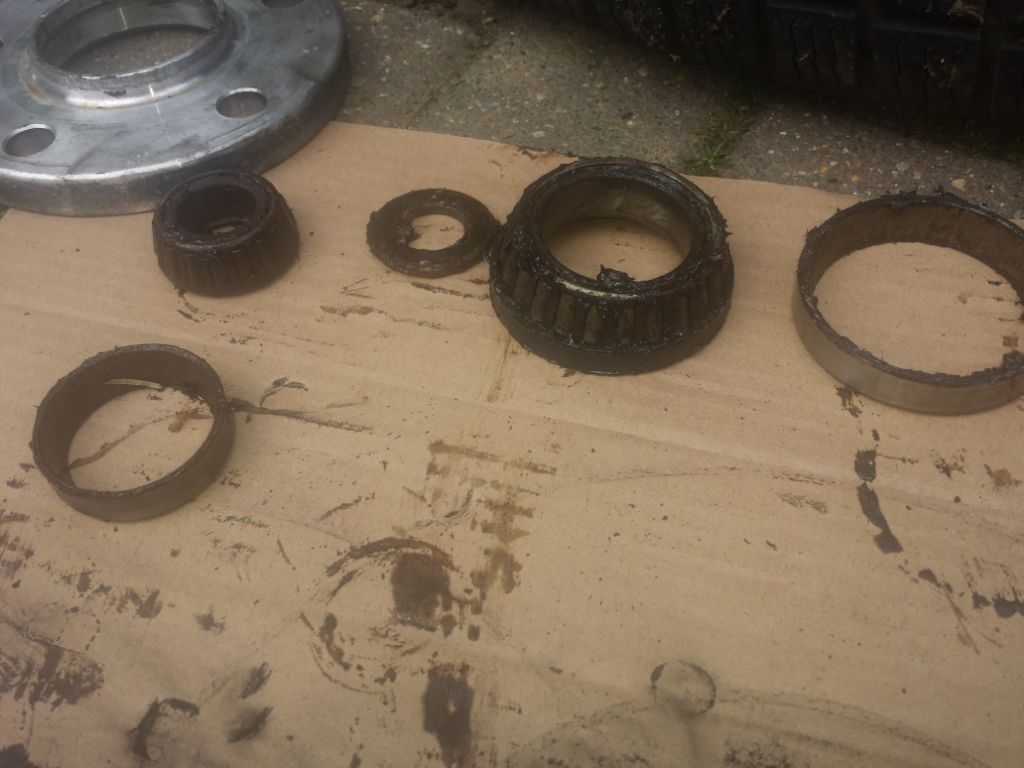
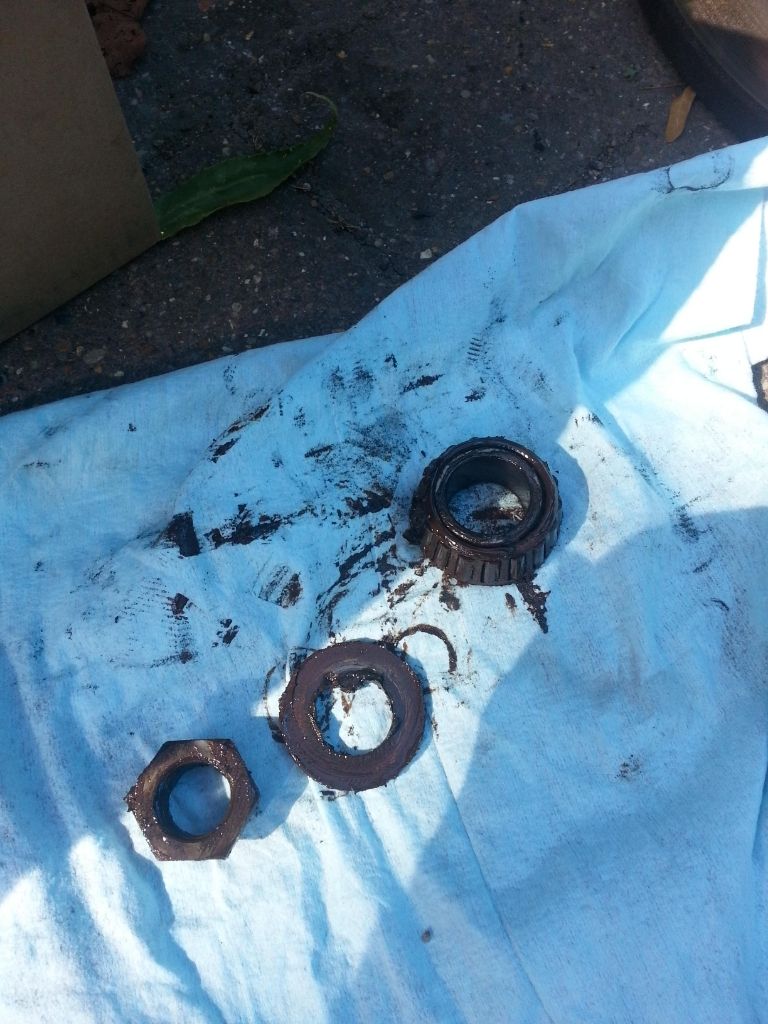
The outer bearing will now fall out, notice the colour.
Image

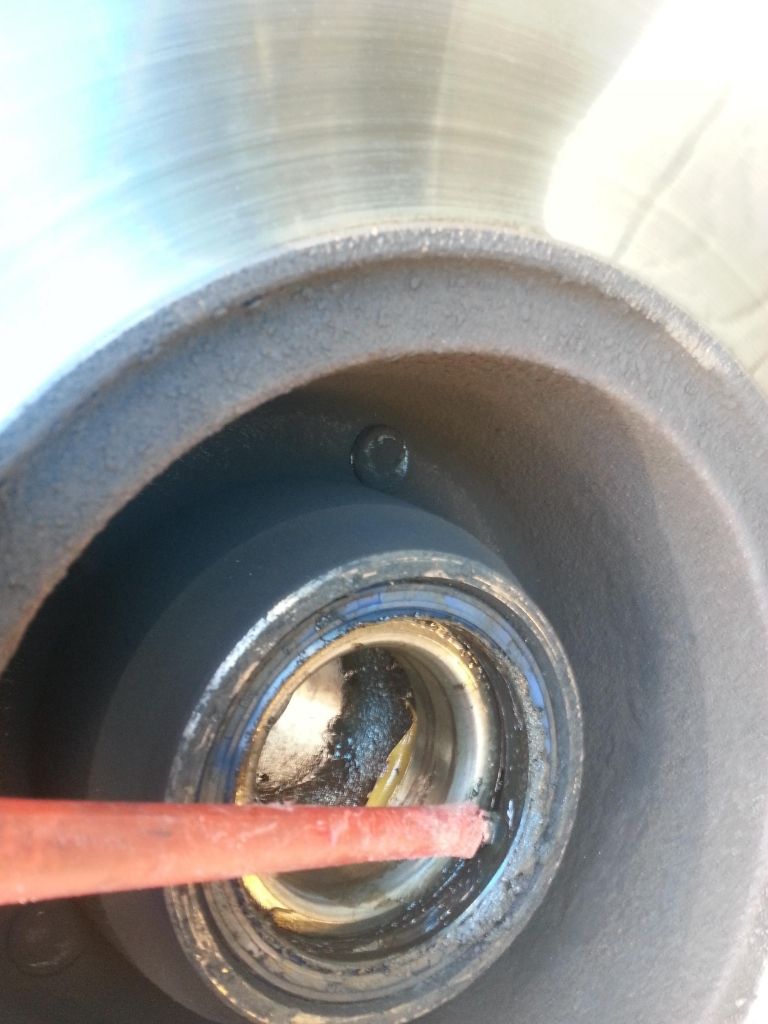
flip the assembly over and remove the seal ( look what way it goes ) using a flat blade.
Image

The inner larger bearing will now fall out.

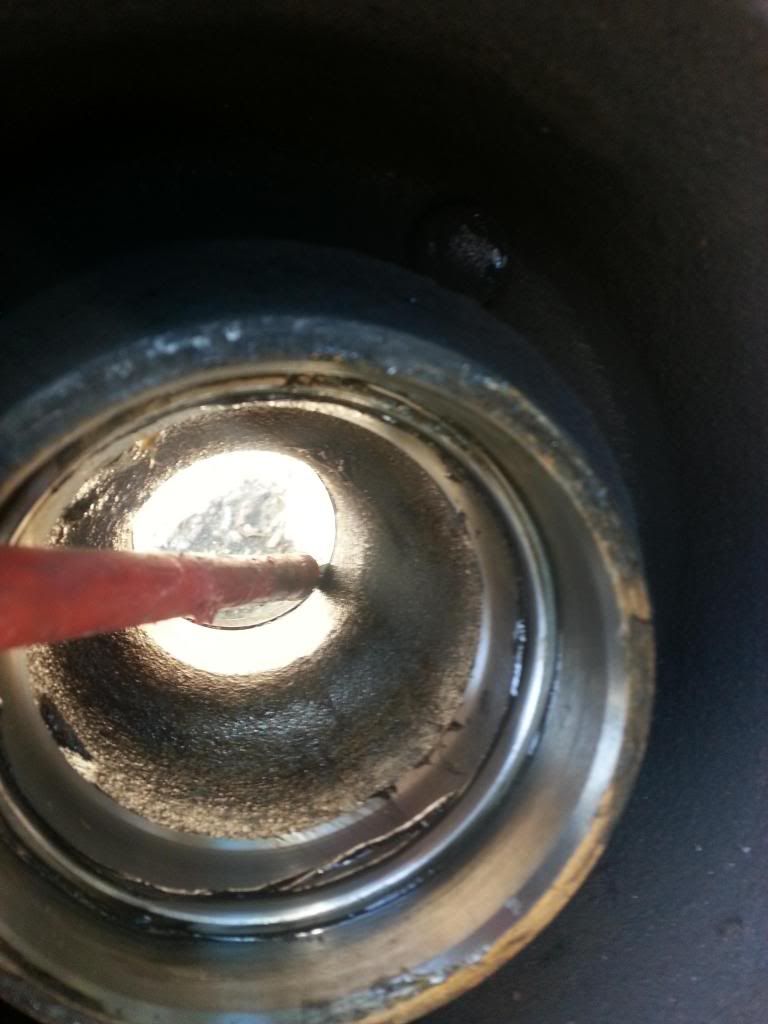
next you need to remove the outer casing for each of the bearings, these are quite a tight fit and will need to persuaded out with a drift or old flat blade and a hammer, from the back side you can just see the lip for the front bearing , place your drift/screwdriver against it and give it a hit... move the drift to the opposite side of the case and repeat, with a few clouts it will soon pop out,
Image

flip over and repeat for the other bearing case.

clean all the old grease out, careful not to contaminate the brake disk !

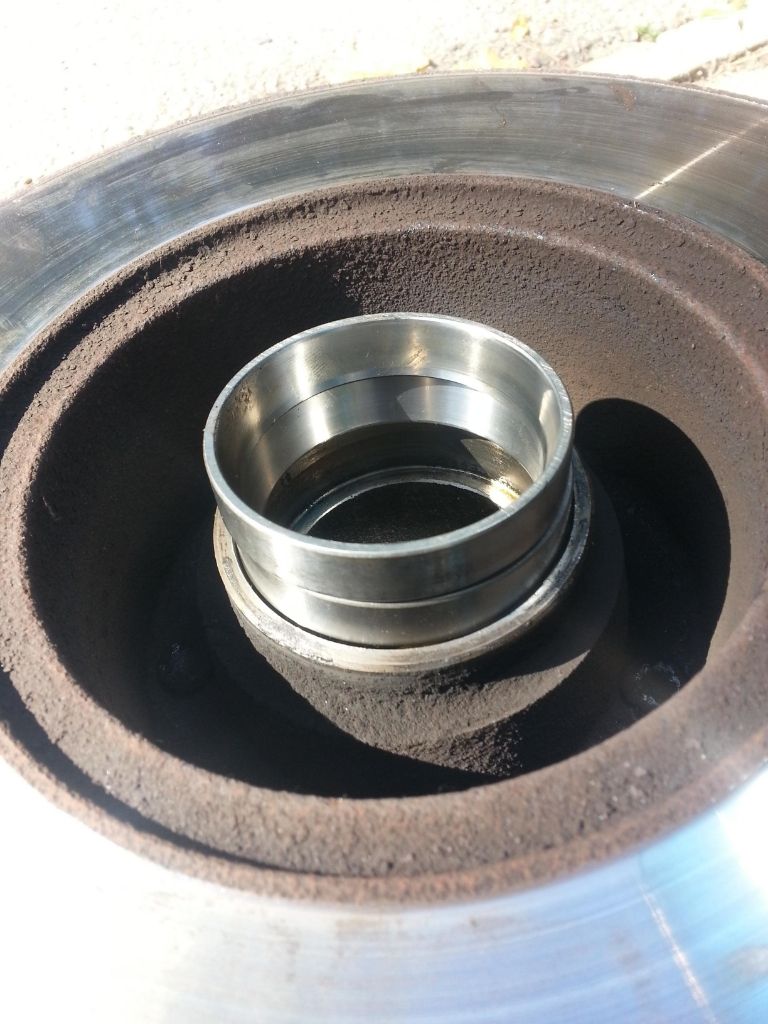
Next put in the new casing, you will need to hammer it into place , get this the correct way round ! tapper facing out so the hole gets smaller as you look into it.

use the old case to help start the new one nice and squarely into the hub.
Image


once it is nearly fully in remove the old casing ( you dont want to get this stuck back in the hub aswell ) go around the case with a drift and hammer, being careful not to damage the surface ! you will know when its fully seated as the noise will change as you hit it. I always go around again at least twice just to be sure its seated fully.

repeat with the other side bearing.

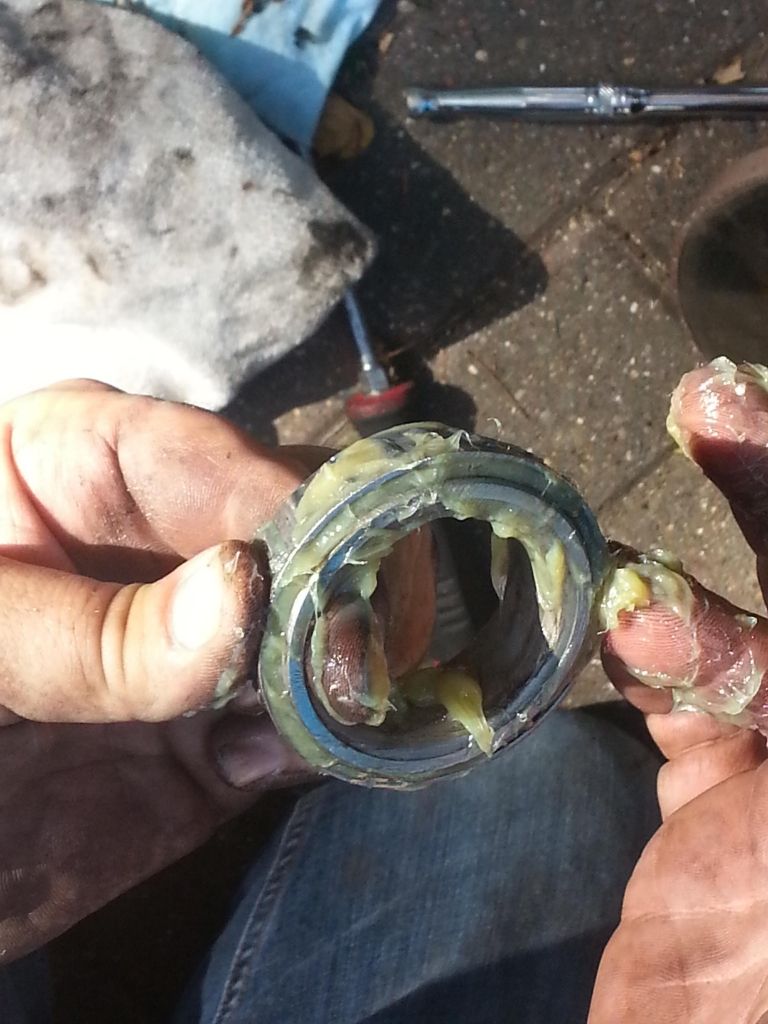
Pack out the bearing races with grease ( cheaply available from any motor factors ) make sure that the grease is pushed into every roller bearing, more is better !
Image

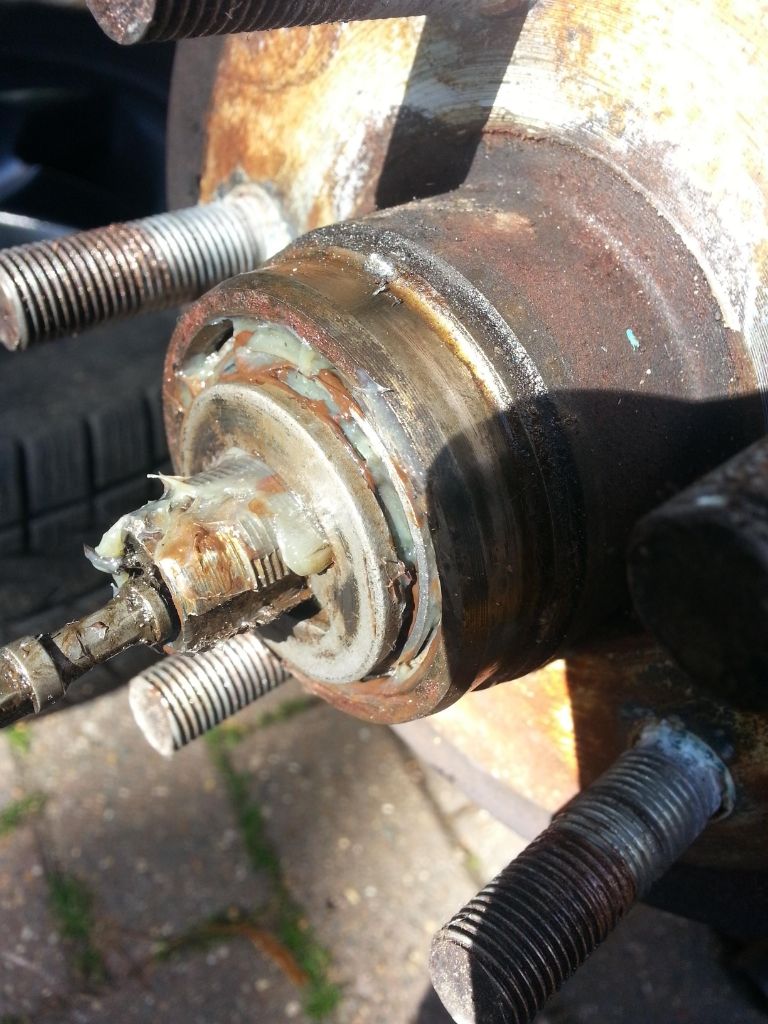
re grease the stub axle
refit the hub onto the stub axle, pushing it fully home... if you cant see this much thread showing then its not fully on, rotate and give a gentle push,
Image

remembering to fit the flat washer with the locating bit in the right place.

fit the new peen nut and tighten whilst rotating the hub assembly.

I use a T bar and socket for this, I find it gives me much more feel, now at this point tighten fairly tight This will ensure that the bearing is seated properly, now undo the nut again.... this next bit is all part of the feeling that you will get on how tight to tighten the nut. I use the T bar and spin the the nut, the momentum of the T bar will provide the correct amount of torque.... basically just tighter than finger tight , this is a technique that In was taught as an apprentice and have always used successfully for tapper roller bearings , and have never had a problem.

Next refit the wheel and tighten ..grab hold of the wheel top and bottom and feel for slight play, it should be similar to how it felt before you started ( unless of course you had total bearing failure and collapse before ! ) If too much or too little then adjust the peen nut... once happy that all is as should be , tap the peen nut with a blunt screwdriver or punch, deforming the skirt into the recess on the stub axle this will stop it coming undone all on its own .

Refit the brake caliper, torque the nuts to the correct torque for your brakes/model

Refit the speedo drive into the bearing cover with the c clip, lower the van and torque the wheel nuts to your vans/ wheel specification.

Remember to pump the brake pedal to remove the play from the calliper caused when you moved the pads earlier.

Take for a drive and rejoice in the silence....

I hope this will help anyone attempting this for the first time :ok

As with everything, slow and steady... check and double check. If unsure ask someone, 8)


( edited to bring links up to date )
Last edited by pionte on 11 Jun 2015, 06:20, edited 2 times in total.
2.5 Quad Cam Scooby engine . Westfalia California 1989

User avatar
Oldiebut goodie
Registered user
Posts: 7297
Joined: 18 Apr 2008, 01:19
80-90 Mem No: 11135
Location: Eastern Angle

Re: Front Wheel Bearing replacement

Post by Oldiebut goodie »

Use a brass drift when fitting - saves on scratches when it slips!
1.6D 2019 VW T-Cross
200hp VW T6
1̶Y̶ ̶1̶9̶8̶7̶ ̶H̶i̶-̶t̶o̶p̶ ̶C̶a̶r̶a̶v̶e̶l̶l̶e̶
5̶0̶8̶d̶ ̶M̶e̶r̶c̶

User avatar
bigherb
Registered user
Posts: 2579
Joined: 27 Mar 2008, 13:50
80-90 Mem No: 5789
Location: West Kent

Re: Front Wheel Bearing replacement

Post by bigherb »

Good write up but a few points.
Don't over pack the bearings with grease, less is better, only one third of the bearing volume. Over packing causes the bearing to hydraulic and skid causing premature bearing failure usually blamed on cheap bearings.
No need to grease the stub axle, it doesn't need lubricating, the seal will push the grease off when refitting the disc and will be flung off with centrifugal force onto the disc.
And lastly seal the the speedo drive in the grease cap like VW did with some sealer, that's where the water gets in causing the nearside bearing to fail and while your at it check the speedo cable entry into the stub axle seal is a good tight fit around the speedo cable.
Image
1982 Camper 1970 1500 Beetle Various Skoda's, Ariel Arrow

User avatar
New Kentish Campers
Registered user
Posts: 1739
Joined: 12 Oct 2010, 06:16
80-90 Mem No: 8994
Location: Near Linton, Kent.
Contact:

Re: Front Wheel Bearing replacement

Post by New Kentish Campers »

bigherb wrote:And lastly seal the the speedo drive in the grease cap like VW did with some sealer, that's where the water gets in causing the nearside bearing to fail and while your at it check the speedo cable entry into the stub axle seal is a good tight fit around the speedo cable.

Ah, thank you for that! My n/s/f bearing had to be replaced for this very reason and I didn't quite know why it had failed, despite their being replaced with good quality ones by the previous owner, which failed after some 18 months of my owning the van! :oops: I shall now go and seal the cap accordingly 8)

User avatar
nobbyfox
Registered user
Posts: 231
Joined: 20 Jul 2011, 19:38
80-90 Mem No: 9991
Location: Surrey

Re: Front Wheel Bearing replacement

Post by nobbyfox »

Just a quick pointer. My bus is 1990 (2WD) but DID require the use of a press to push the bearing race into the disc. I replaced the 2 front discs at the same time too. They were the correct ones supplied by Brickwerks.

Cheers

Steve
Westfalia pop-top 1990 1.6JX

User avatar
pionte
Registered user
Posts: 549
Joined: 17 Oct 2009, 10:35
80-90 Mem No: 8209
Location: Tonbridge Kent

Re: Front Wheel Bearing replacement

Post by pionte »

Good tip about the sealant bigherb,i will be doing mine now. my comment about usually its the nearside that fails first was for all cars... this is my first bearing change that I have done on a T25 . These where at least 6 years old.

The packing of the bearing is subjective, I have seen people just put a smear of grease on the outside of the races... I much prefer to get some in between the rollers, obviously you would have to go some to completely fill them up, but good to point out that it is possible to overdo it. The grease on the stub axle was just a smear.. to stop further rust from forming, in the pic shown the grease is there from when I took the hub off, i cleaned it of as it was contaminated with sh1te.

This was just a quick guide to show others how easy it is to do... it took me longer to write up than do the job.

Please feel free to add any helpful tips, or shortcuts or delete as you feel fit. OBG, good tip re brass drift.

Ive never heard of a tapered roller bearing having to be pressed in place before :shock: but worth being mindful that its a possibility .
Last edited by pionte on 02 Sep 2013, 20:01, edited 2 times in total.
2.5 Quad Cam Scooby engine . Westfalia California 1989

User avatar
Dazco
Registered user
Posts: 2299
Joined: 18 Dec 2011, 15:44
80-90 Mem No: 10544
Location: Sheffield. 1984 autosleeper trooper. 1.9 petrol called Jambo

Re: Front Wheel Bearing replacement

Post by Dazco »

Like that , it be be getting filed away for use later on :ok
Auto sleeper fitted with EJ 20 subaru lump

User avatar
nobbyfox
Registered user
Posts: 231
Joined: 20 Jul 2011, 19:38
80-90 Mem No: 9991
Location: Surrey

Re: Front Wheel Bearing replacement

Post by nobbyfox »

Oops it was needle bearings on the front of mine :oops:
Sorry for the confusion
Westfalia pop-top 1990 1.6JX

California Dreamin
Registered user
Posts: 2673
Joined: 03 Apr 2007, 12:54
80-90 Mem No: 8386
Location: Nottingham

Re: Front Wheel Bearing replacement

Post by California Dreamin »

nobbyfox wrote:Oops it was needle bearings on the front of mine :oops:
Sorry for the confusion

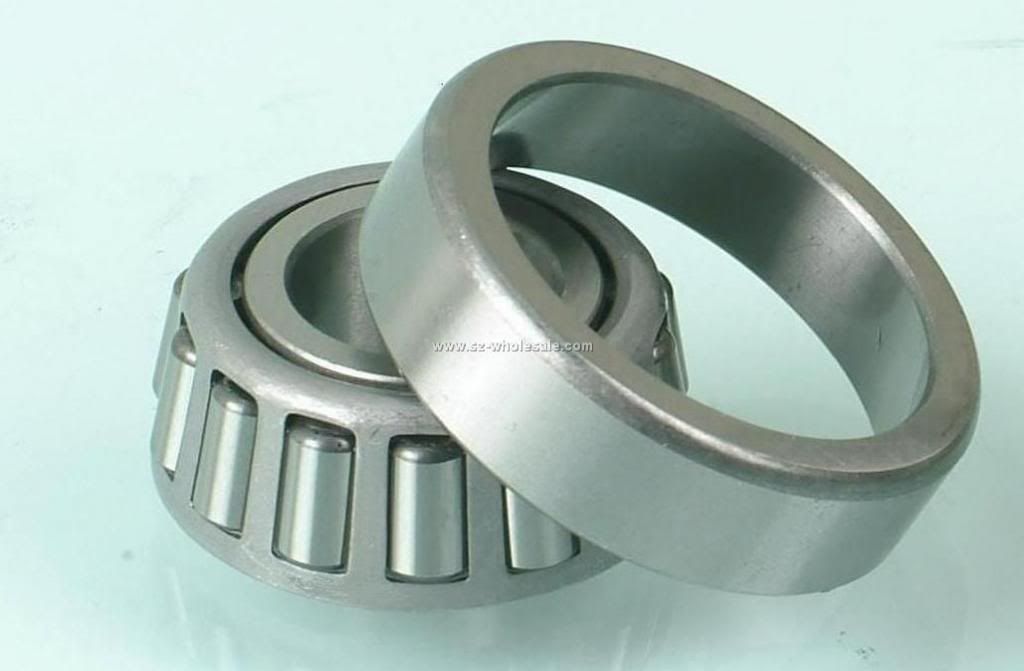
All 2WD 's have Taper roller bearings up front: like

Image


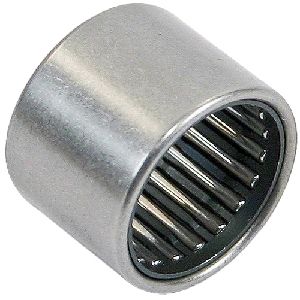
Needle rollers are usually parallel and the bearings are small like pencil lead (for want of a better description) an example would be the spigot shaft bearing found in the end of 'some' cranks to support the input shaft to the gearbox. similar to:

Image

Martin
1989 California 2.1MV

User avatar
Johnt25
Registered user
Posts: 62
Joined: 02 Jul 2013, 15:45
80-90 Mem No: 12687
Location: Morecambe, NW Lancs

Re: Front Wheel Bearing replacement

Post by Johnt25 »

Many thanks Pionte - and all others for taking the time to provide this info (esp all the pics!), will save this for when my old bearings go to the Great Smelting Factory In The Sky :D

...maybe this could be Wikificated?

All the best,

John
'85 Westy pop-top 1.6TD

"You are only young once, but you can be immature forever."

User avatar
pionte
Registered user
Posts: 549
Joined: 17 Oct 2009, 10:35
80-90 Mem No: 8209
Location: Tonbridge Kent

Re: Front Wheel Bearing replacement

Post by pionte »

Just a little update.

The van hardly gets used, maybe 500 miles since Busfest last year, so I was a tad surprised when yesterday I took her for a quick run and heard a rumble from the NSF :shock:

On further investigation I found this :roll:

Image

How could it have gotten rusty so quick :?

luckily I had a spare bearing so changed it out, and on refitting I noticed that the speedo cable seal was quite loose...
Image

So worth checking these regularly , I am certain that I had refitted it fully after changing last time, I will look for a new one but in the meantime a cable tie is helping to hold it in place.

just thought I would share, may save someone else having to do the job twice like I have !!
2.5 Quad Cam Scooby engine . Westfalia California 1989

User avatar
docklad
Registered user
Posts: 289
Joined: 28 Aug 2009, 14:51
80-90 Mem No: 7386
Location: Anglesey, North wales

Re: Front Wheel Bearing replacement

Post by docklad »

Anything on the spigot ring? Spacer ring? Hub damper ring? In other words....when returning the wheel to the hub have you, is there a ring that sits in the inner rim of the wheel. Buggered if I can find anything on them. Nothing on the Bentley CD. Tyre man says they are absolutely required. I've never had them My bad
T25 1985-19D water cooled. owned her for three years now. On second engine, VW Caddy 19diesel.

California Dreamin
Registered user
Posts: 2673
Joined: 03 Apr 2007, 12:54
80-90 Mem No: 8386
Location: Nottingham

Re: Front Wheel Bearing replacement

Post by California Dreamin »

If I am understanding you then you can see on Pionte's first picture that his 'spacers' have a shoulder but the original wheels & hubs never had them.
The wheels are centralized by the taper/radialized nuts and bolts.

Martin
1989 California 2.1MV

User avatar
docklad
Registered user
Posts: 289
Joined: 28 Aug 2009, 14:51
80-90 Mem No: 7386
Location: Anglesey, North wales

Re: Front Wheel Bearing replacement

Post by docklad »

Cheers Martin. I see what you mean. Tyre man couldn't have known
T25 1985-19D water cooled. owned her for three years now. On second engine, VW Caddy 19diesel.

User avatar
Choppski
Registered user
Posts: 140
Joined: 12 May 2010, 20:19
80-90 Mem No: 8838
Location: Cheshire

Re: Front Wheel Bearing replacement

Post by Choppski »

great post, Thanks!! :ok
1982 Viking with 2.0 CU

Carpe Diem

Post Reply